The Ultimate Ukiyo-e Guide: A Uniquely Japanese Art Form Admired by Van Gogh-Step Into the World of Ukiyo-e
Ukiyo-e, which blossomed as a form of popular culture during Japan’s Edo period, is drawing renewed attention today. Mass-produced and enjoyed as woodblock prints, ukiyo-e vividly captured everyday life, landscapes, and the people of the time—and went on to have a major impact not only on Japanese art, but on art around the world. In this article, we’ll break down its origins and appeal from the basics and introduce places where you can experience ukiyo-e for yourself.
Introduction
Ukiyo-e is a style of Japanese painting that became hugely popular during the Edo period. Today, Japan is experiencing an unprecedented ukiyo-e boom. One reason is the 2025 NHK Taiga drama series, a nationally beloved program that depicts Japanese history and culture, which is airing “Berabou.” The main character of “Berabou” is Tsutaya Jūzaburō, a publisher (hanmoto) of ukiyo-e prints during the Edo period. As a result, more people have become interested in ukiyo-e once again. Even modern-day Japanese audiences are captivated by the many masterpieces of Edo-period ukiyo-e.
Ukiyo-e has been embraced not only in Japan but around the world for over 150 years. In the late 19th century, artists such as Monet and Van Gogh encountered ukiyo-e—free-spirited and full of originality—and were captivated by its fresh style, unlike anything in Western academic art. This influence helped give rise to the groundbreaking Impressionist movement. Many surviving works are thought to have drawn inspiration from the compositions found in Japanese ukiyo-e.
What Is Ukiyo-e?
Paintings that depict the daily lives and customs of people living in a given era are called fūzokuga (genre painting), and ukiyo-e falls into this category. The “ukiyo” in ukiyo-e comes from the term ukiyo (written as 憂き世), meaning “a painful world.”
Later, “ukiyo” came to be written as 浮世 and took on the meaning of “this world, right now.” In other words, ukiyo-e depicts “people living in the present moment.”
Ukiyo-e is basically woodblock printing. Because the same image could be produced cheaply in large quantities, commoners such as merchants and townspeople could afford to buy it, making it a major craze during the Edo period. Since it was mass-producible, some smash hits were printed in runs of thousands. Prices varied by era, but it’s said that one print cost roughly the same as a bowl of kake soba. Ukiyo-e covered a wide range of subjects, from everyday life to natural scenery, beautiful women, and stylish kabuki actors. Ukiyo-e wasn’t only displayed as art. Some people decorated their rooms with prints much like idol posters, while others used them as children’s board games (sugoroku), or even as talismans to ward off bad luck.
Because ukiyo-e appeared in so many settings, it’s clear it was something familiar and close to everyday life for people in Edo.
The History of Ukiyo-e
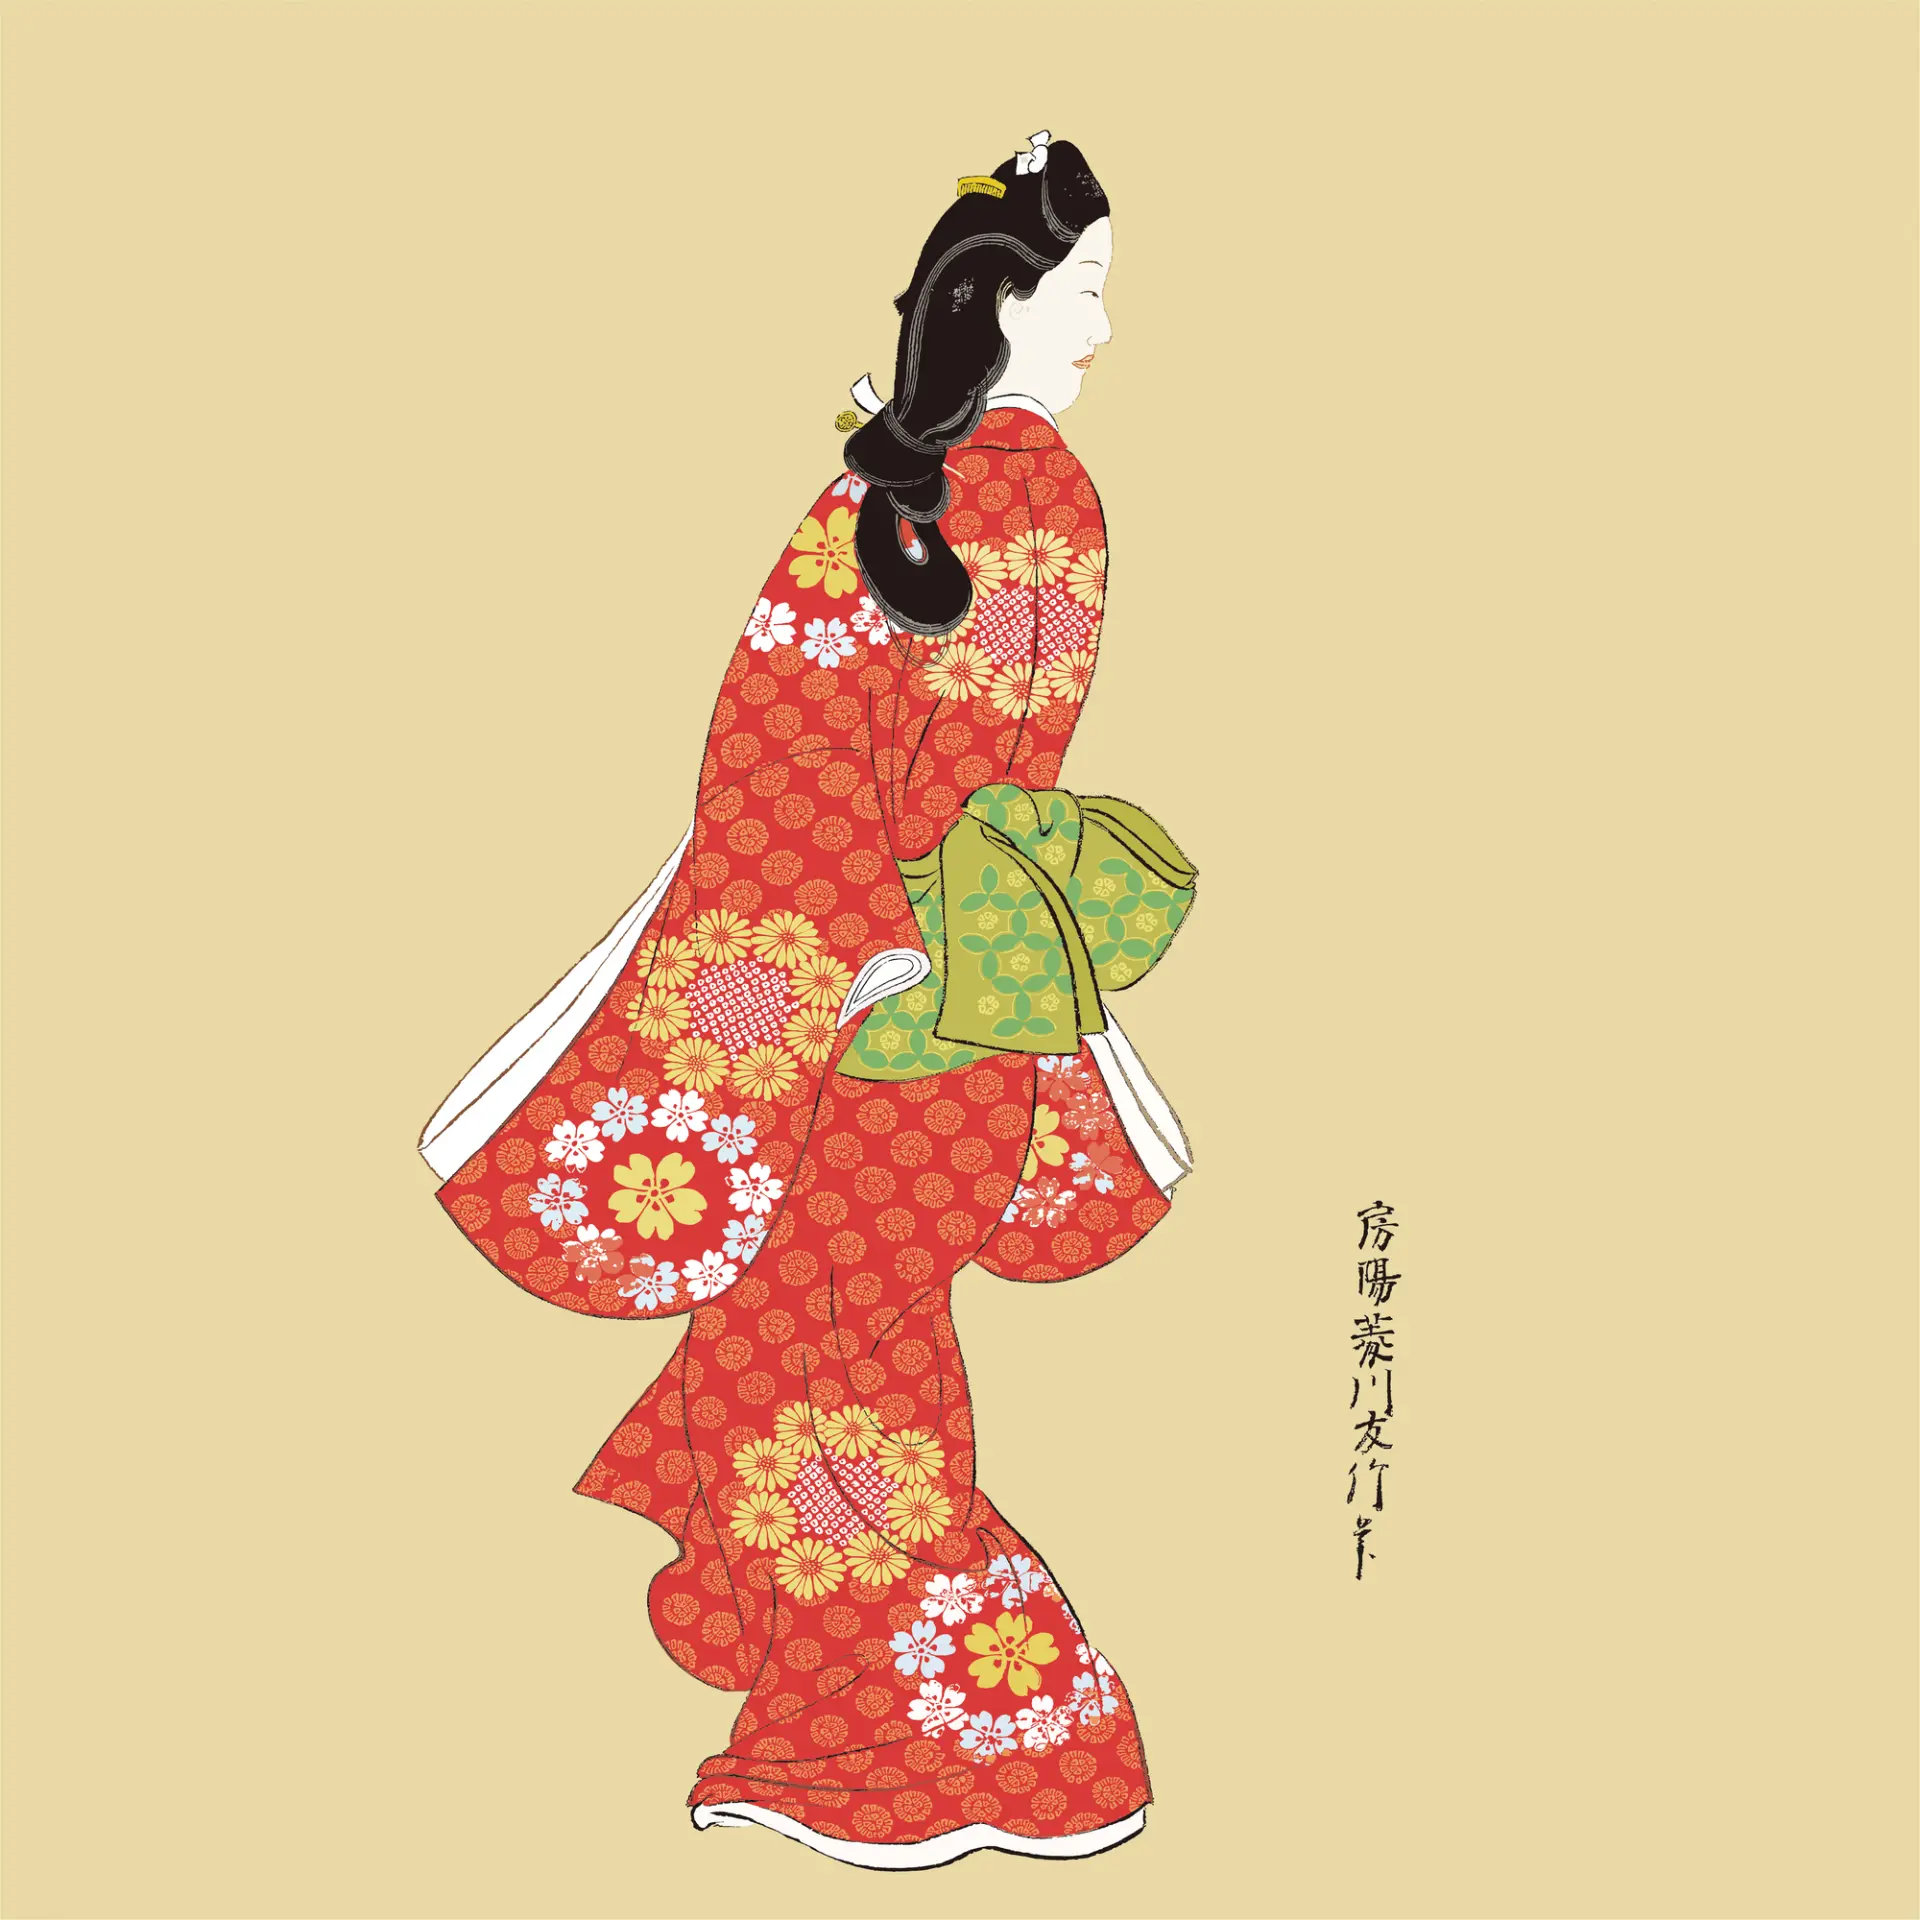
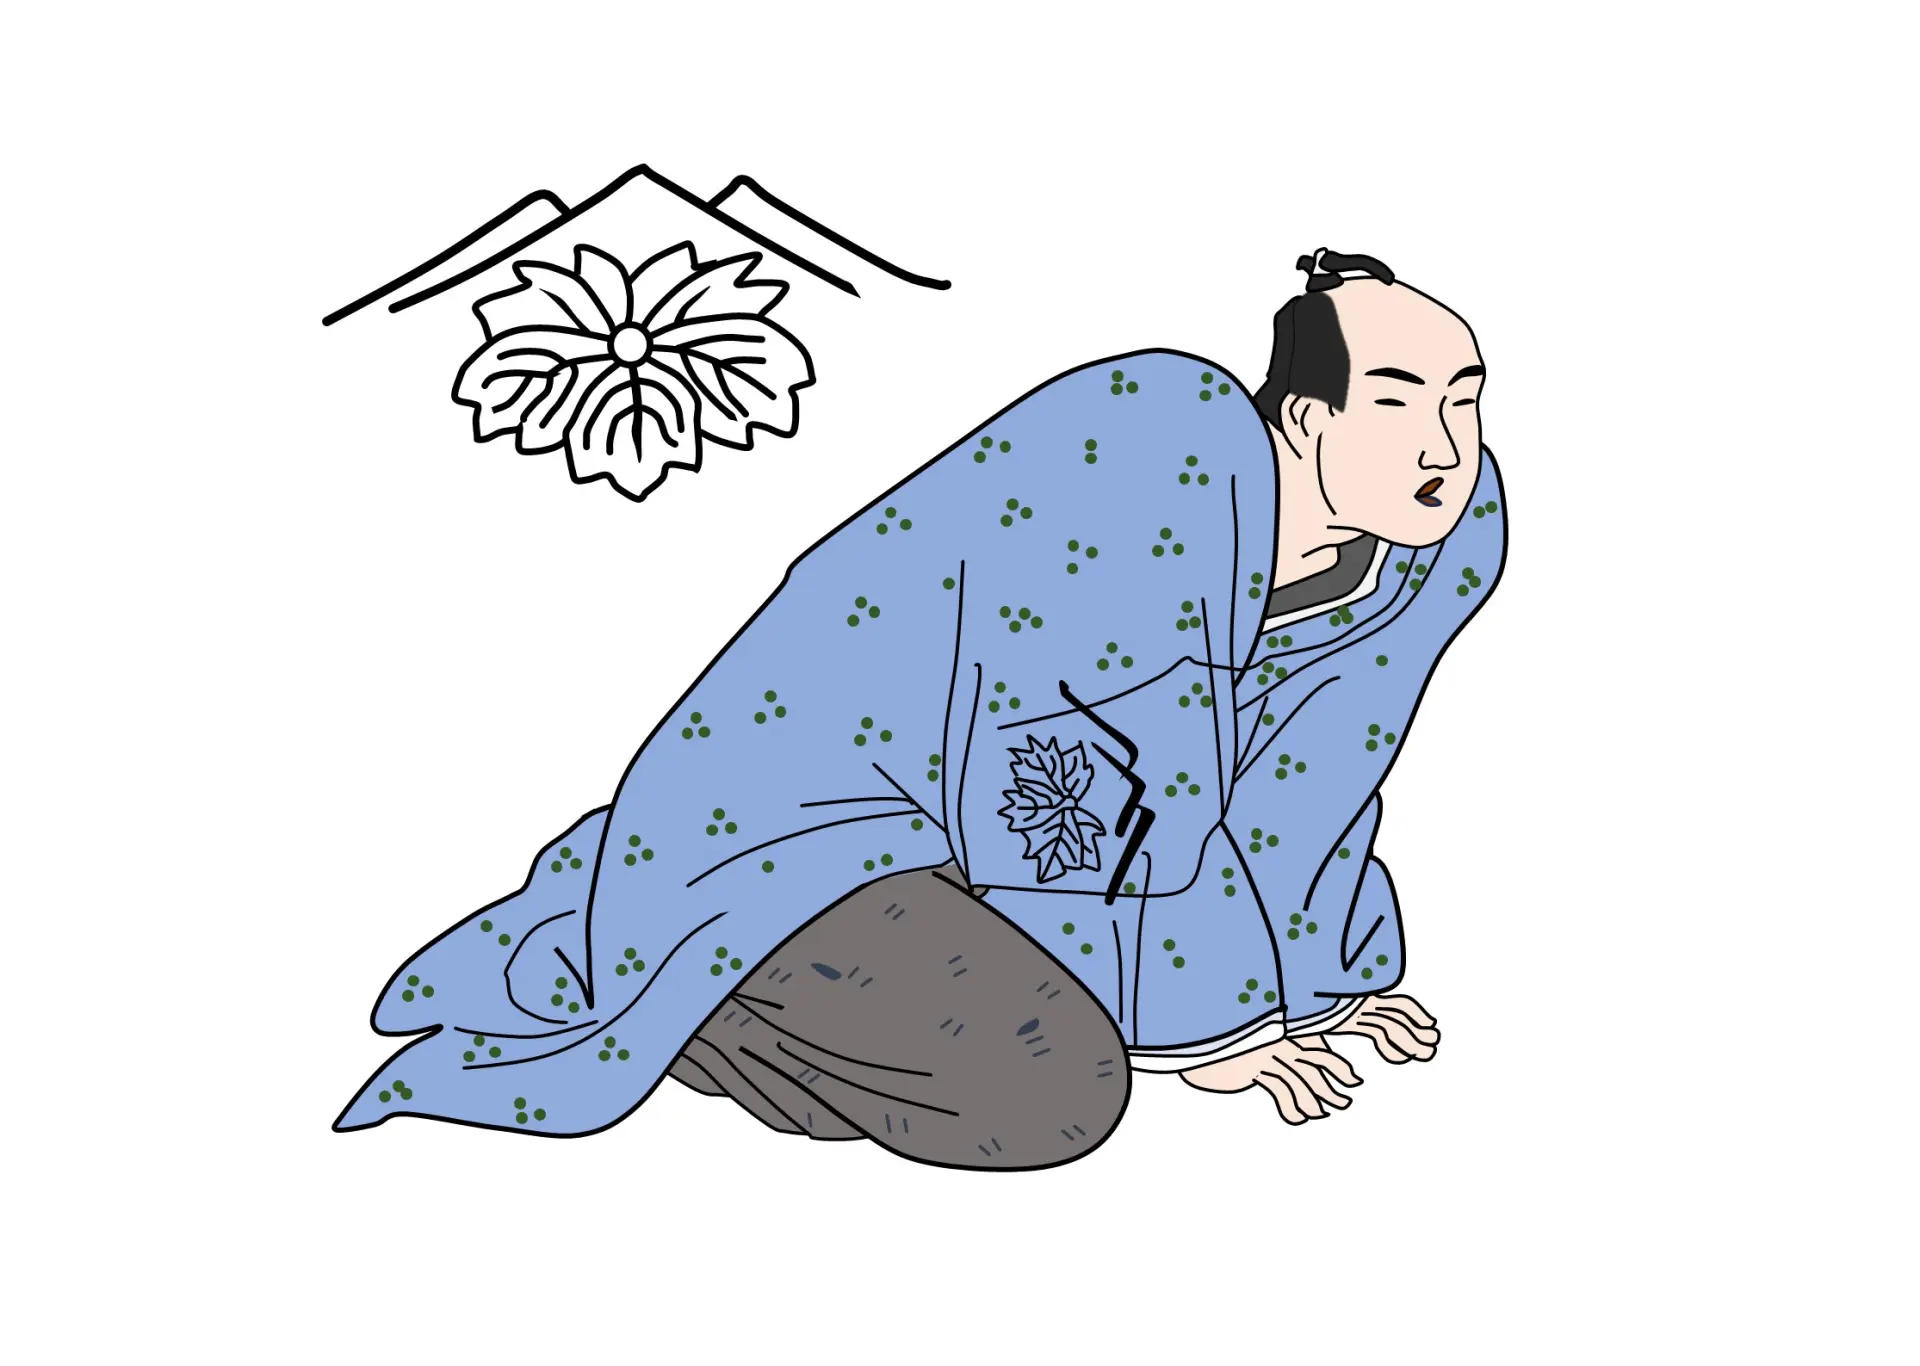
Ukiyo-e was born in the Edo period, around 1670. The founder is said to be Hishikawa Moronobu, the artist of Mikaeri Bijin-zu (Beauty Looking Back).
Hishikawa Moronobu is considered the founder of the Hishikawa school within ukiyo-e and is said to have established a studio with many disciples.
Ukiyo-e can be broadly divided into three types:
(1) woodblock-printed book illustrations, (2) single-sheet woodblock prints, and (3) hand-painted ukiyo-e. Types (1) and (2) were hand-printed and mass-produced, while (3) refers to original paintings drawn by the artist. Today, when people say “ukiyo-e,” they generally mean type (2). Single-sheet woodblock prints continued to evolve, and by the late Edo period they had established what was then the world’s leading color-printing technology for woodblock prints.
Hishikawa Moronobu originally created book illustrations (type (1)), but he separated images from books and developed ukiyo-e as single-sheet prints.
When ukiyo-e first began spreading in Edo, it was printed in just one color: black ink. These prints are called sumizuri-e (ink-printed pictures). Then, approx. 20 years later, around 1688, ukiyo-e became colored. Each print was hand-colored with a brush. While ukiyo-e could now be mass-produced as ink prints, adding color by hand took time...
If colors could also be printed from woodblocks, ukiyo-e could be produced much more efficiently. And so, approx. 80 years after woodblock ukiyo-e first appeared, around 1744, a technique called benizuri-e emerged. This method involved carving separate blocks for each color and printing them on top of the original ink print. It was a major technological breakthrough for the time.
Even so, the palette was limited to only 2 to 3 colors, such as red, green, and yellow. Approx. 20 years later, ukiyo-e entered an era of even more multicolor printing. The number of colors increased to 7 or 8. This multicolor printing became popular and came to be known as nishiki-e (brocade pictures).
With the arrival of nishiki-e, the ukiyo-e boom accelerated. More and more talented artists emerged, and masterpiece after masterpiece was created.
How Ukiyo-e Is Made
The People Involved in the Ukiyo-e Production Process
First, let’s introduce the people involved in making ukiyo-e.
How were ukiyo-e prints made? In fact, ukiyo-e was produced through a division of labor, with specialists handling each stage. A single print was completed through their collaboration.
Before we explain each step, let’s look at the four specialized roles involved in the process.
1. Hanmoto (Publisher)
The hanmoto was responsible for planning, producing, and selling ukiyo-e prints. In the 2025 NHK Taiga drama “Berabou,” the main character is a hanmoto. The series depicts the life of Tsutaya Jūzaburō, also known as “Tsutajū,” who released hit after hit during the Edo period.
A hanmoto was essentially a publisher in today’s terms. Even now, the term hanmoto is sometimes used to refer to a publishing house, and Edo-period hanmoto played a similar role. They also acted like producers.
After deciding on a project, the hanmoto oversaw everything: selecting the artist, carver, and printer; meetings and coordination; production; raising and managing the necessary funds; and sales. The more successful a hanmoto was, the more likely they were to attract top artists, carvers, and printers. Some even kept artists, carvers, and printers on retainer. To bring popular, sellable ukiyo-e to the market, a hanmoto needed a keen sense for the era and demand, as well as the financial power to nurture new talent.
2. Artist
The person who decided the composition and drew the image was the artist. It’s said there were over 300 ukiyo-e artists, but only around 20 remain widely famous today.
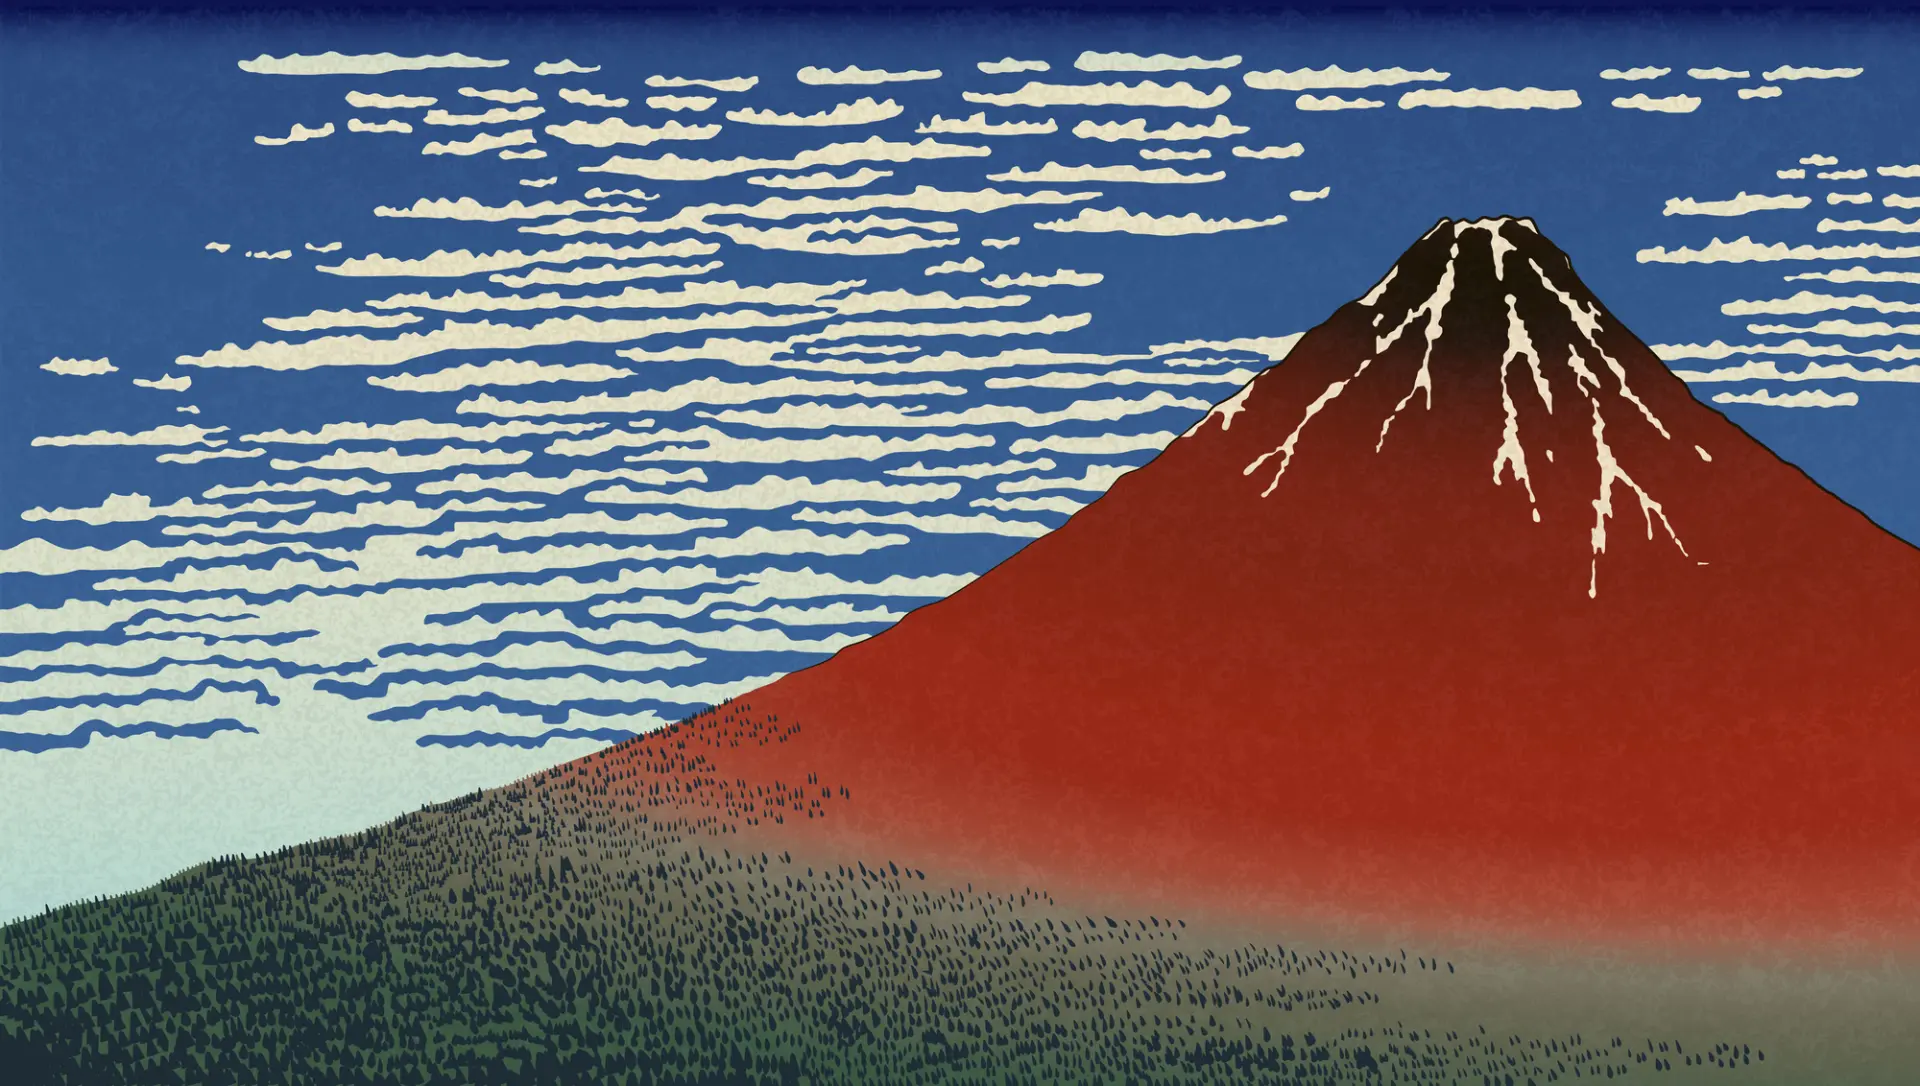
Suzuki Harunobu, the originator of multicolor printing and a master of bijin-ga (pictures of beautiful women); Torii Kiyonaga; Kitagawa Utamaro, a bijin-ga expert discovered by Tsutaya Jūzaburō; Tōshūsai Sharaku, known for yakusha-e (actor prints) depicting kabuki actors; Katsushika Hokusai, who produced more than 30,000 works before his death at age 89 and is internationally known for Thirty-six Views of Mount Fuji; and Utagawa Hiroshige, who portrayed everyday life and the changing seasons, are considered the “Six Great Artists.”
3. Carver
The carver pasted the artist’s finished drawing (hanshita-e) onto the woodblock and carved it using chisels and other tools. After carving the key block for black ink printing, the artist specified the colors. Following those instructions, the carver then carved the color blocks.
4. Printer
The printer received the key block and color blocks carved by the carver, then printed them in order onto paper to complete the ukiyo-e print.
Once a proof print was made, the artist checked it. If adjustments were needed, it was also the printer’s job to make corrections.
The Ukiyo-e Production Process
Now that we’ve introduced the people involved in making ukiyo-e, let’s take a look at the production steps.
1. The publisher plans the project and commissions the artist
The publisher comes up with a marketable idea and commissions the artist to create the artwork. Once the details are agreed on, production begins.
2. The artist draws the draft
Based on the publisher’s plan, the artist draws a draft in black ink only. They sketch while refining the overall composition, and the draft must reflect the publisher’s intentions. Once the draft is complete, it’s transferred onto another thin sheet of paper, ink lines are added, and areas meant to be solid black are filled in with ink.
3. The carver carves the blocks
First, the carver creates the block for ink printing. Yamazakura (Japanese cherry wood) is used for the block. Since the block is printed from many times, it needs to be hard enough not to wear down—but not so hard that it becomes impossible to carve. Yamazakura is said to have the ideal balance. The draft is pasted face-down onto the block, then carved using knives and chisels. The resulting ink print is shown to the artist, who specifies the colors.
Next, the carver creates separate color blocks based on the artist’s color instructions. Because the print is made by layering multiple colors, misalignment would ruin the image. To help the printer align the paper accurately, registration marks called kentō are also carved.
4. The printer prints
First, the key block (the main block) is printed in black. Then the color blocks are layered from lighter colors to darker ones.
For the first printing of a new work, the artist is also present. The artist checks the result and instructs the carver on carving corrections and the printer on color adjustments until the print is finished. Incidentally, a first printing run of a new work is said to be 200 copies.
5. The publisher sells the prints
Once completed, the publisher sells the prints. If a work sold well, additional print runs were sometimes made.
Genres of Ukiyo-e
Ukiyo-e covered many different themes. Among them, bijin-ga (pictures of beautiful women) and yakusha-e (actor prints) were especially popular.
In the Edo period, as highways connecting Edo with other regions were developed, a travel boom took off.
During this time, landscape prints also circulated widely.
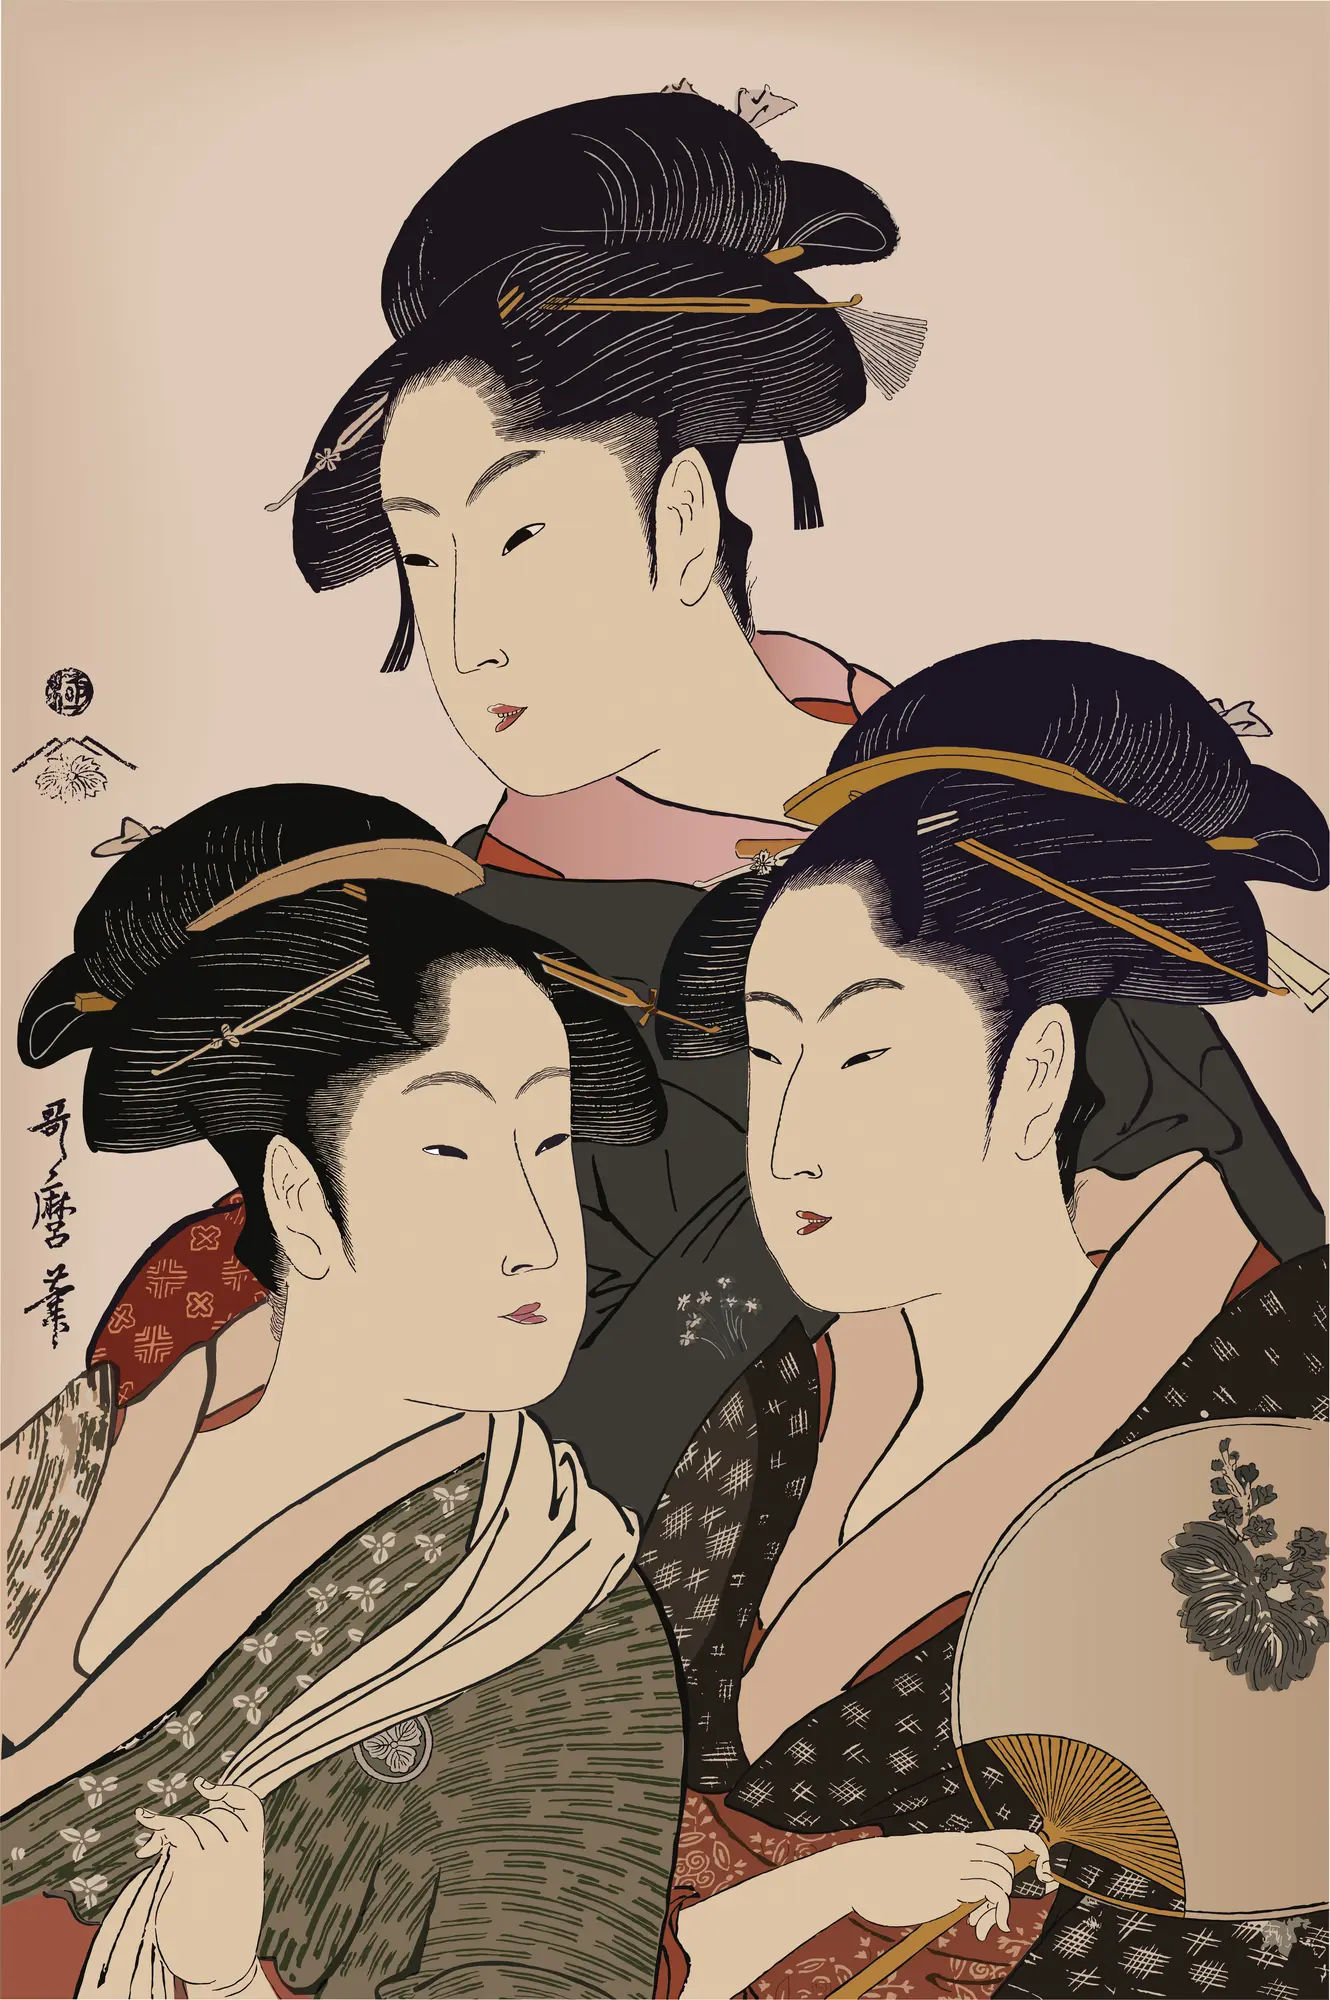
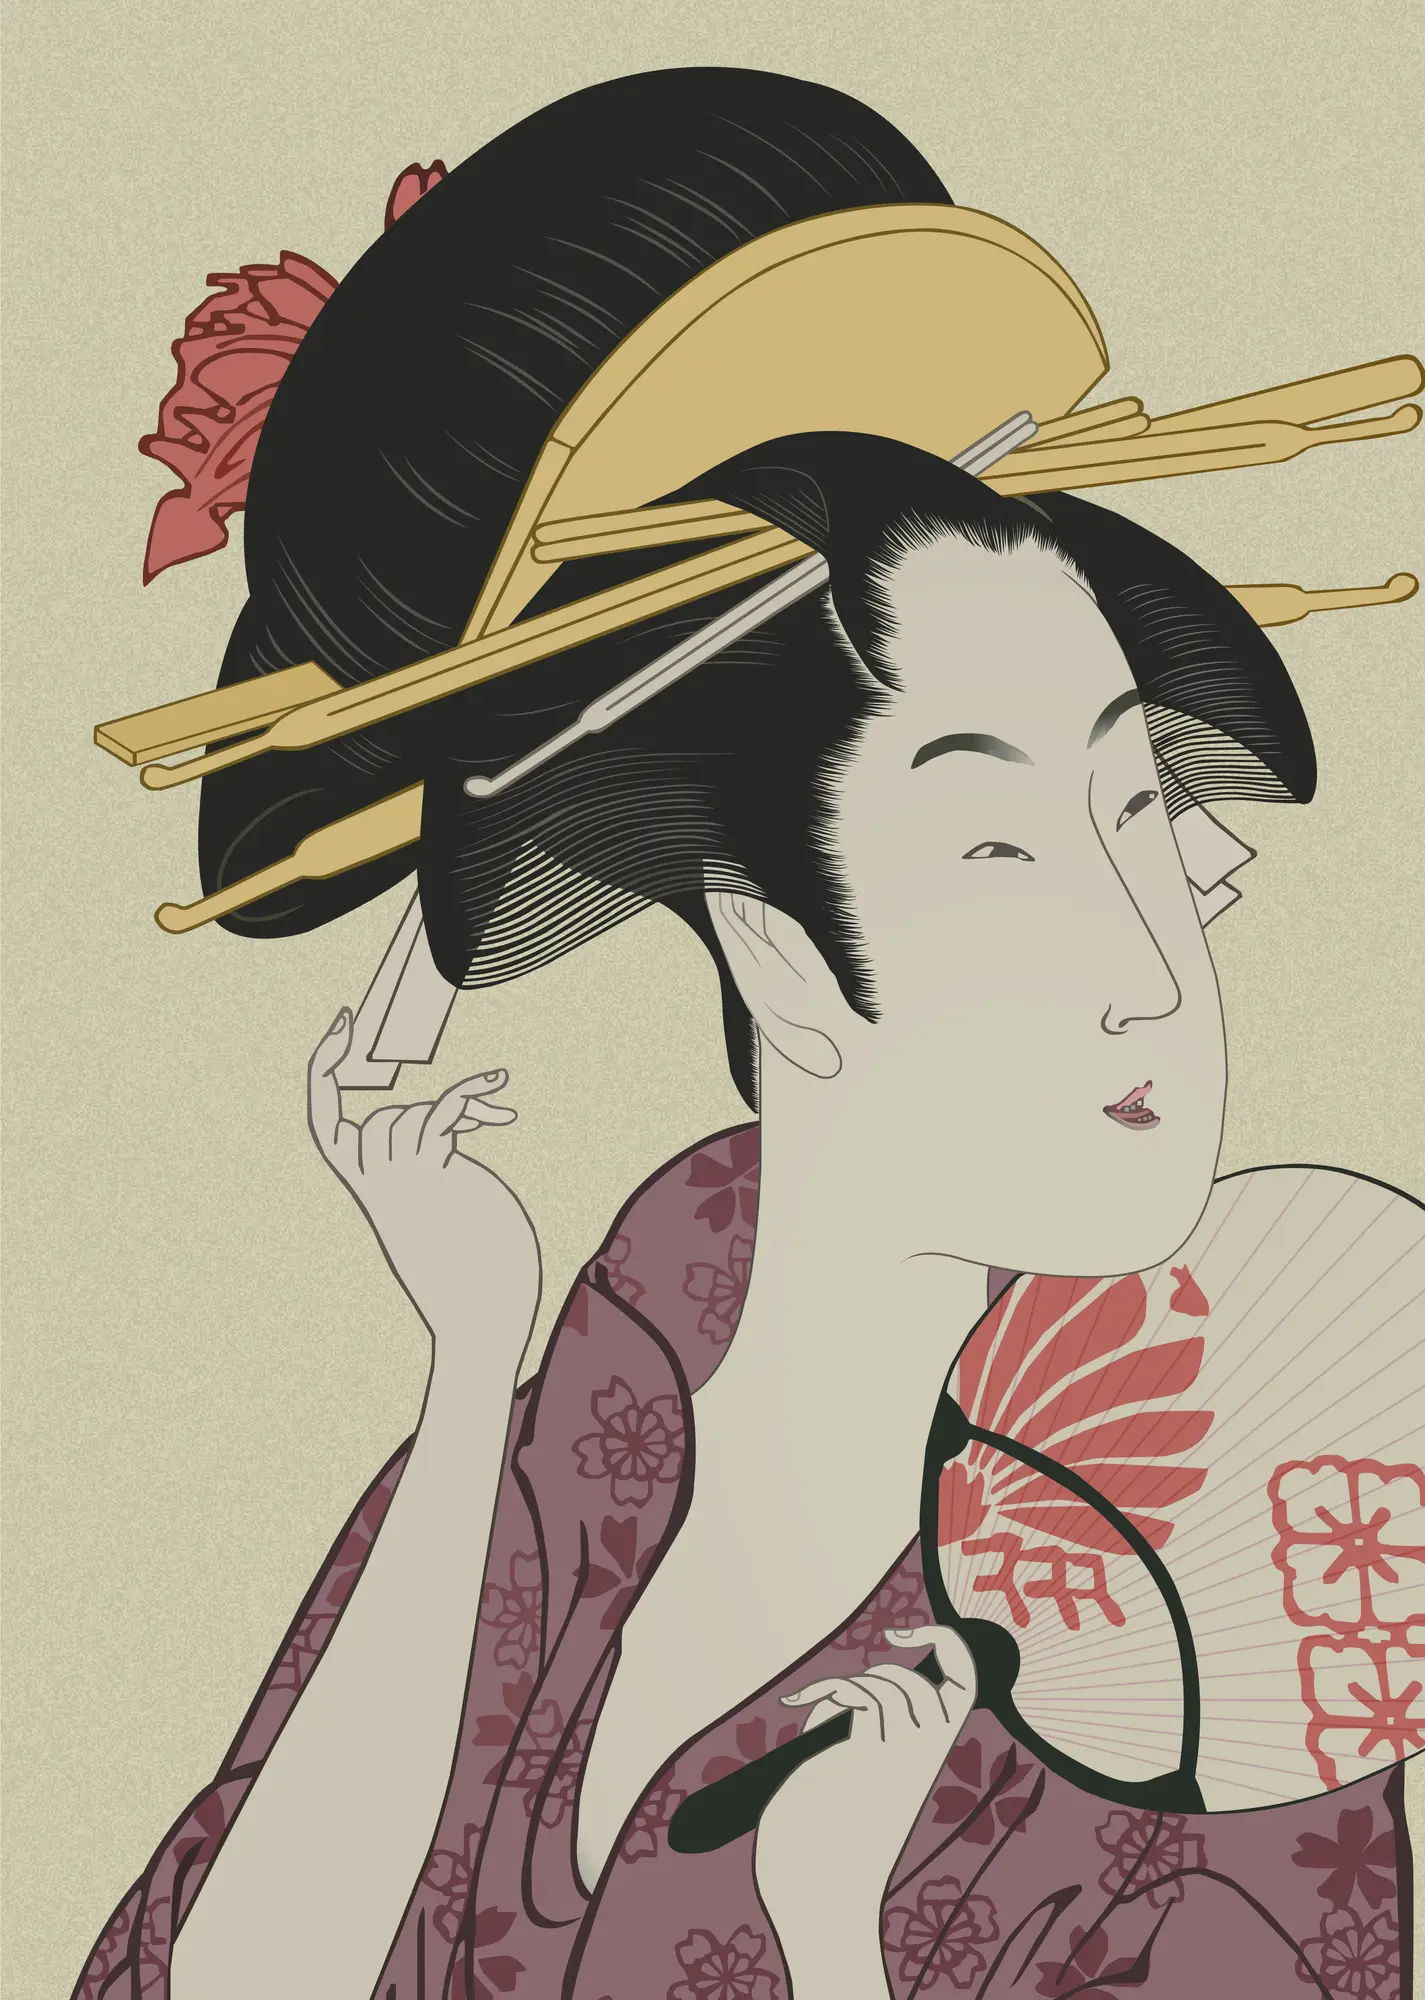
Bijin-ga
These depict beautiful women as models.
Subjects ranged from courtesans and geisha to teahouse poster girls.
Hishikawa Moronobu’s Mikaeri Bijin-zu (Beauty Looking Back), showing a woman turning her head, is especially famous.
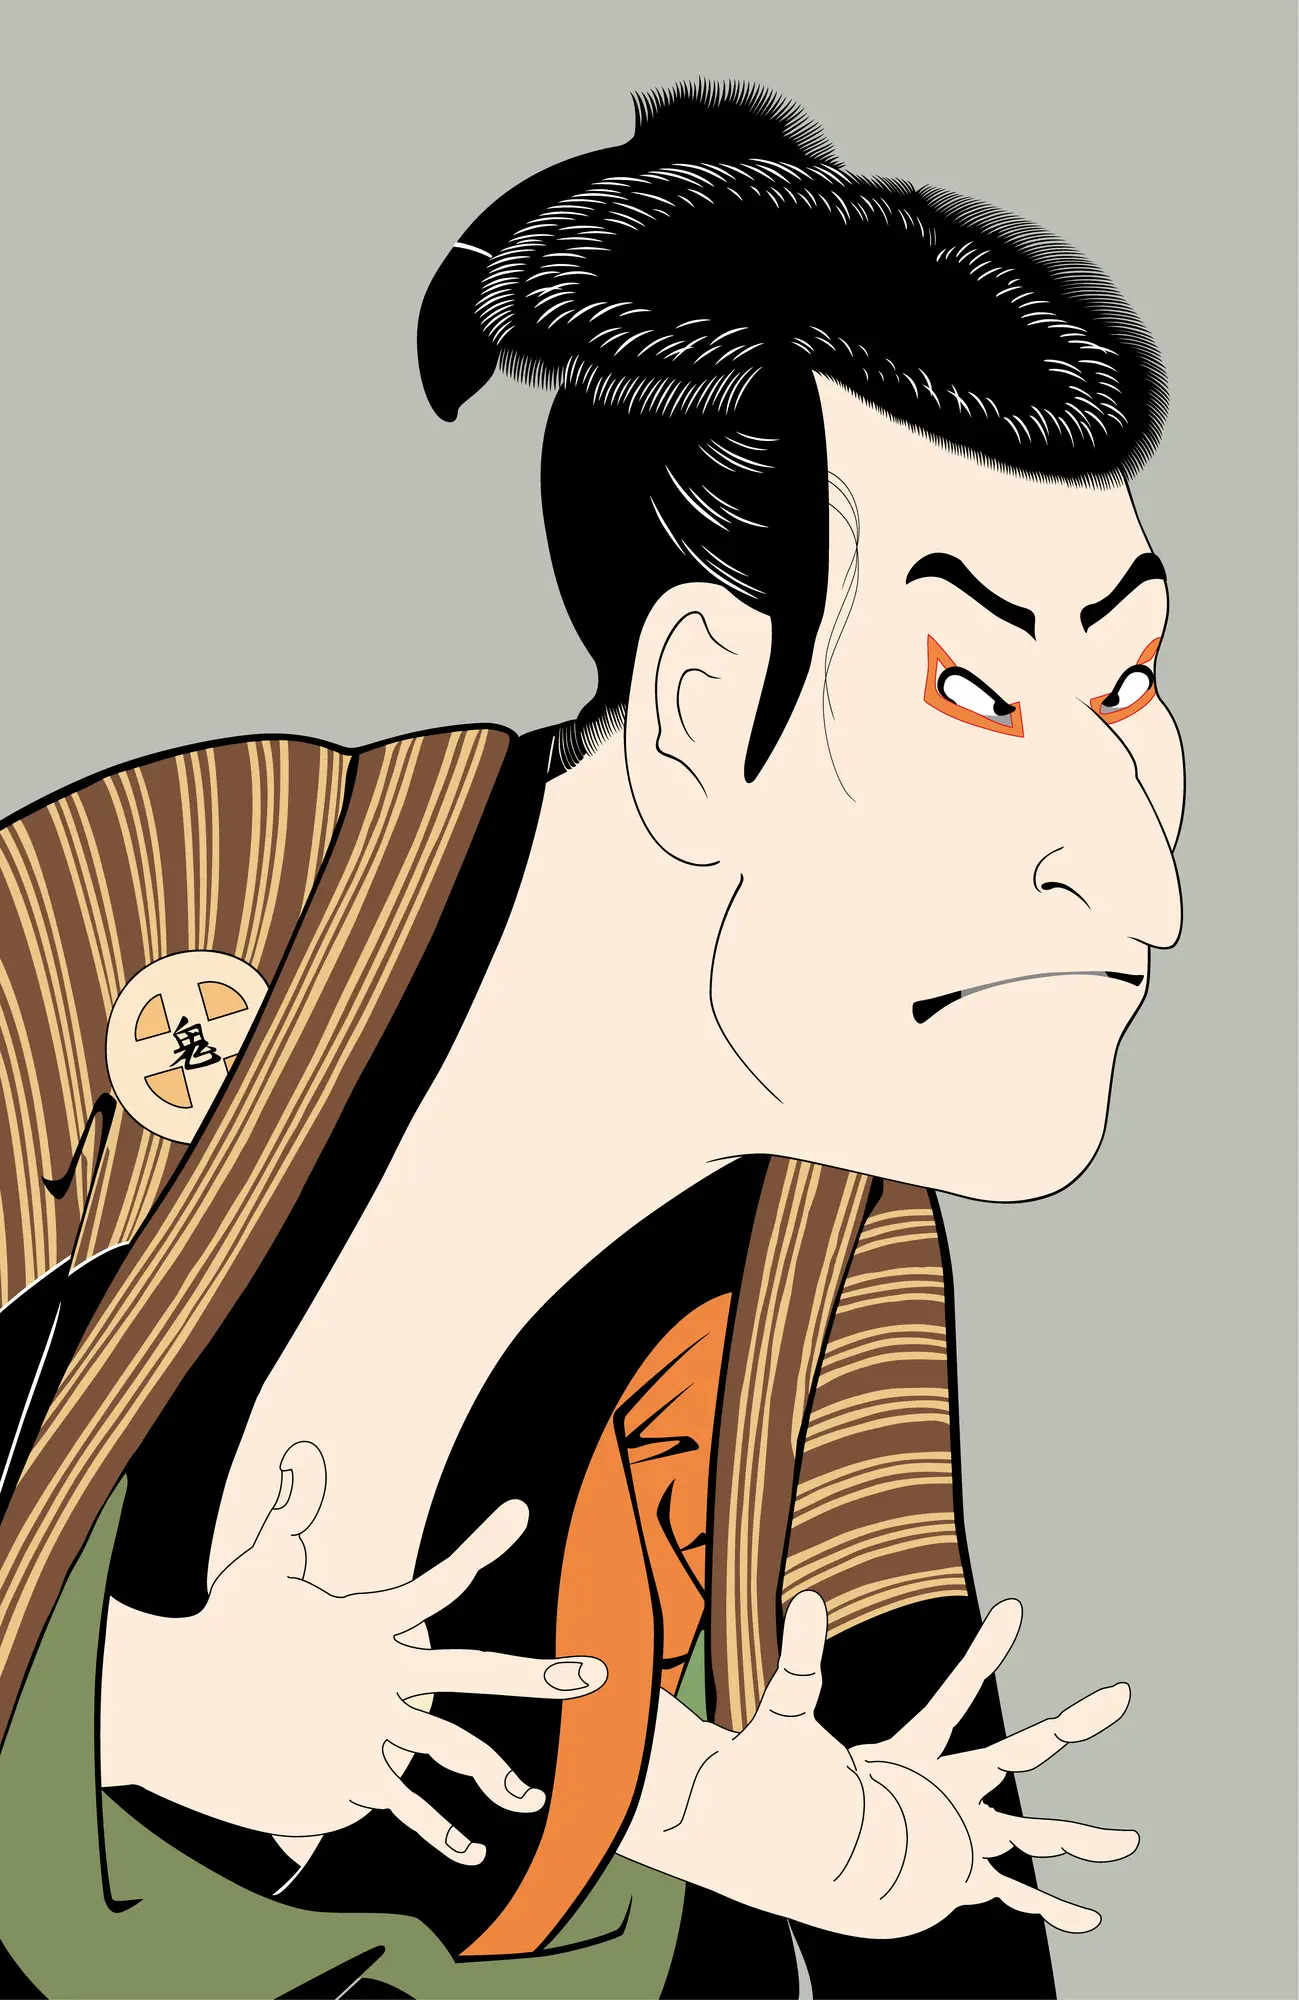
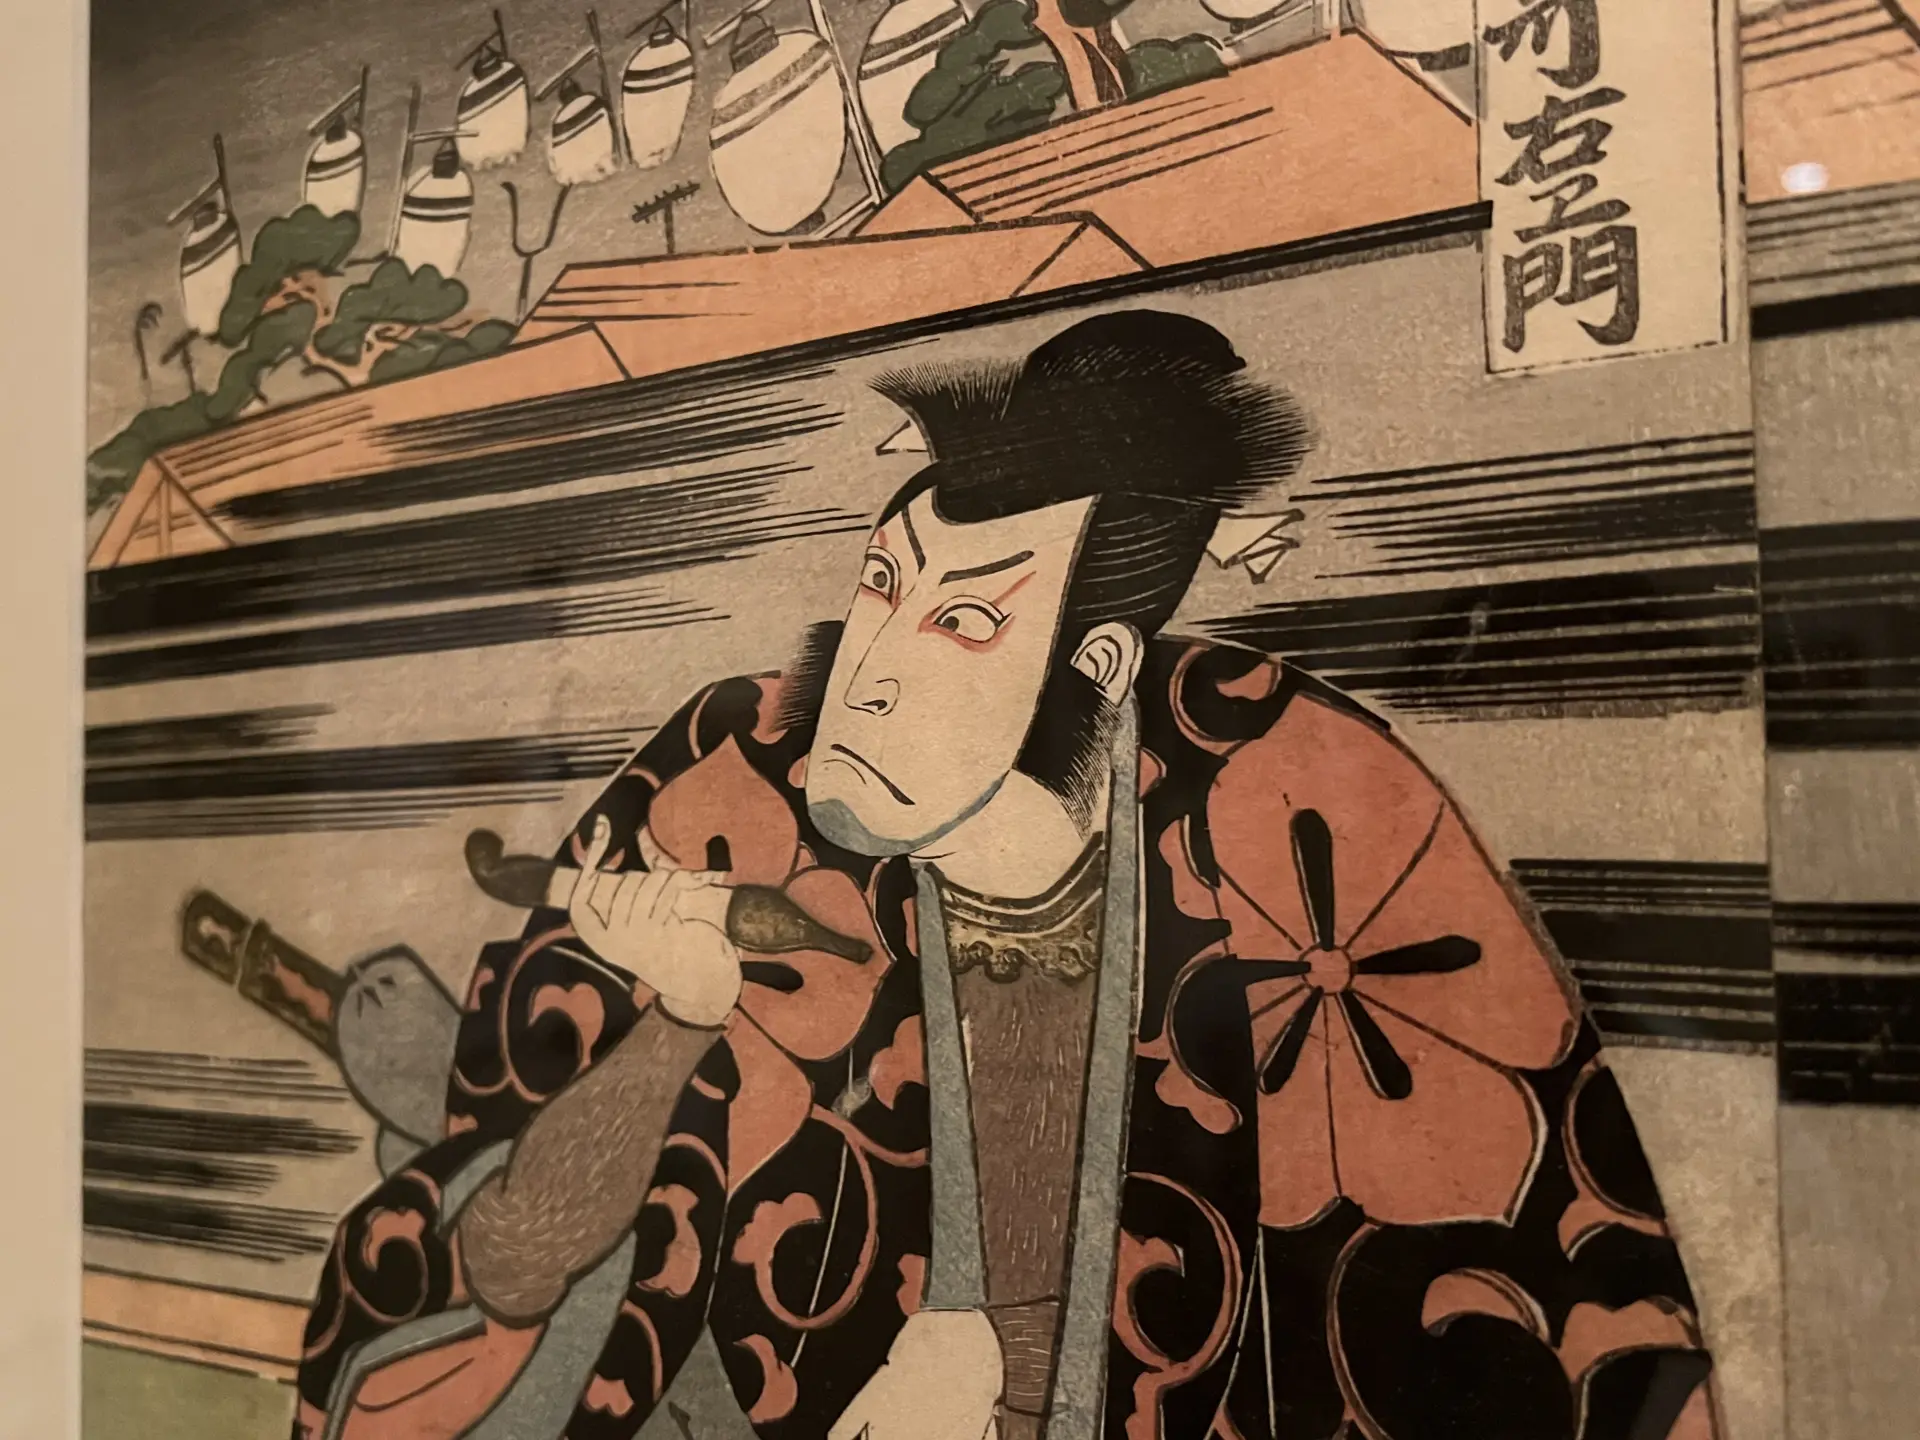
Yakusha-e
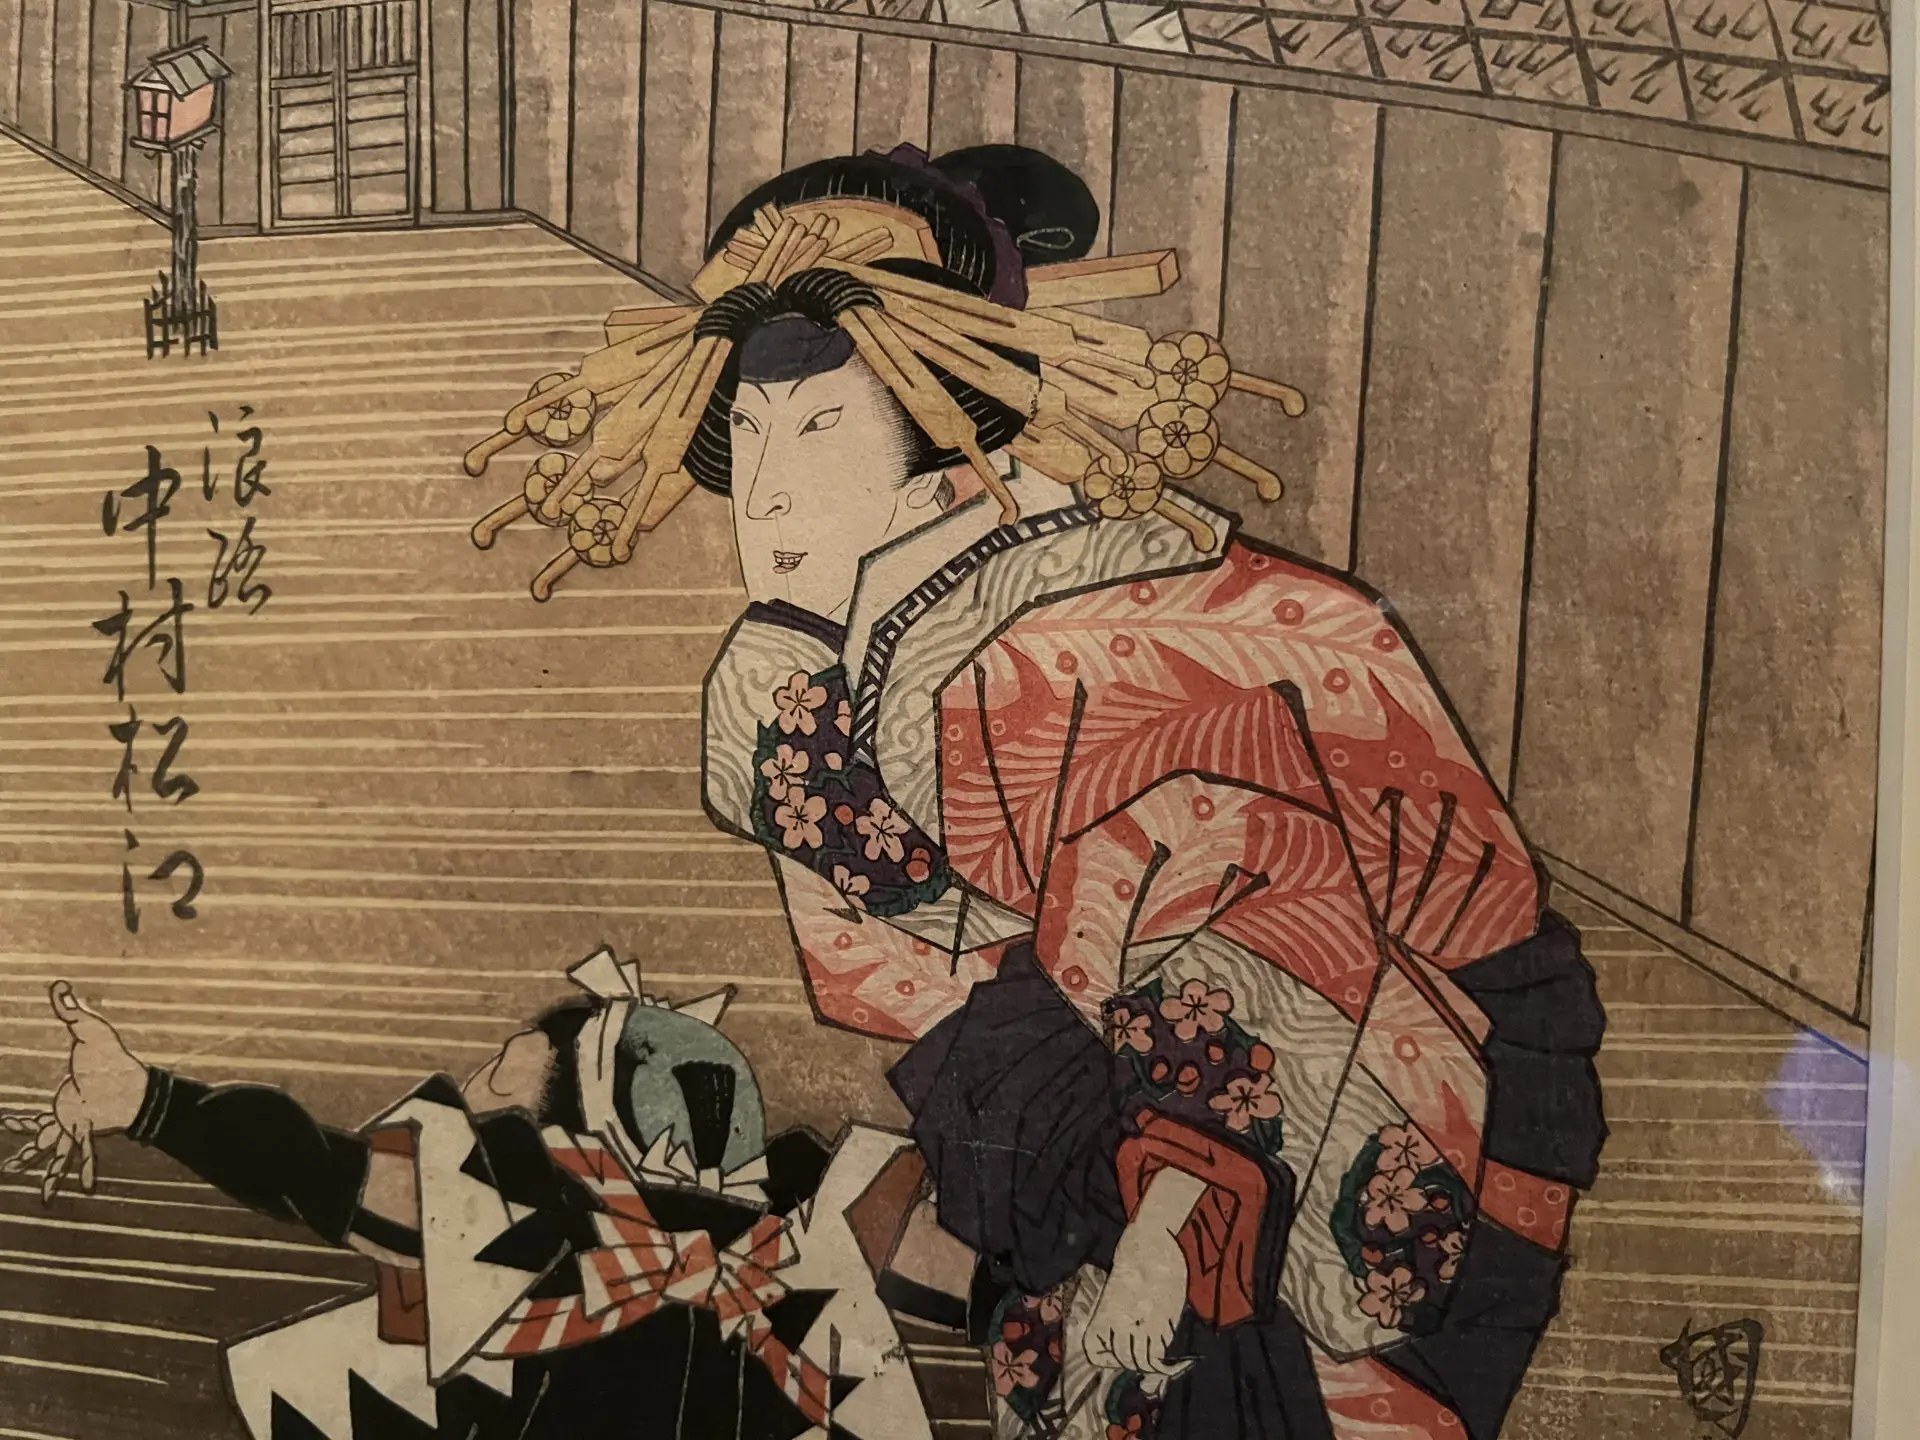
These are ukiyo-e prints depicting kabuki actors, and they represent one of the best-known styles of ukiyo-e that developed in Kamigata (the Kyoto-Osaka cultural region.)
Fans collected them much like idol photo cards.
Landscape Prints
These depict scenery from all over Japan.
One well-known example is Katsushika Hokusai’s Thirty-six Views of Mount Fuji.
Landscape prints are a defining genre of ukiyo-e that developed in Edo.
Giga
These are highly entertaining ukiyo-e prints, such as trick pictures and picture-based puzzle quizzes.
Monster and Supernatural Prints
These depict eerie subjects such as ghosts and yōkai (supernatural creatures). In an era without electric lighting, people’s imaginations ran wild, and it seems that the supernatural felt close at hand.
Kachōga (Bird-and-Flower Prints)
These ukiyo-e prints depict plants such as flowers, as well as birds and animals. Some include haiku or waka poetry.
Warrior Prints and Story Prints
These portray figures ranging from real samurai to fictional heroes in powerful, dramatic compositions.
Shunga
These ukiyo-e prints depict sexual love between men and women, or between people of the same sex. Many are sensuous in tone.
Kamigata Ukiyo-e Museum: A Place to View and Try Making Ukiyo-e
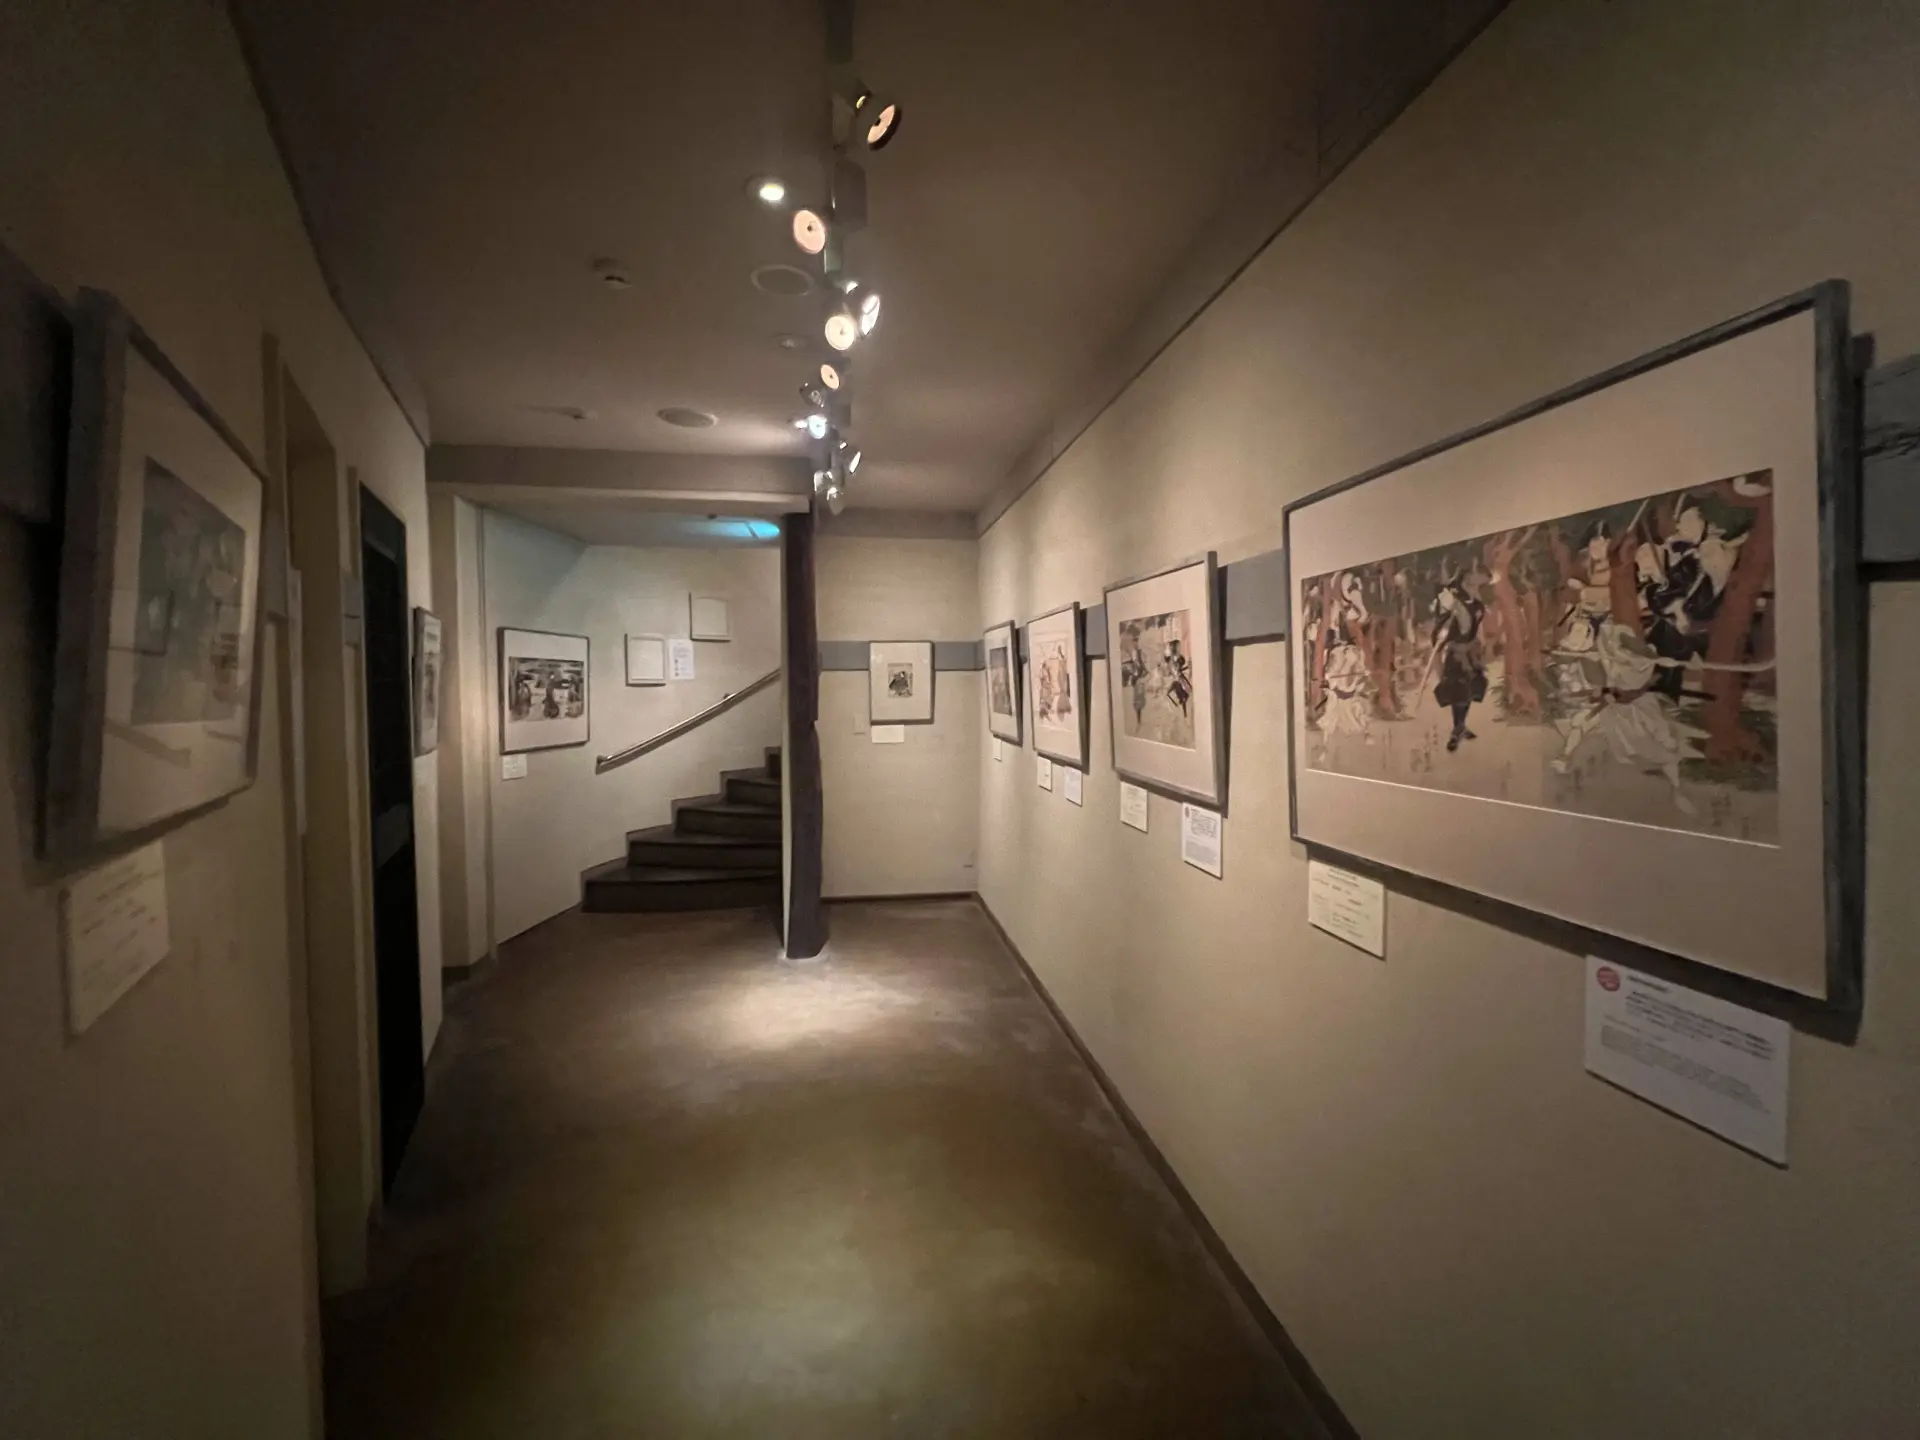
While ukiyo-e developed in Edo with a strong focus on landscapes and in Kamigata with a focus on actor prints, there is a private museum in Osaka where you can take a close look at “Kamigata ukiyo-e.” It’s the Kamigata Ukiyo-e Museum in Chūō Ward, Osaka. It opened approx. 25 years ago and is the only museum in the world dedicated to Kamigata ukiyo-e.
The building has four floors: the 1st floor is the reception area and gift shop, the 2nd and 3rd floors are exhibition spaces, and the 4th floor is for hands-on experiences.
Here, you’ll find ukiyo-e prints of Osaka kabuki actors from the late Edo period through the early Meiji period. The museum’s director, Seiko Takano, originally collected ukiyo-e as a longtime hobby. As her passion grew, she decided to display works from her own collection and established a museum dedicated to Kamigata ukiyo-e. The museum stands at the entrance to Hōzenji Temple in Namba, an area that once thrived as the approach to the temple.

It’s located just a short walk from one of Osaka’s most popular sightseeing spots: the Glico sign in Dotonbori. Why was a museum for Kamigata ukiyo-e built here? The answer is closely tied to the region’s history. Dotonbori in Osaka produced famous jōruri (puppet theater) writers such as Ihara Saikaku and Chikamatsu Monzaemon, who wrote for both jōruri and kabuki. In the Edo period, this area was lined with theaters for kabuki and jōruri—essentially the Broadway of the time. Crowds packed in for a glimpse of star kabuki actors. Kamigata ukiyo-e depicted kabuki performances staged at theaters such as Kadoza and Naka-za, which are still remembered today.
These prints portrayed the actors appearing in a production while it was running, and fans bought them up—much like today’s stage photos or idol photo cards. Shinsaibashi-suji, just north of Dotonbori, was lined with publishers in the Edo period, and ukiyo-e prints were sold there. In other words, the area around the Kamigata Ukiyo-e Museum was the center of Kamigata ukiyo-e culture. Even the artwork printed on the ticket is Kamigata ukiyo-e, showing a scene from old Osaka when kabuki actors would arrive by boat along the Dotonbori River for a traditional “funanorikomi” entrance.
Because ukiyo-e is sensitive to light, the museum keeps the lighting dim. If you’d like to take a closer look, LED lights are available to borrow at the reception desk—feel free to use one.
What’s on Display at the Kamigata Ukiyo-e Museum
Exhibitions are refreshed every three months with a new theme, and each time, around 30 works are displayed.
We visited in November 2025. That day’s theme was “Shiten: Costumes and Roles.”
On display were ukiyo-e prints featuring lavish costumes: the heavy obi and uchikake robes of an oiran, the gorgeous furisode of a sheltered princess, and even formal samurai attire such as kamishimo and suō. Some designs were especially eccentric, such as omigoromo, a kabuki costume that developed in its own distinctive way—something you could also spot in the prints.
There were also ukiyo-e from Edo on display, which made it great for comparing the differences with Kamigata ukiyo-e. For example, these prints both depict the same kabuki actor, Nakamura Utaemon.
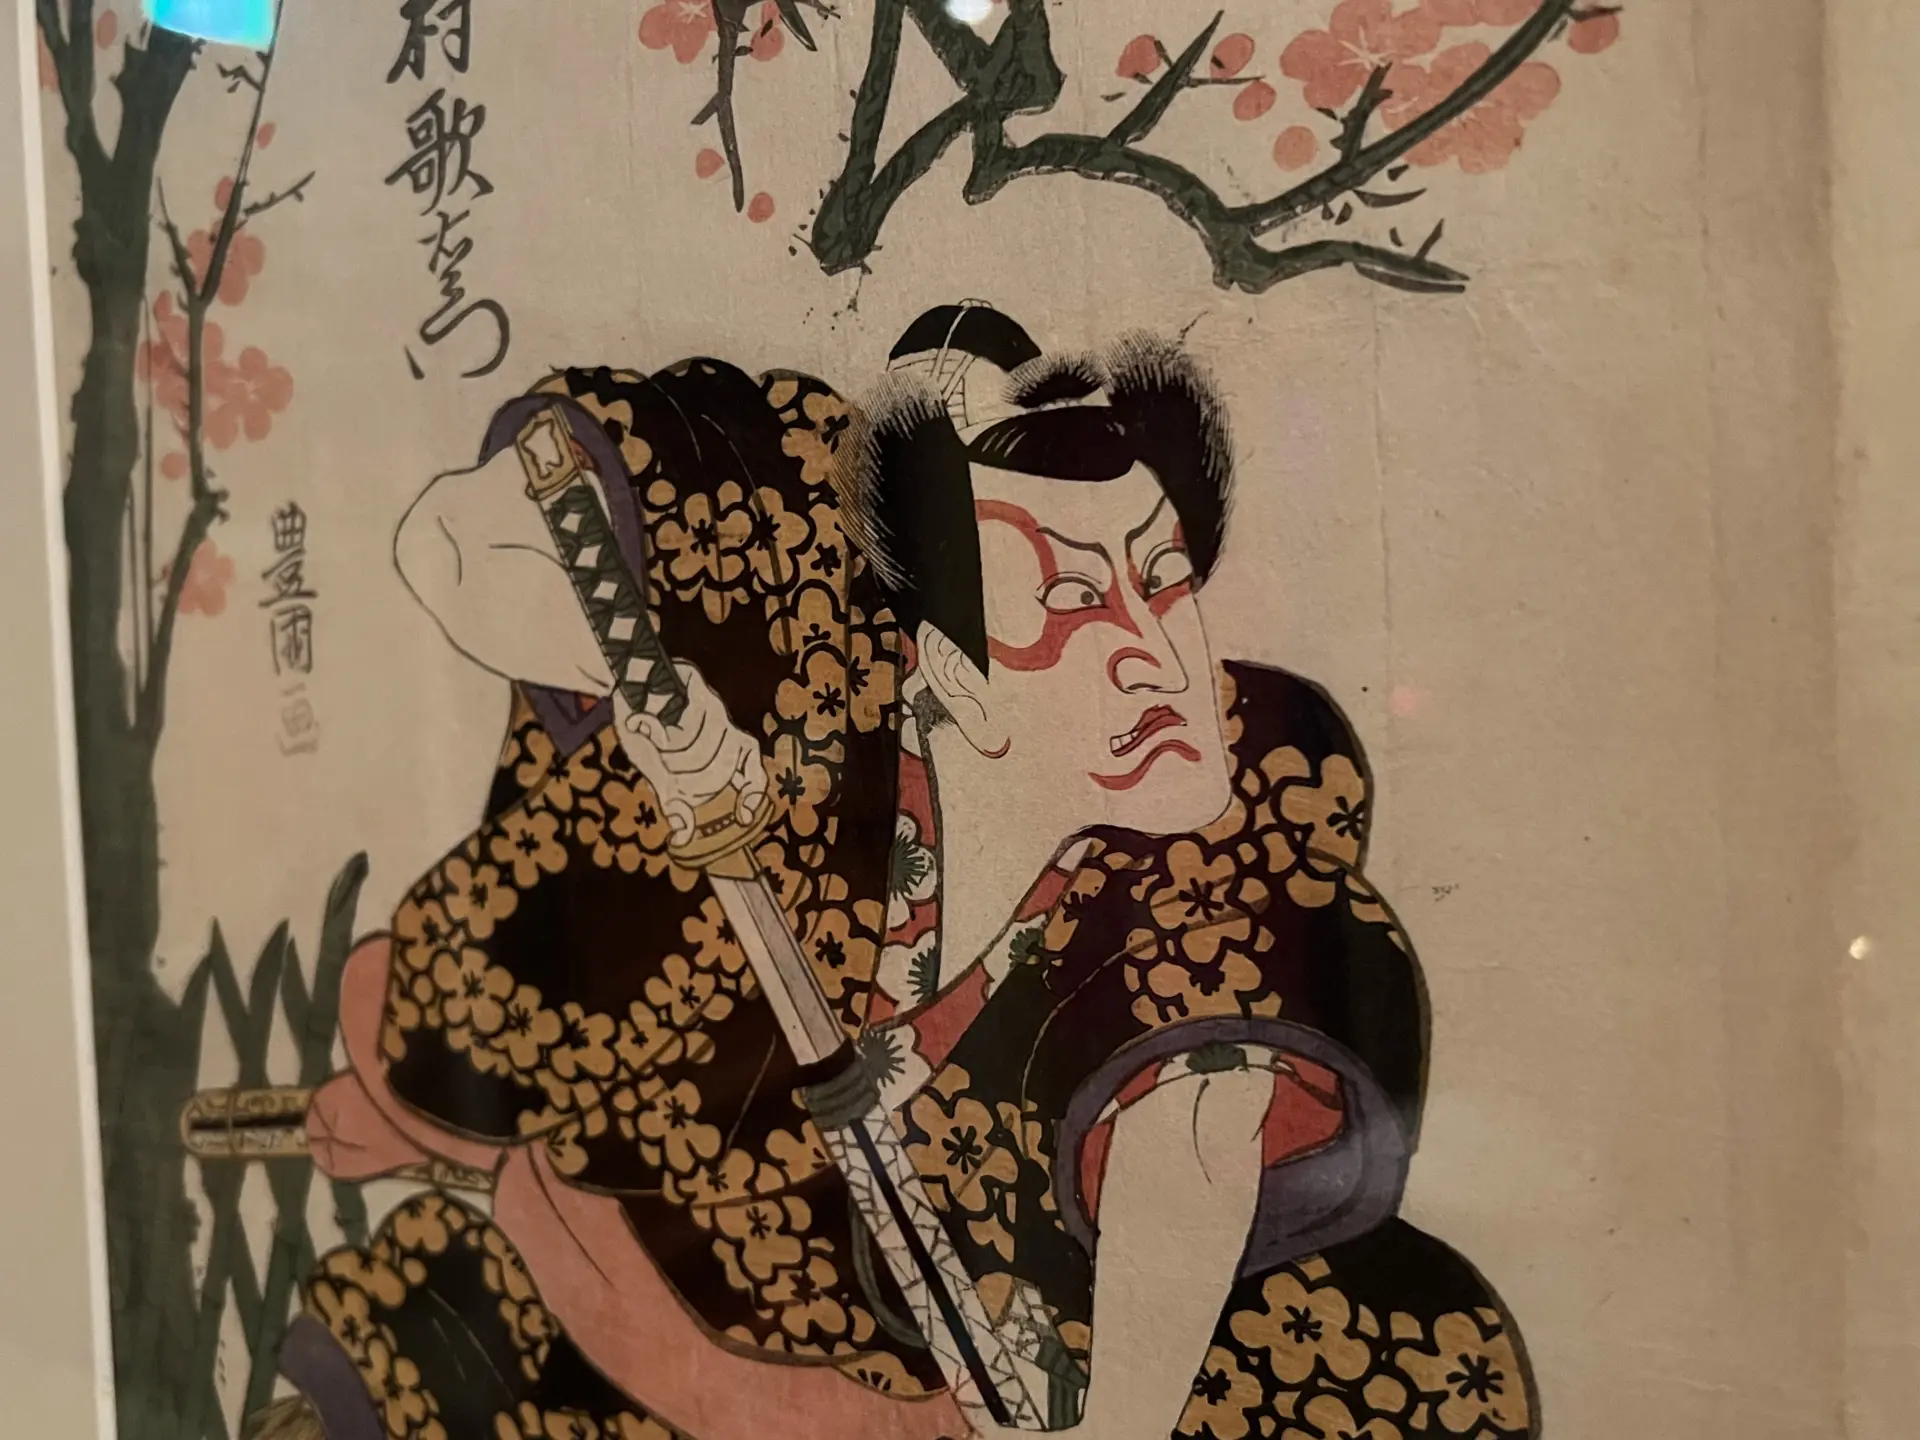
Edo ukiyo-e portrays him in a stylish, cool way. Kamigata ukiyo-e, by contrast, is known for expressing Utaemon’s approachable charm and portraying him in a way that resembles the actor himself. Seeing them side by side makes the differences easy to understand. Throughout the museum, you’ll find thoughtful display choices like this, aimed at helping more people discover the appeal and fun of ukiyo-e. Because the exhibition changes every three months, it’s a place you can enjoy again and again.
On the 4th floor, in a tatami room, you can also try ukiyo-e printing. The museum also hands out ukiyo-e coloring sheets, which you can finish on the spot with colored pencils.
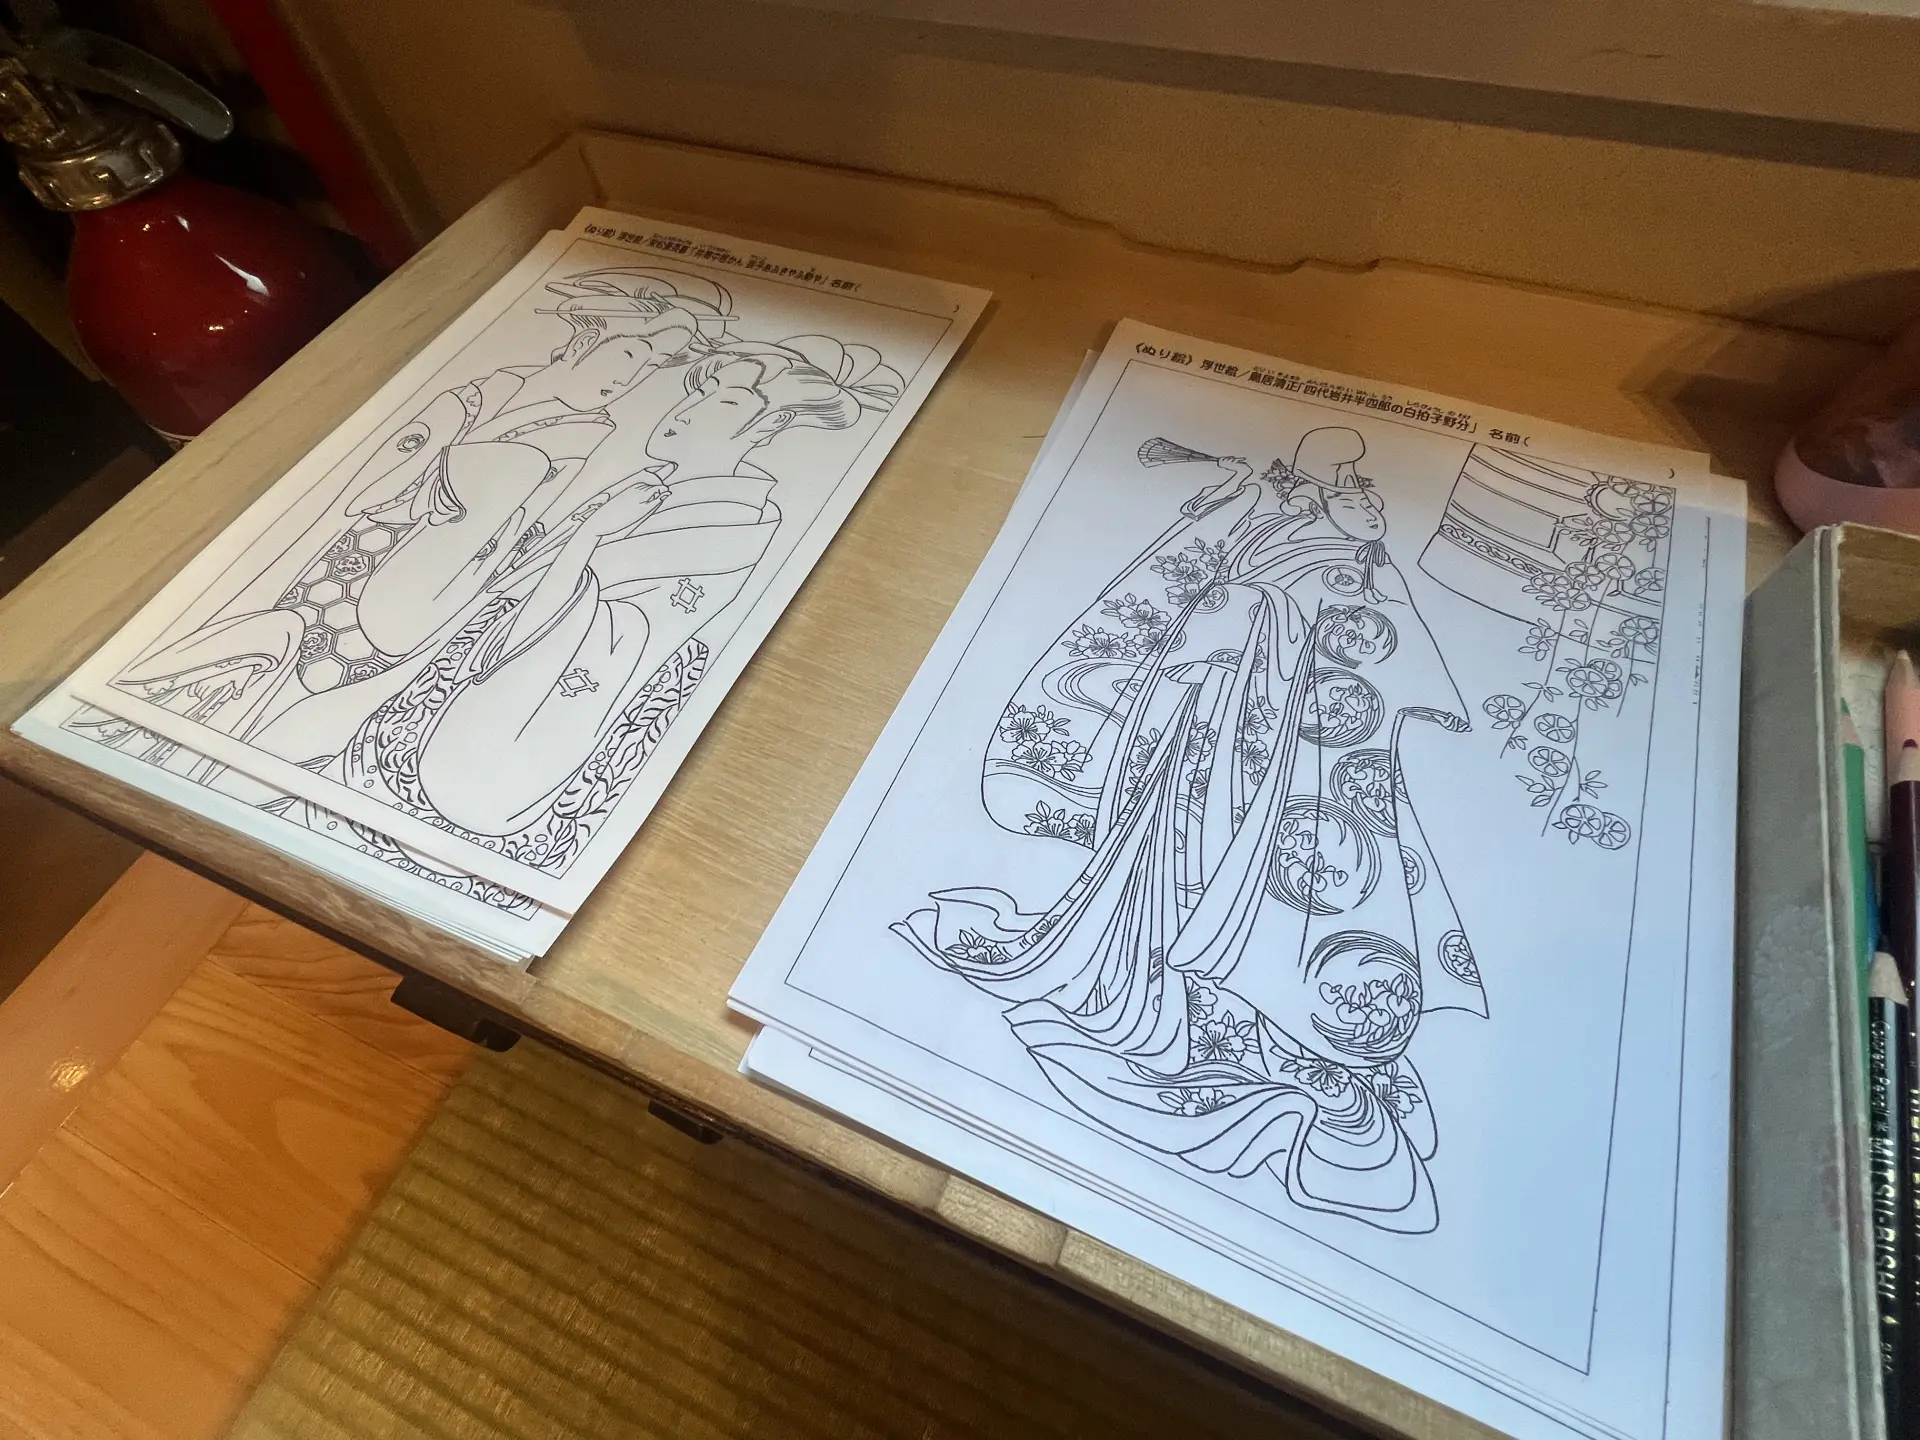
This coloring activity is free to try. You can either complete it there, or take it home and color it later while reliving your travel memories.
Ukiyo-e Souvenirs for Sale
Since you’ve come all the way to the Kamigata Ukiyo-e Museum, be sure to pick up a ukiyo-e-themed souvenir. A gift shop is located on the 1st floor.
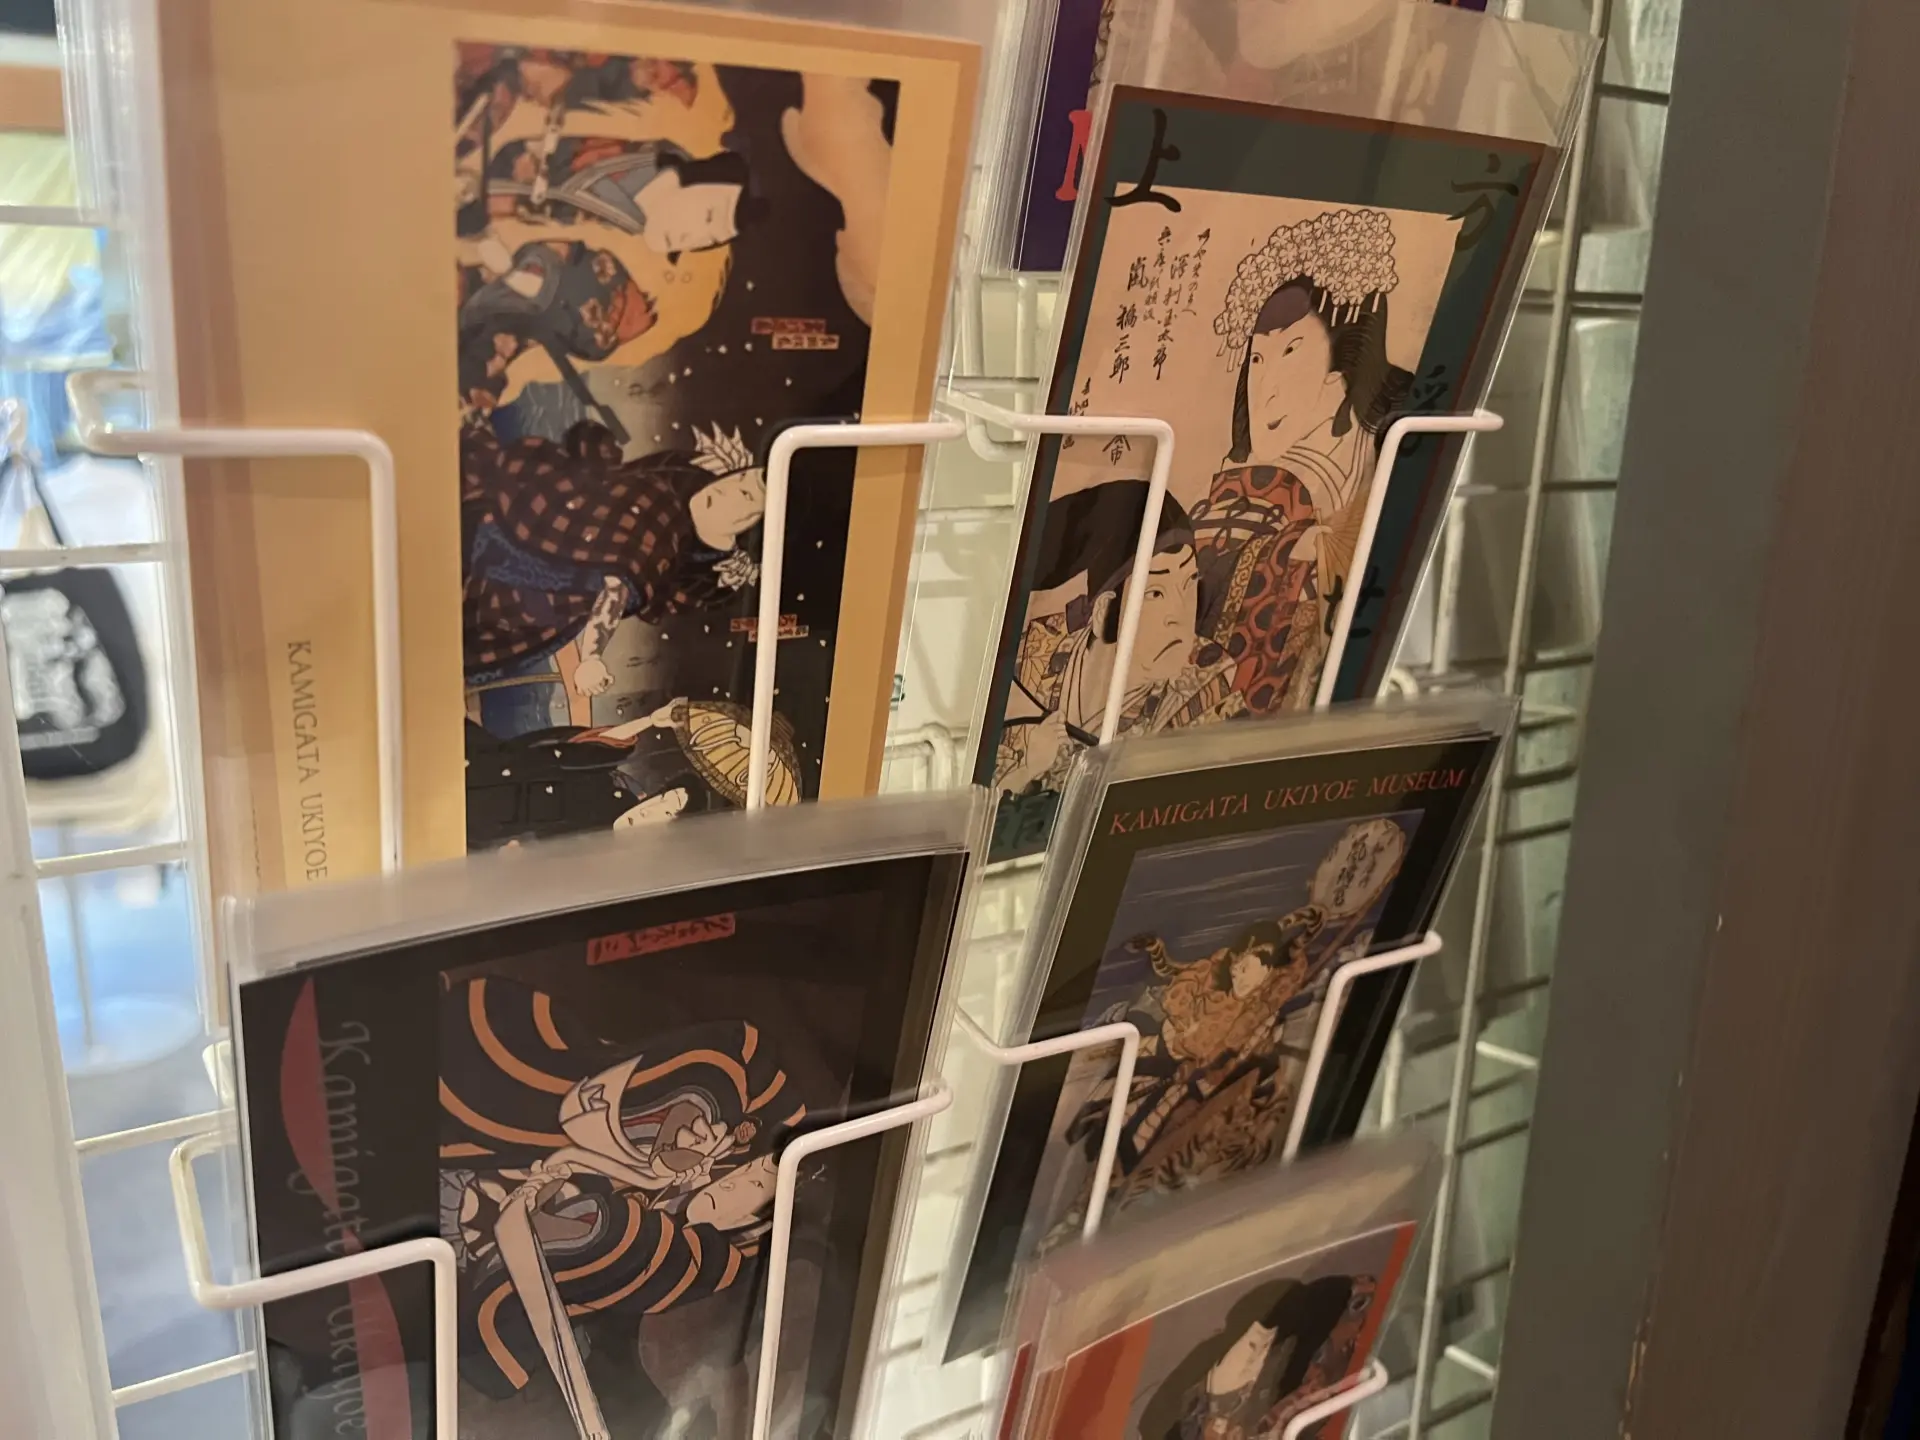
If you follow the museum’s Instagram account, you can receive one ukiyo-e postcard as a gift!
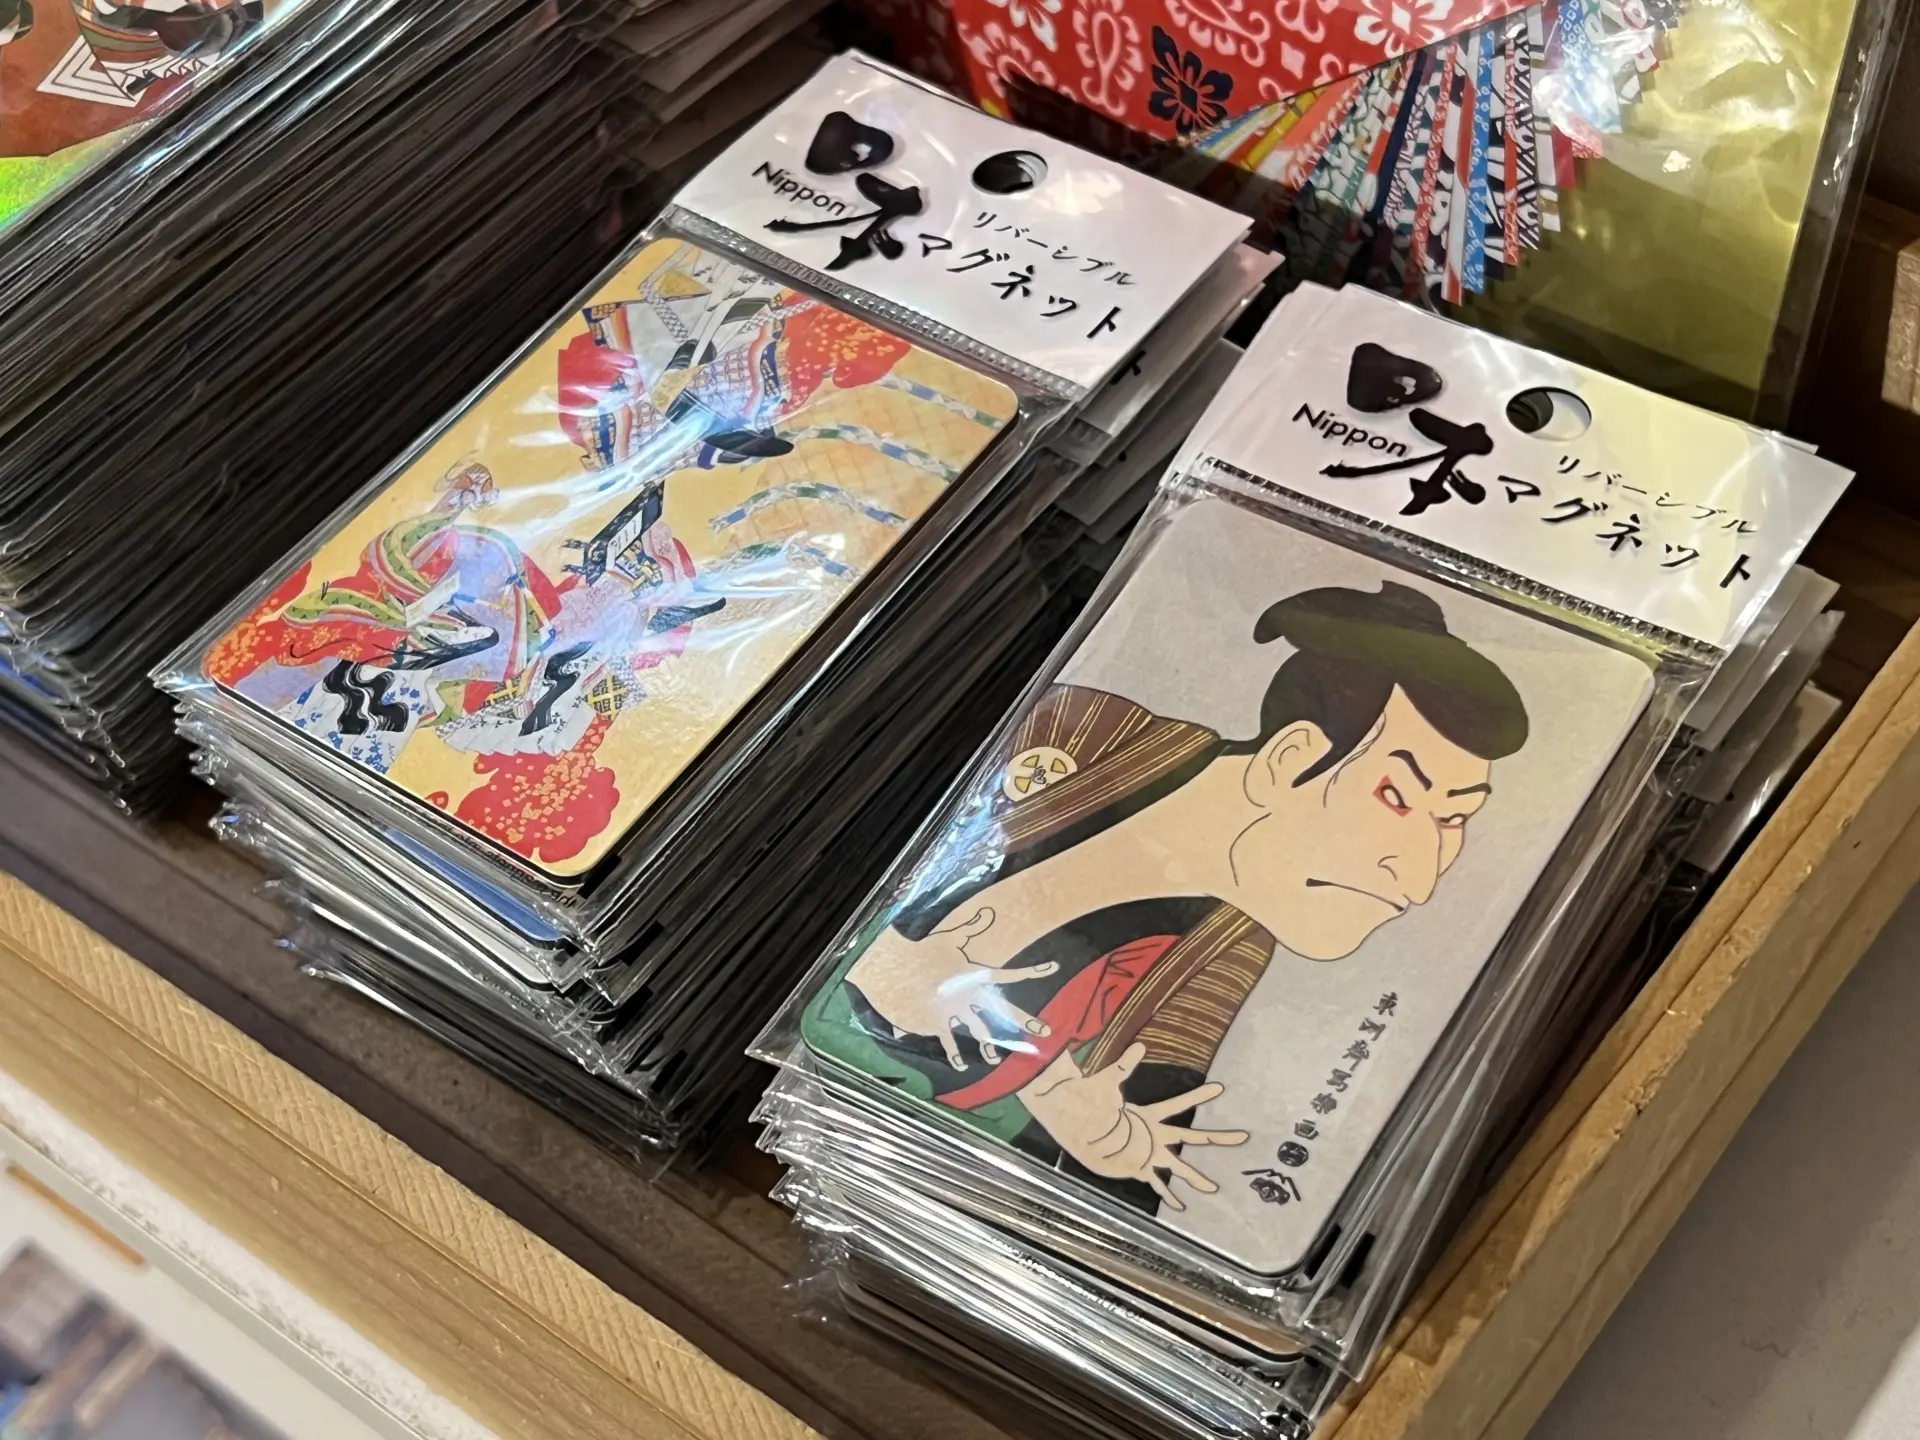
They also sold a Rubik’s Cube printed with ukiyo-e designs, as well as ukiyo-e origami. The magnets are palm-sized and seem perfect as souvenirs for friends and family.
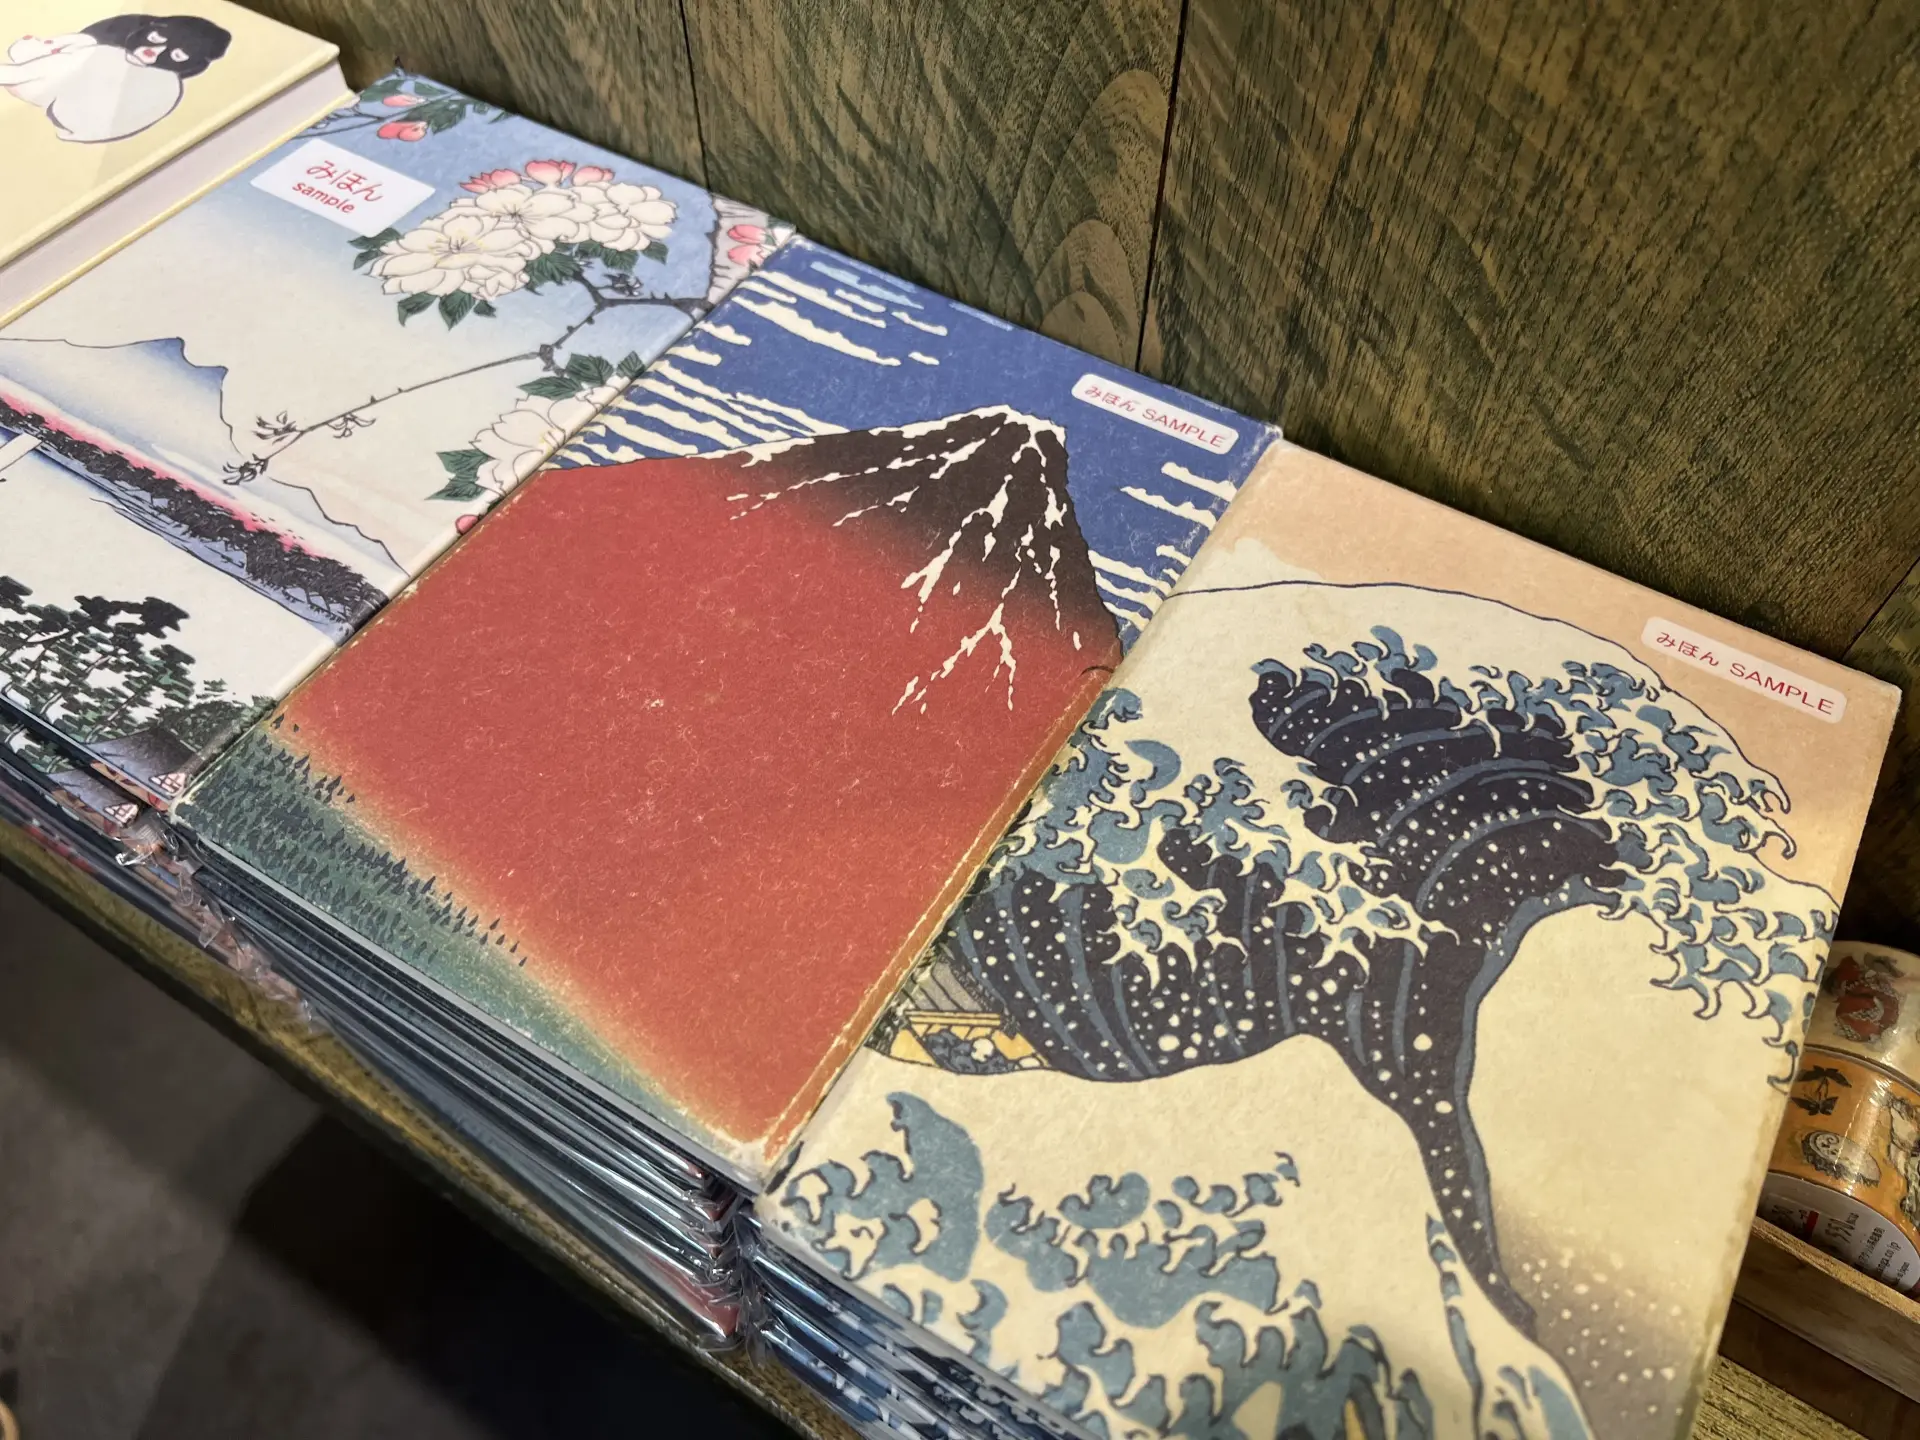
One especially popular souvenir right now is a goshuincho (temple and shrine stamp book) with an ukiyo-e cover.
If you buy one, try making your first page special: visit Hōzenji Temple right in front of the museum and receive a goshuin stamp.

Try Making Ukiyo-e Yourself!
Believe it or not, the Kamigata Ukiyo-e Museum offers a hands-on ukiyo-e making experience.
As mentioned earlier, ukiyo-e prints were created through the collaboration of an artist, carver, and printer. Here, you can try the printing step using woodblocks. There are three options: the Beginner Course, Intermediate Course, and Advanced Course.
This time, we tried the Intermediate Course, which uses four colors.
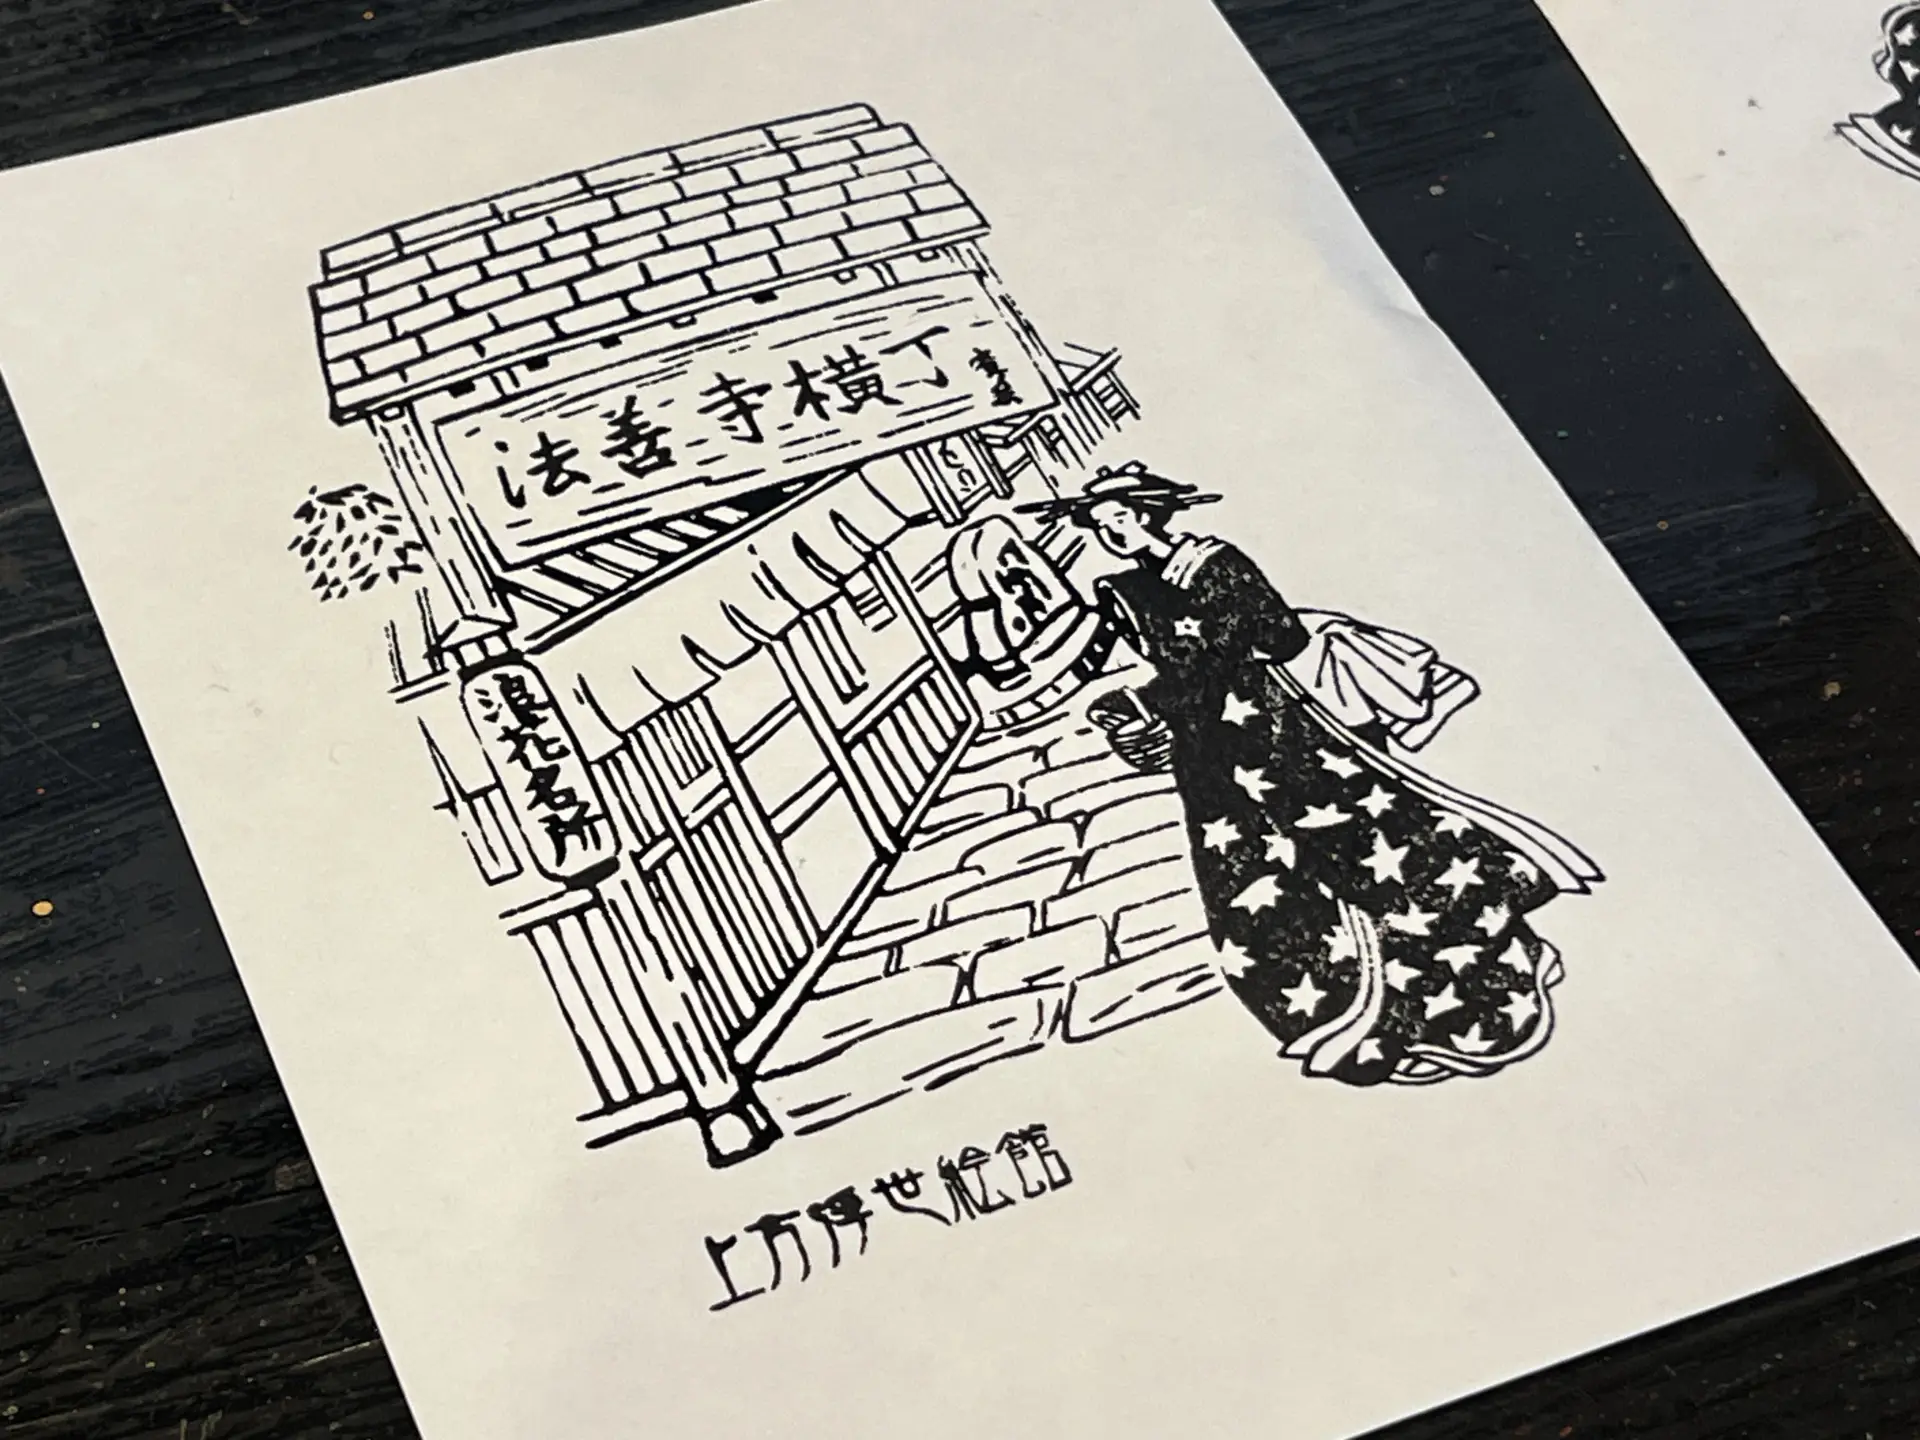
The design features Hōzenji Yokocho and a cute town girl.
- Course Name
- Intermediate Course
- Admission
- 1,200 yen per person (Reservation required for 2 or more people)
- Hours
- Approx. 30–45 minutes
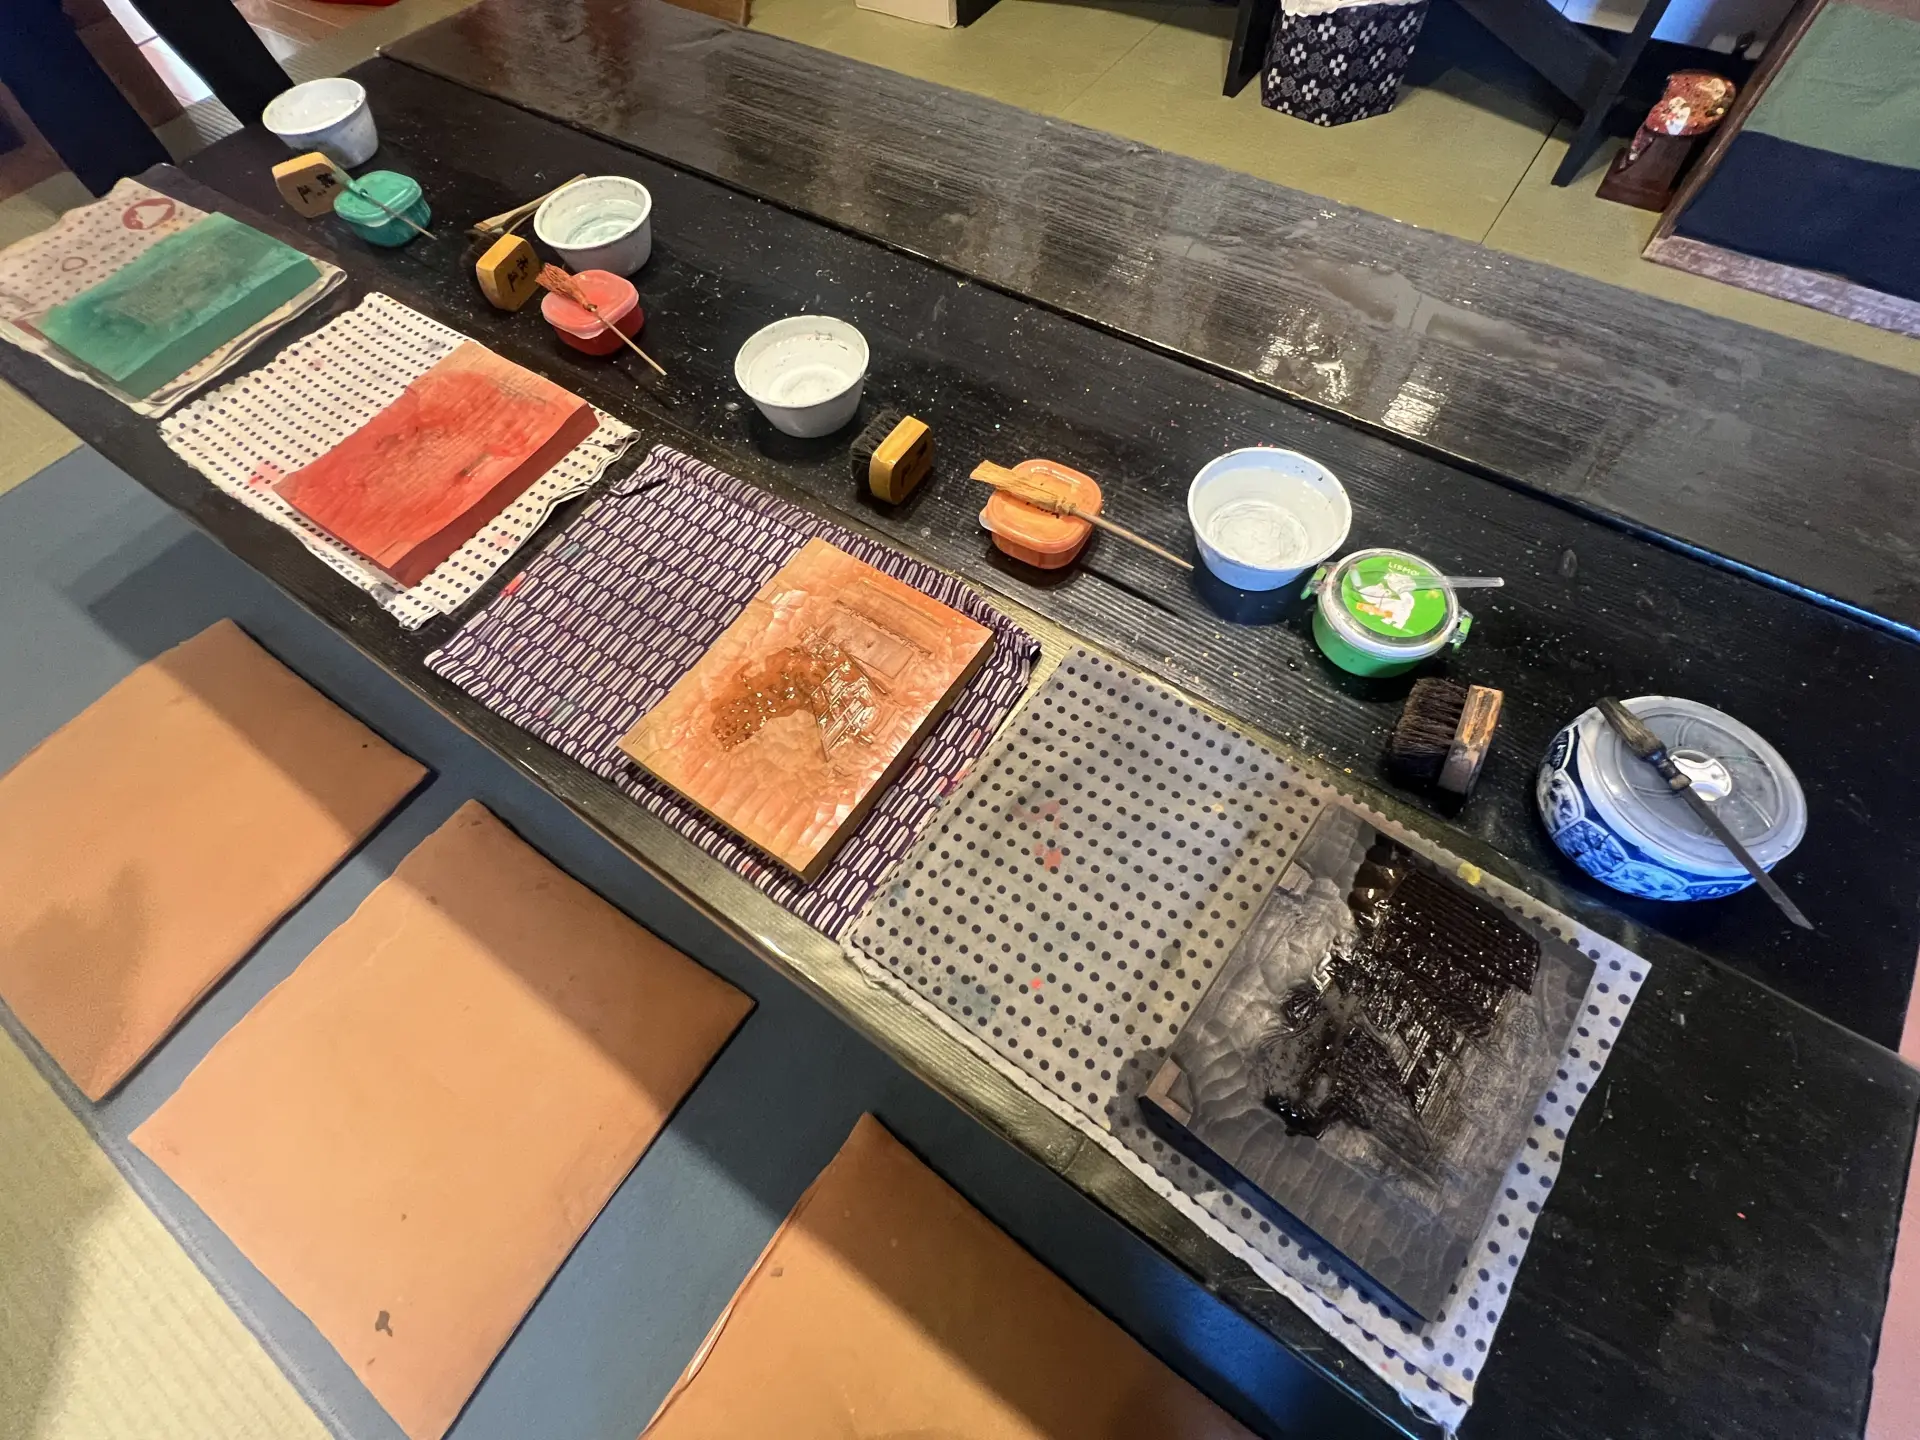
The experience takes place on the 4th floor. After climbing the stairs, you’ll find a tatami room, and you’ll take off your shoes before stepping inside.
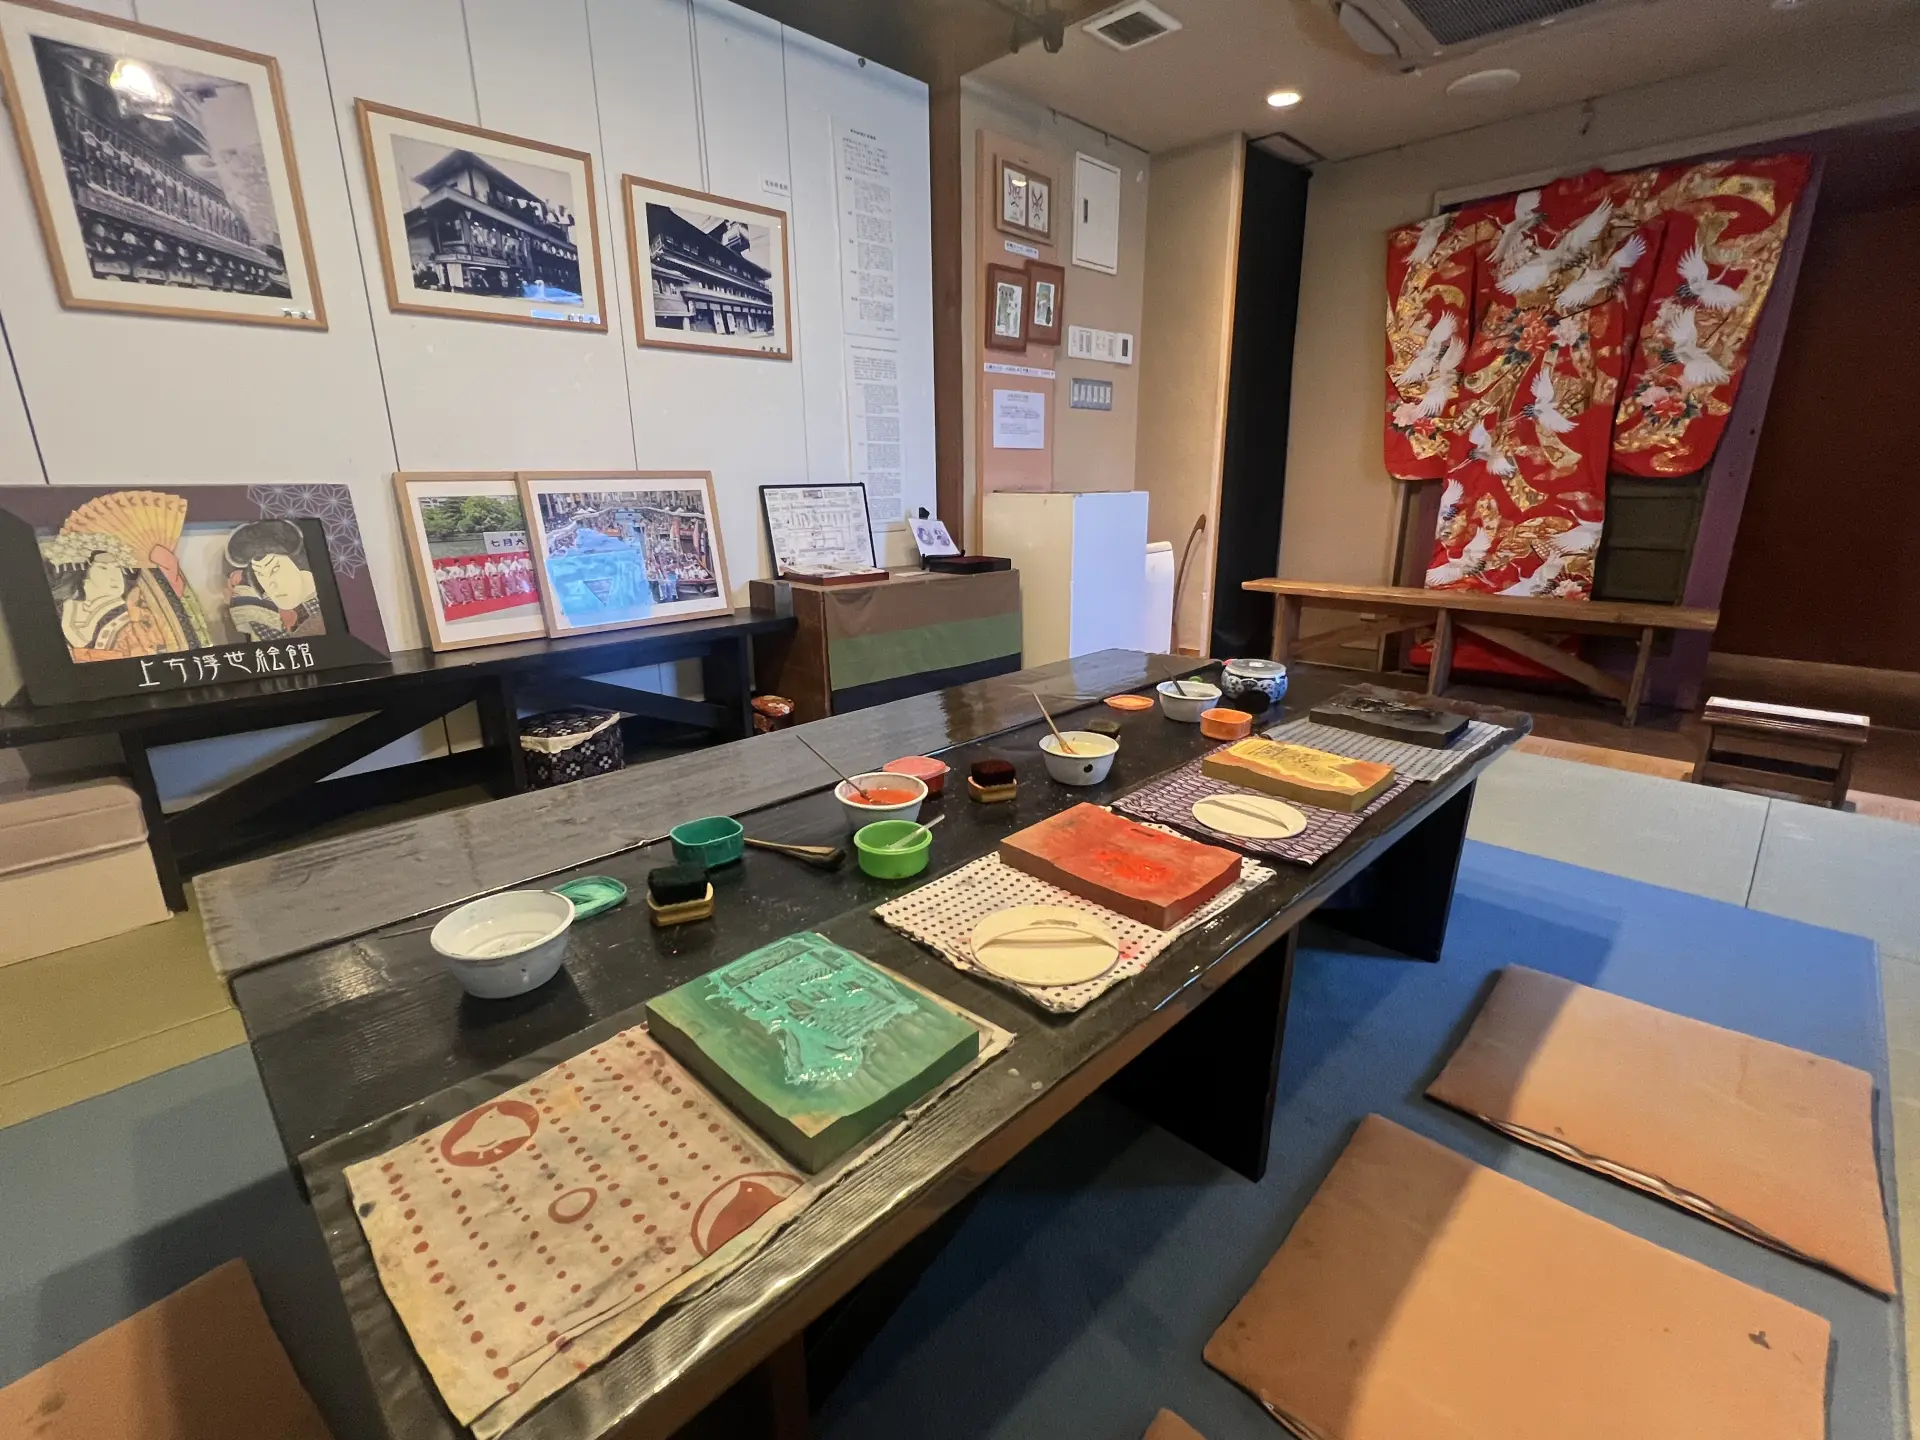
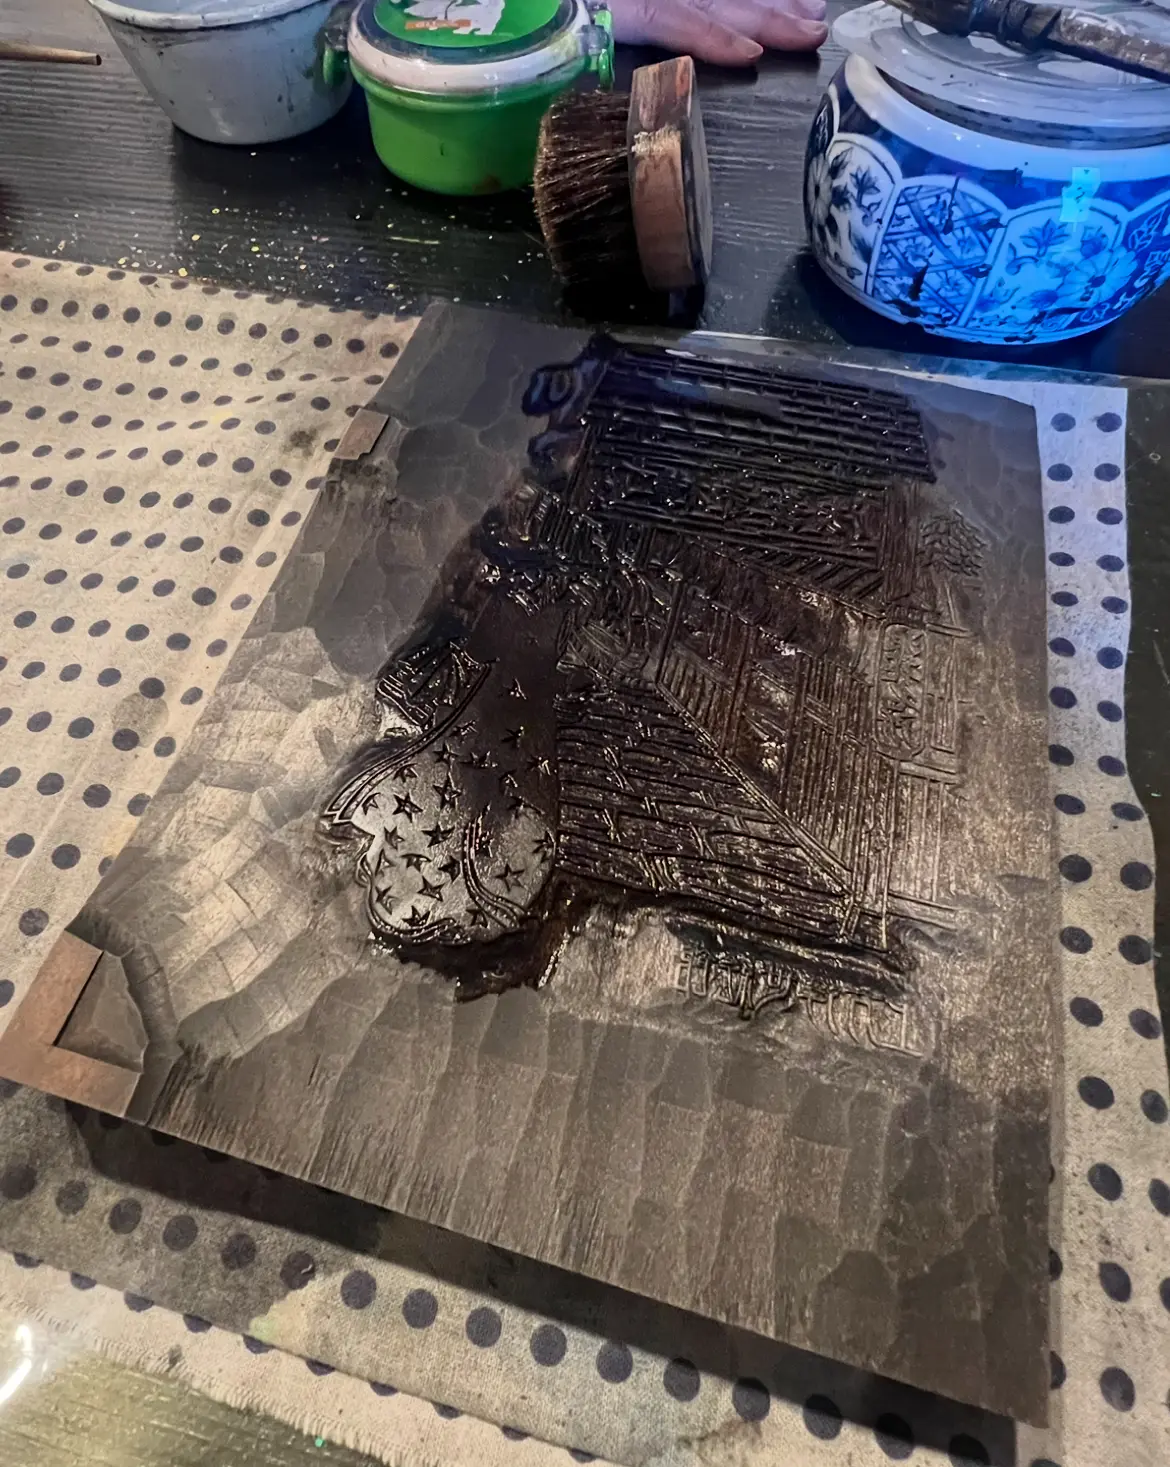
On the long table are four woodblocks. Since the Intermediate Course uses four colors, there’s one block for each color. Printing with these four blocks creates a single finished image. You print the colors in this order, from right to left: black → orange → red → green.
1. Apply ink to the black (key block)
The first block is called the key block, used to print the black outlines of the image. Using a brush, spread black pigment (sumi ink) mainly over the raised areas of the block.
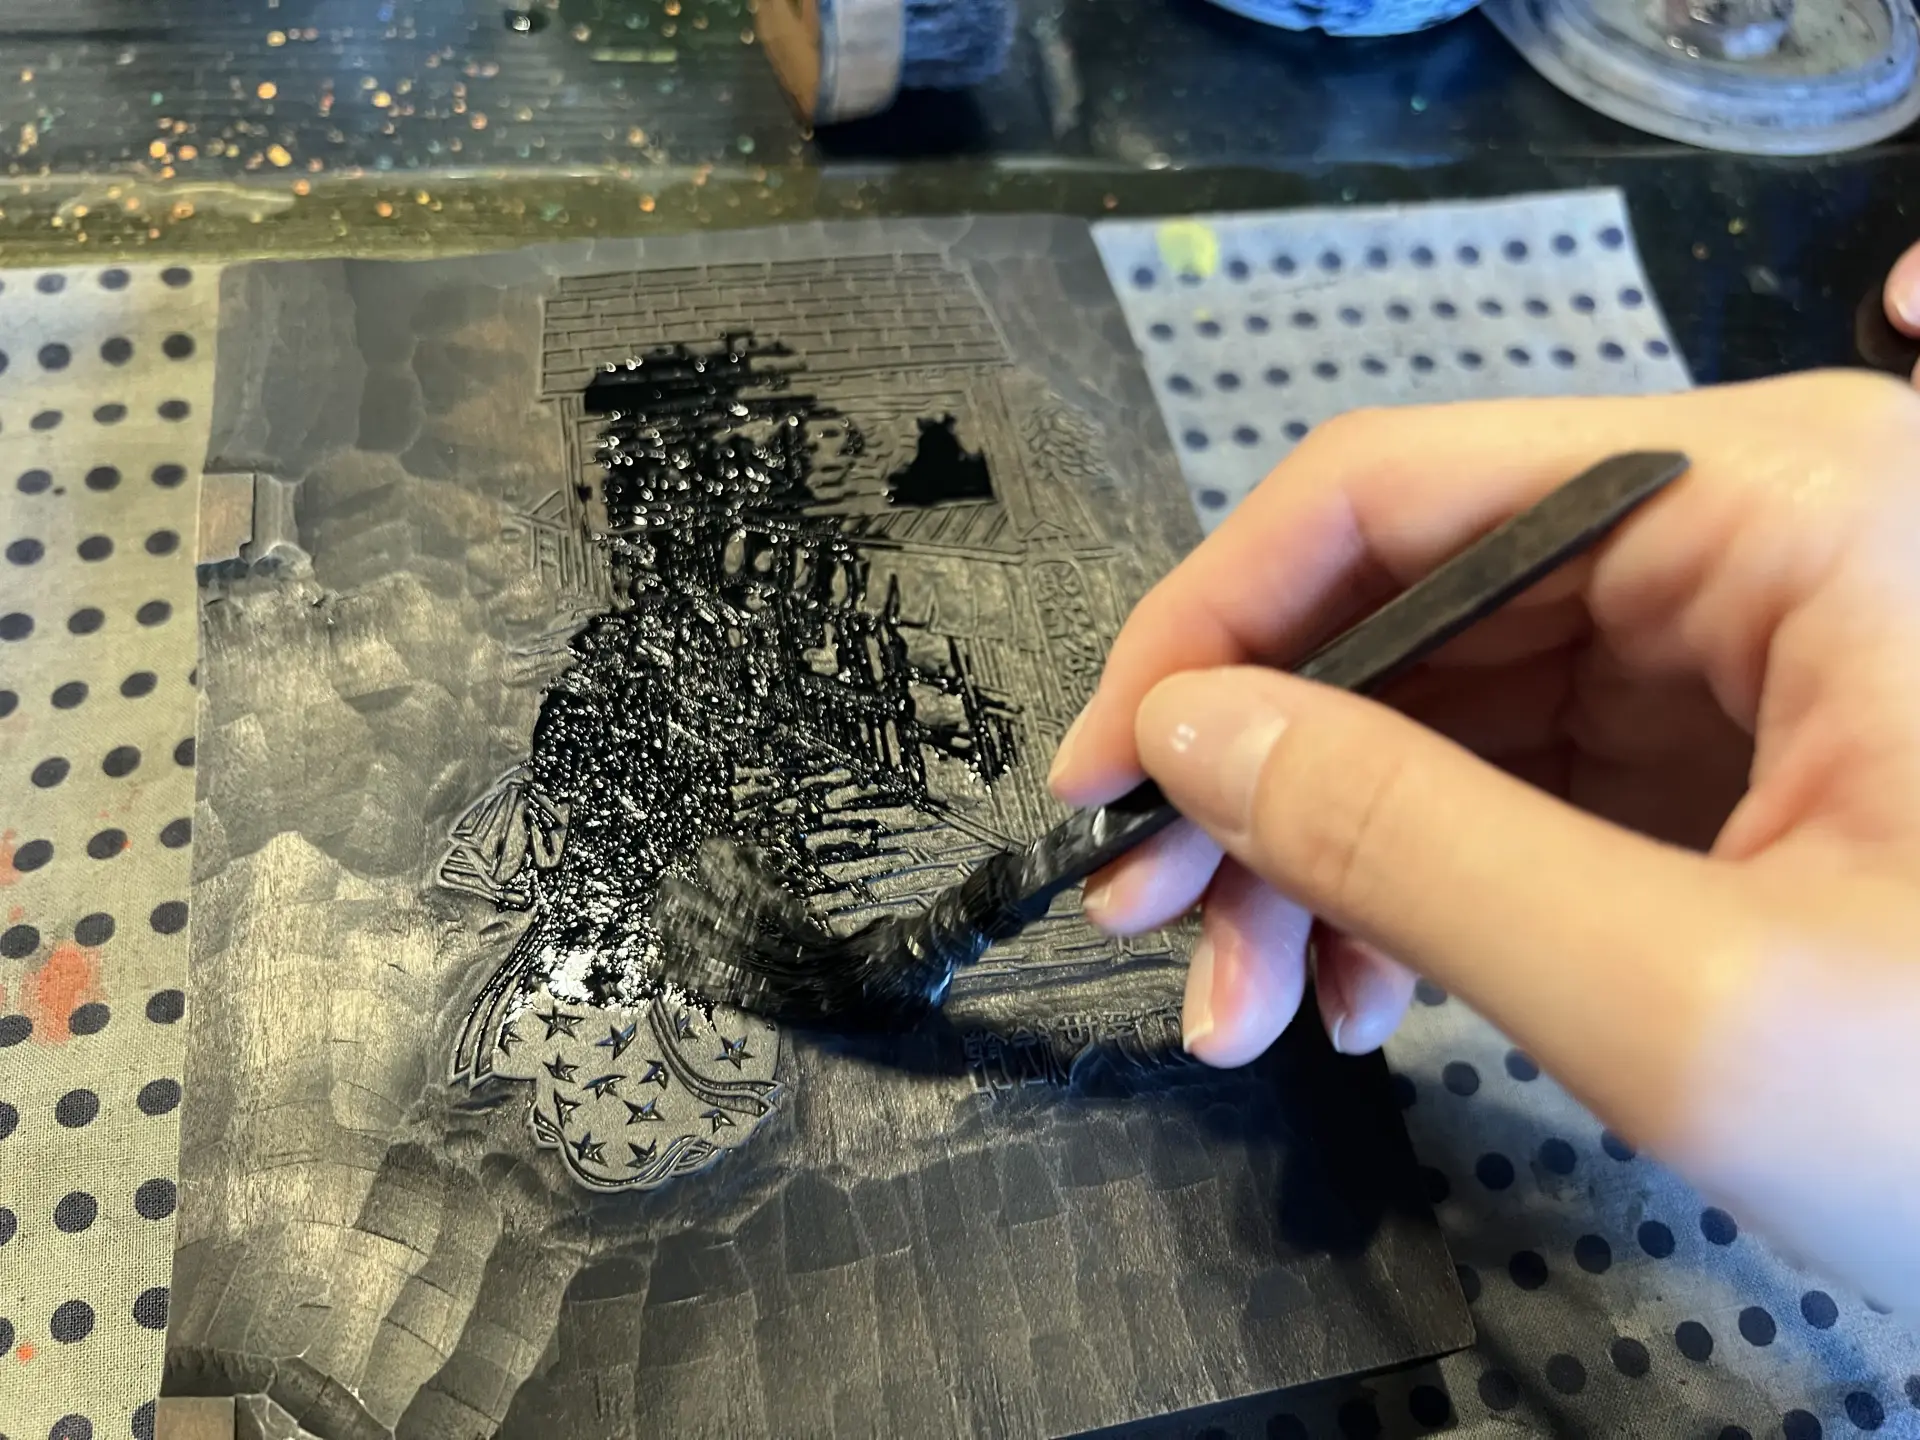
If you miss any spots, those areas will print faintly or not at all, so make sure to spread the pigment thoroughly. After that, add just a small amount of paste to the center.
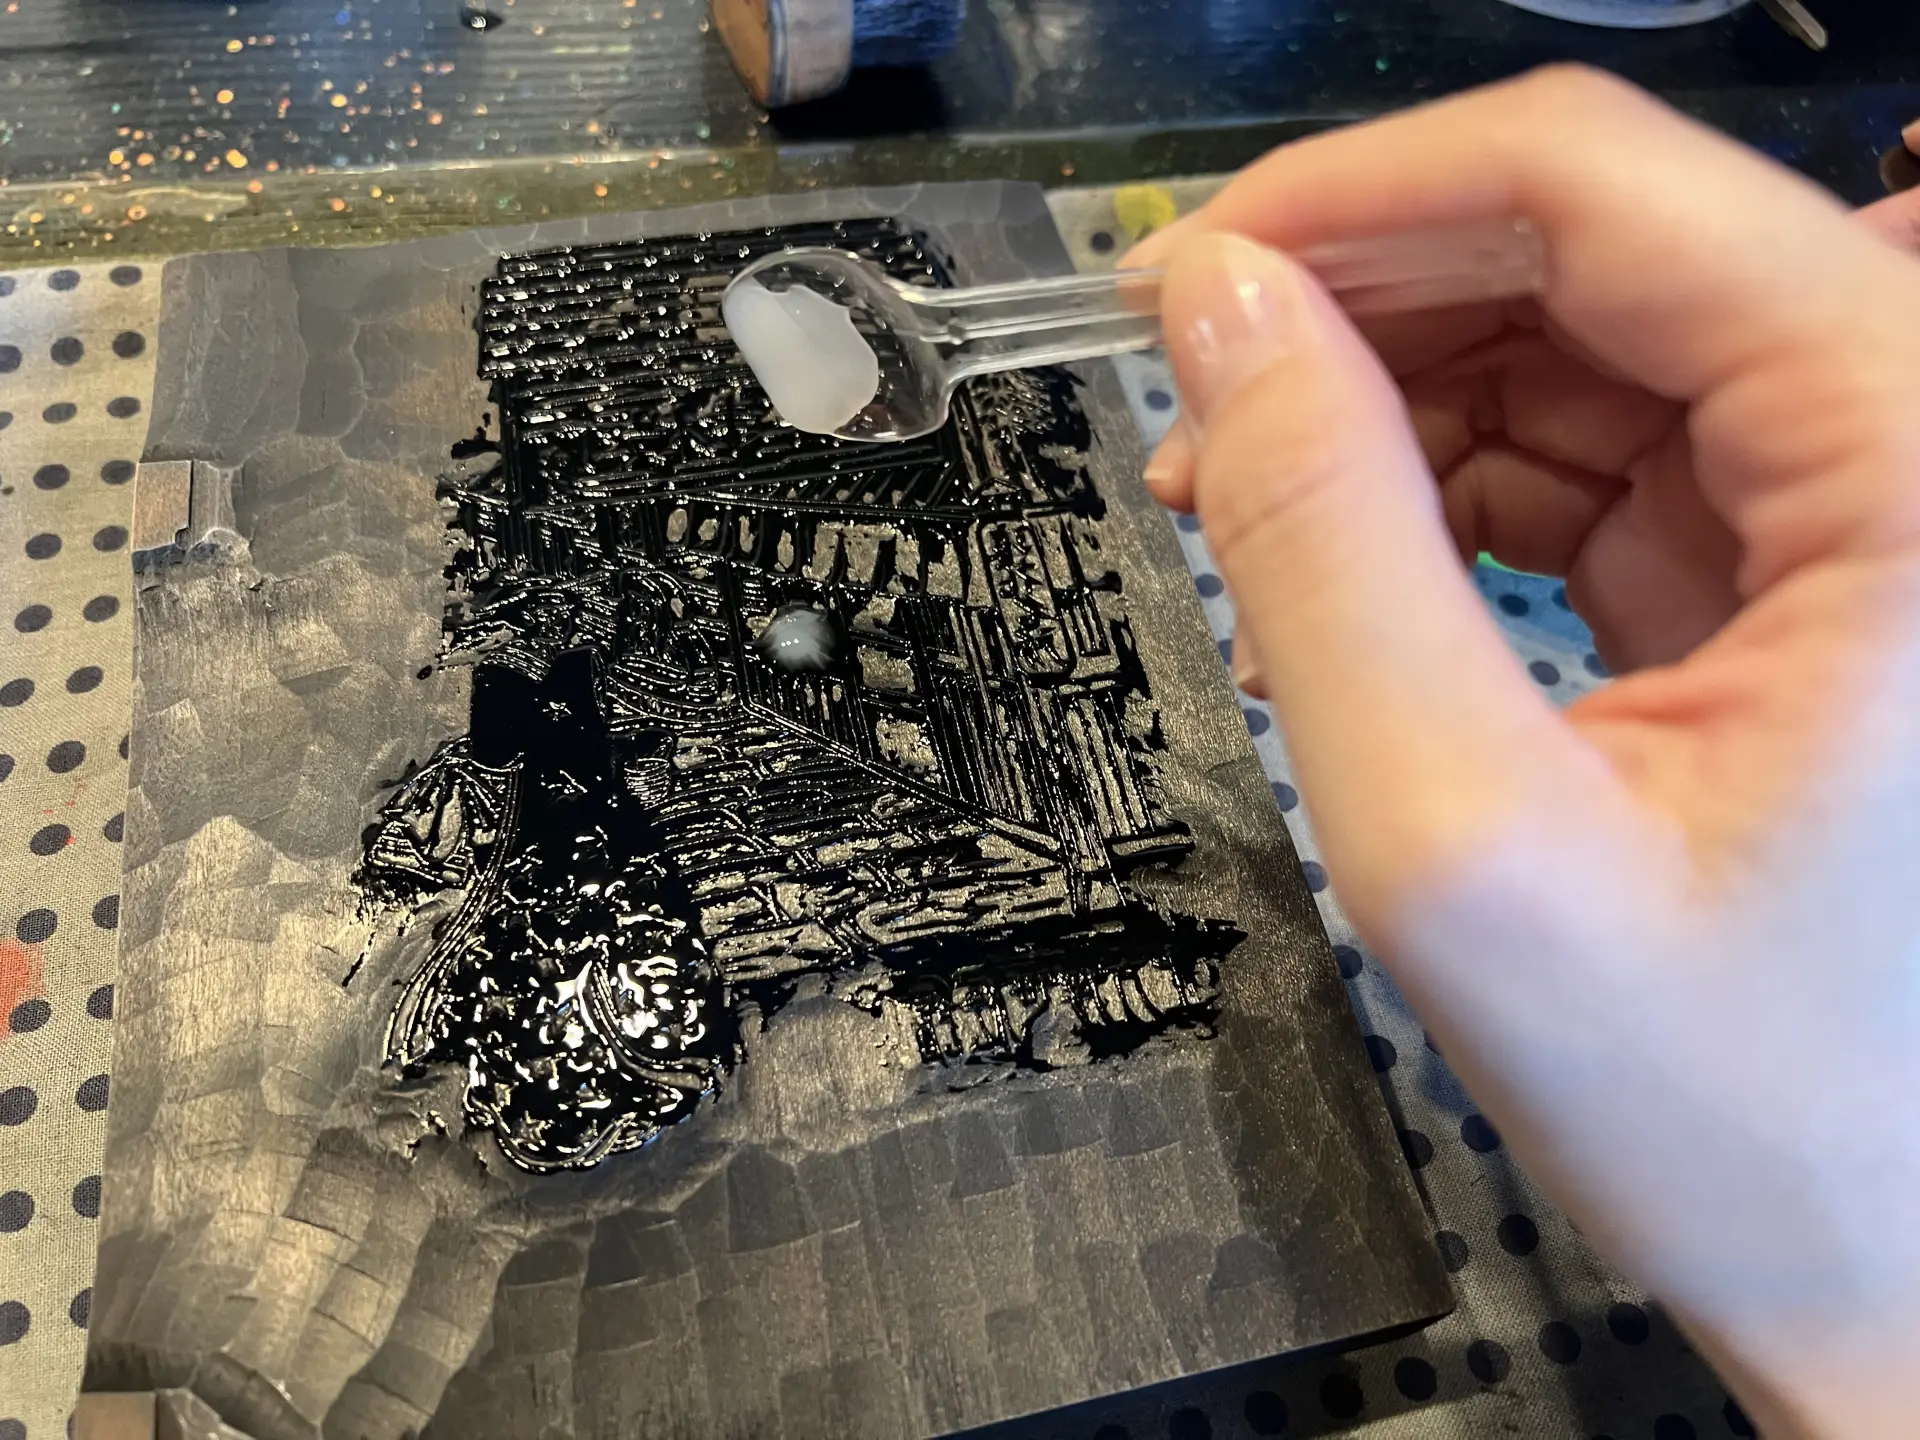
Next, use a dense-bristled brush to blend the paste in.
A quick pass is enough. Spreading the paste helps the pigment adhere better.
2. Align the washi paper to the kentō marks and print
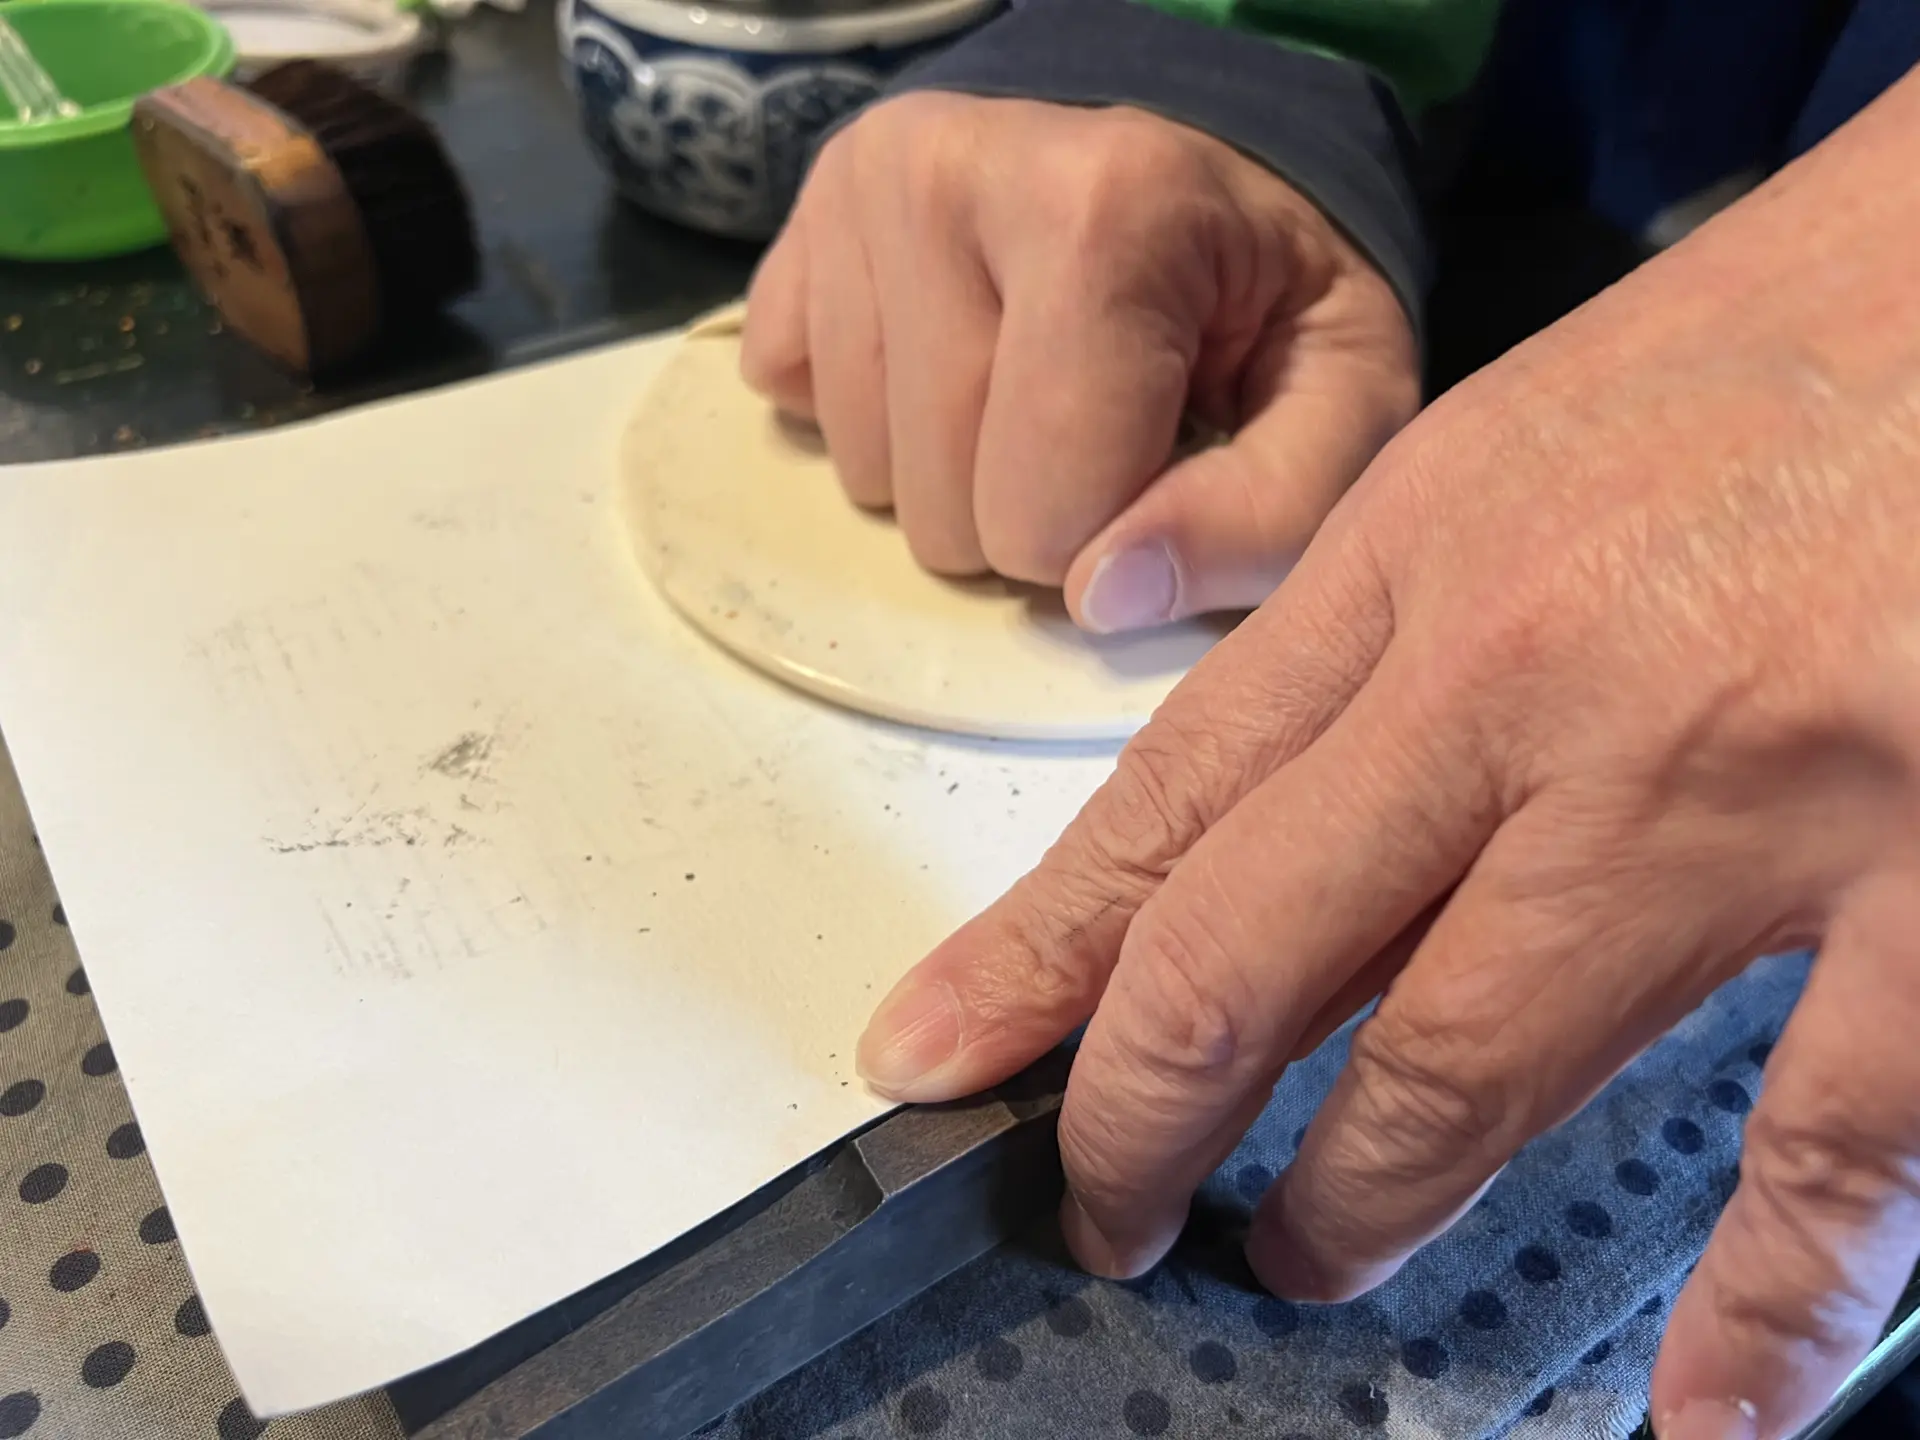
Next comes the printing step—an especially nerve-wracking moment. On the block, you’ll find carved notches at the lower-left corner and along the left edge. These are called kentō registration marks.
If the washi shifts when you layer multiple colors, the ukiyo-e won’t come out properly. That’s why you use the kentō marks as guides to align the paper. We also learned that kentō is the origin of Japanese expressions like kentōhazure and kentōchigai (meaning “off the mark” or “incorrect”). To print ukiyo-e successfully, the key is to avoid being “off the mark” by carefully aligning the washi to the kentō.
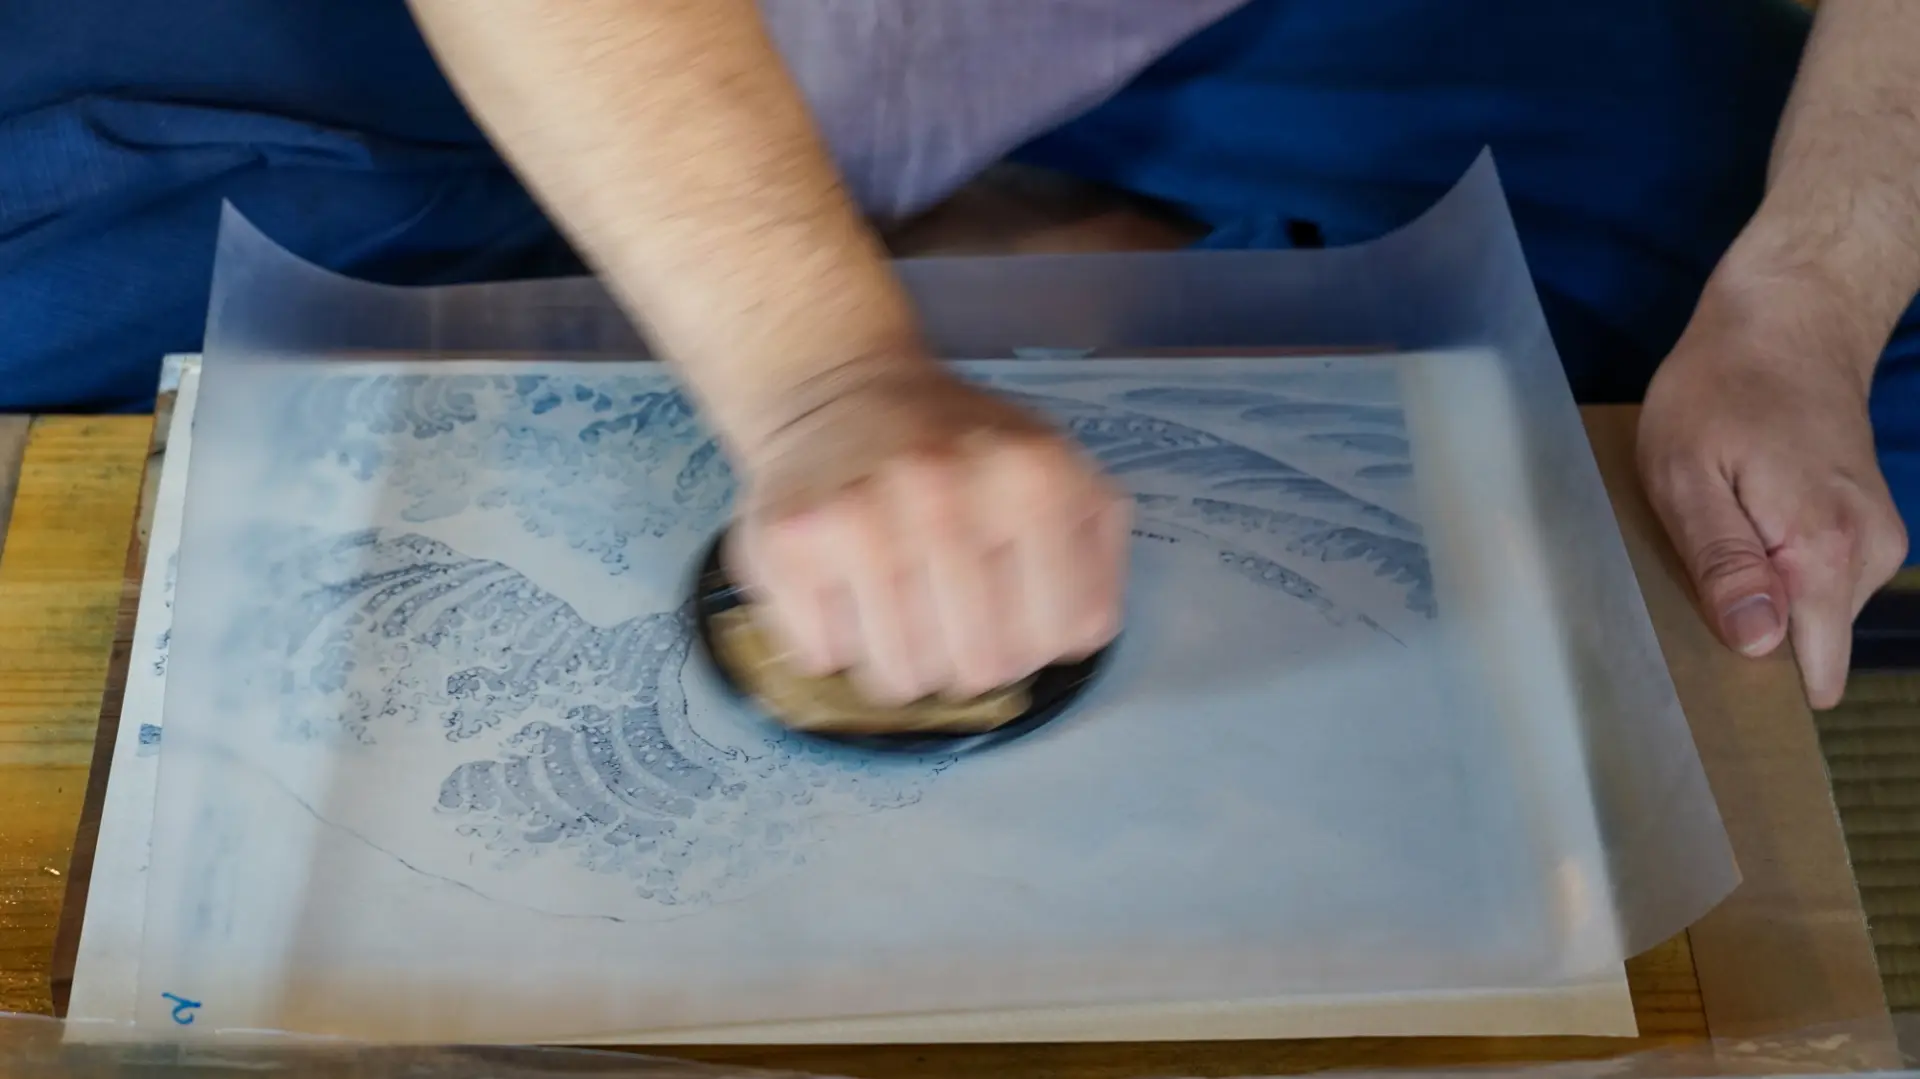
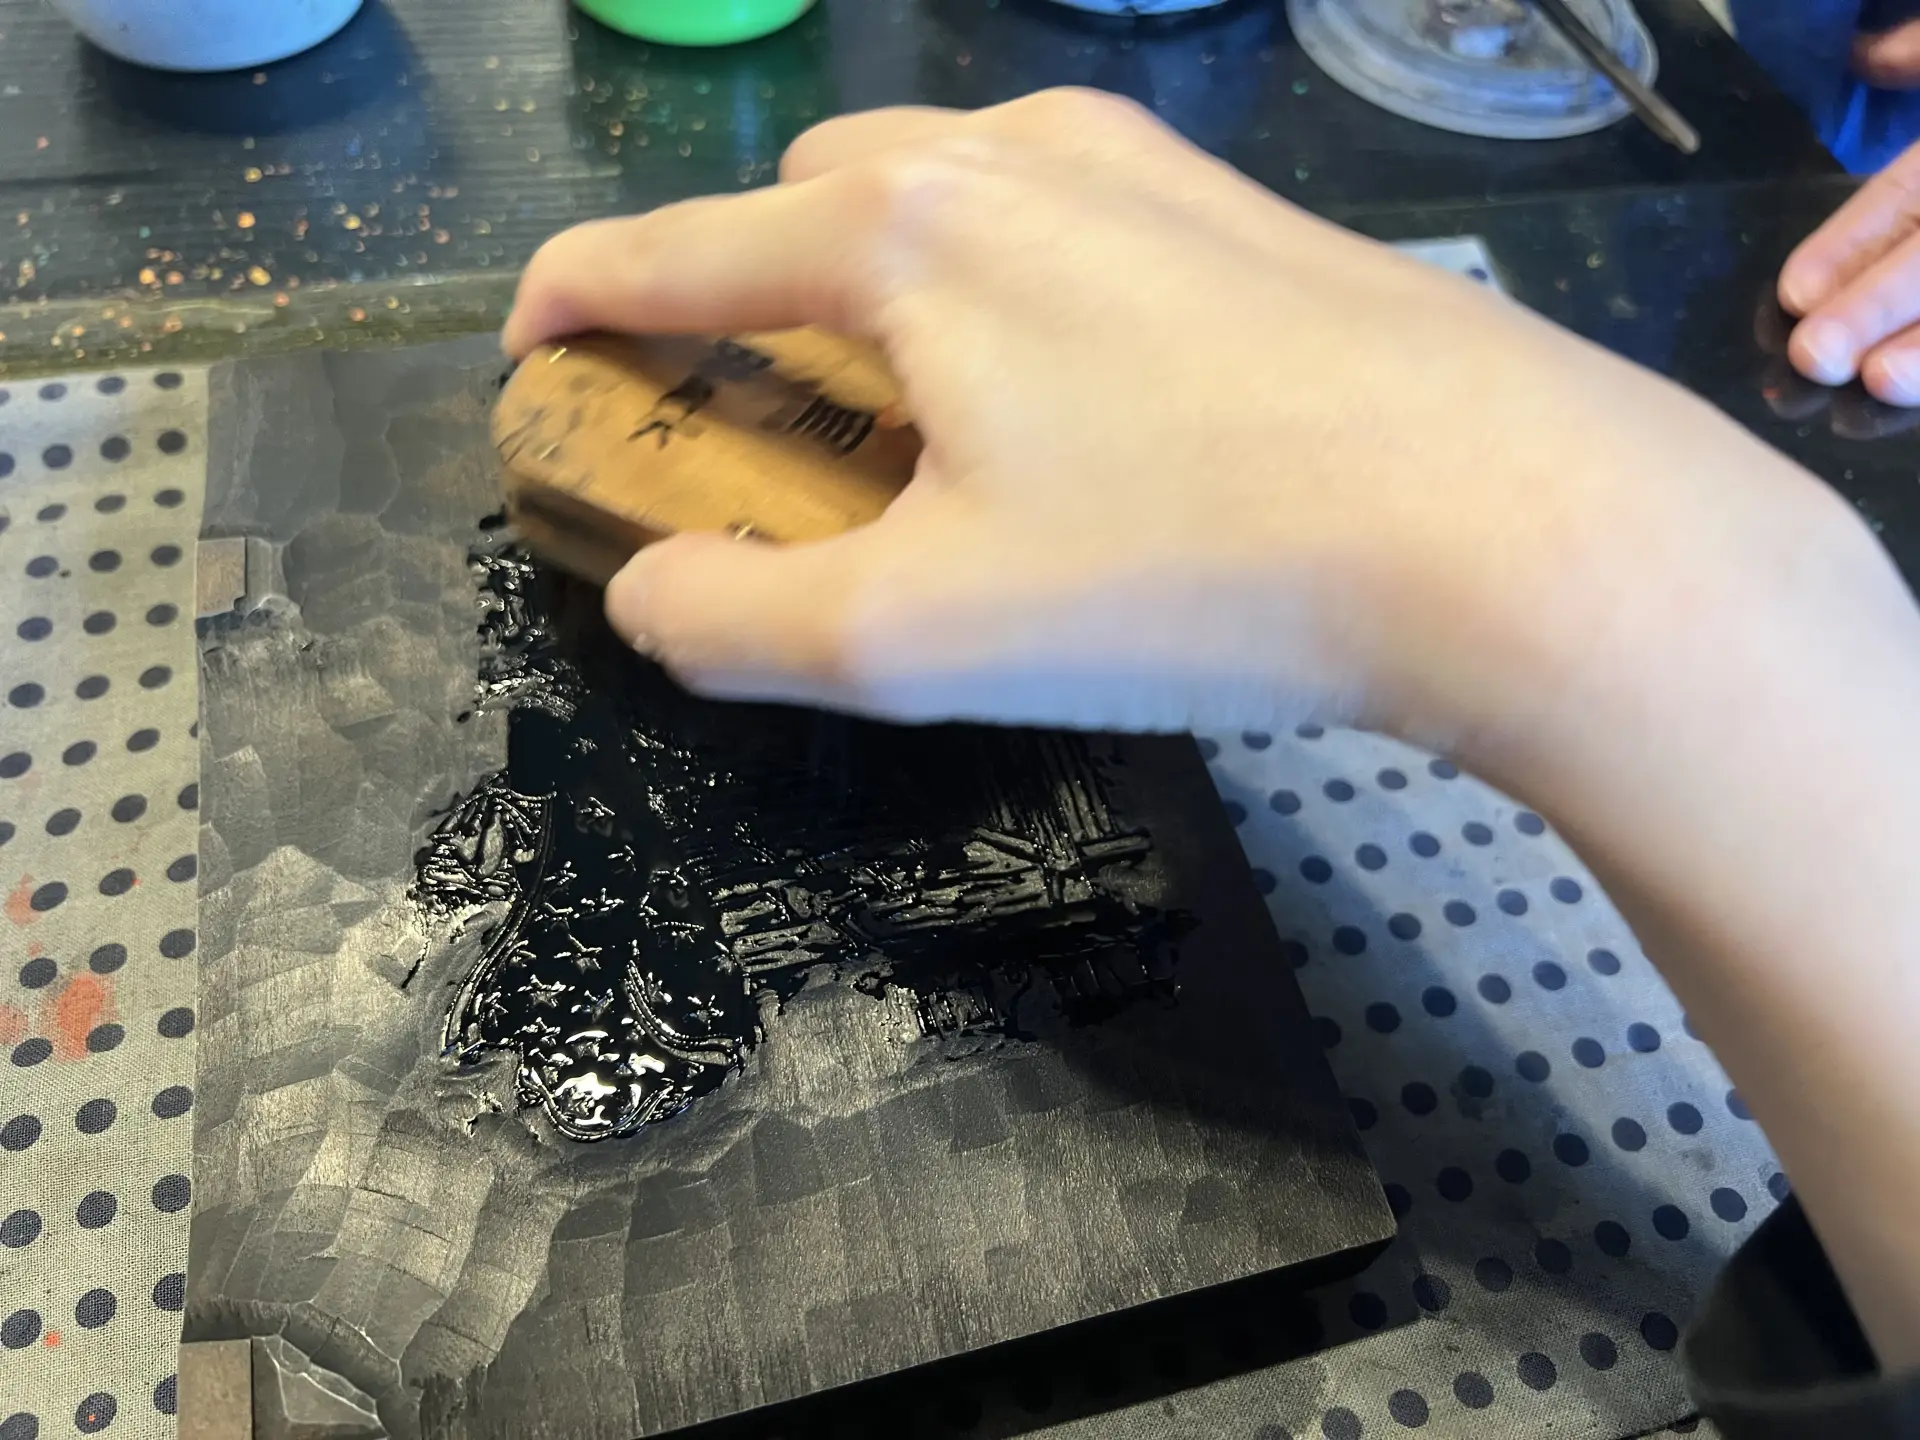
Washi has a smoother side and a rougher side, so print with the smoother side facing down. Place the paper only on the two kentō marks at the lower-left corner and left edge—don’t lower the paper fully yet. Press firmly on the kentō points with your thumb and index finger. Carefully, so it doesn’t shift! Once it’s secure, lower the paper. At this point, do not press down on the paper with your hand. Hold the baren firmly with your index through little finger, bend slightly at the knees, and rub the baren across the paper as if pressing down. The slight squat helps you put your body weight into the baren. You need that much pressure while rubbing.
Rub repeatedly in a circular motion. This takes quite a bit of strength. If you don’t rub firmly enough, the print won’t transfer well and you’ll get faded areas. To avoid that, rub strongly and repeatedly. After rubbing for a while, don’t peel the paper off all at once—lift it slightly to check whether it printed properly. At this moment too, don’t release your thumb and index finger holding the paper at the kentō! If it looks good, you can remove the paper. If any parts are faint, rub that area again with the baren. That completes the key block step.
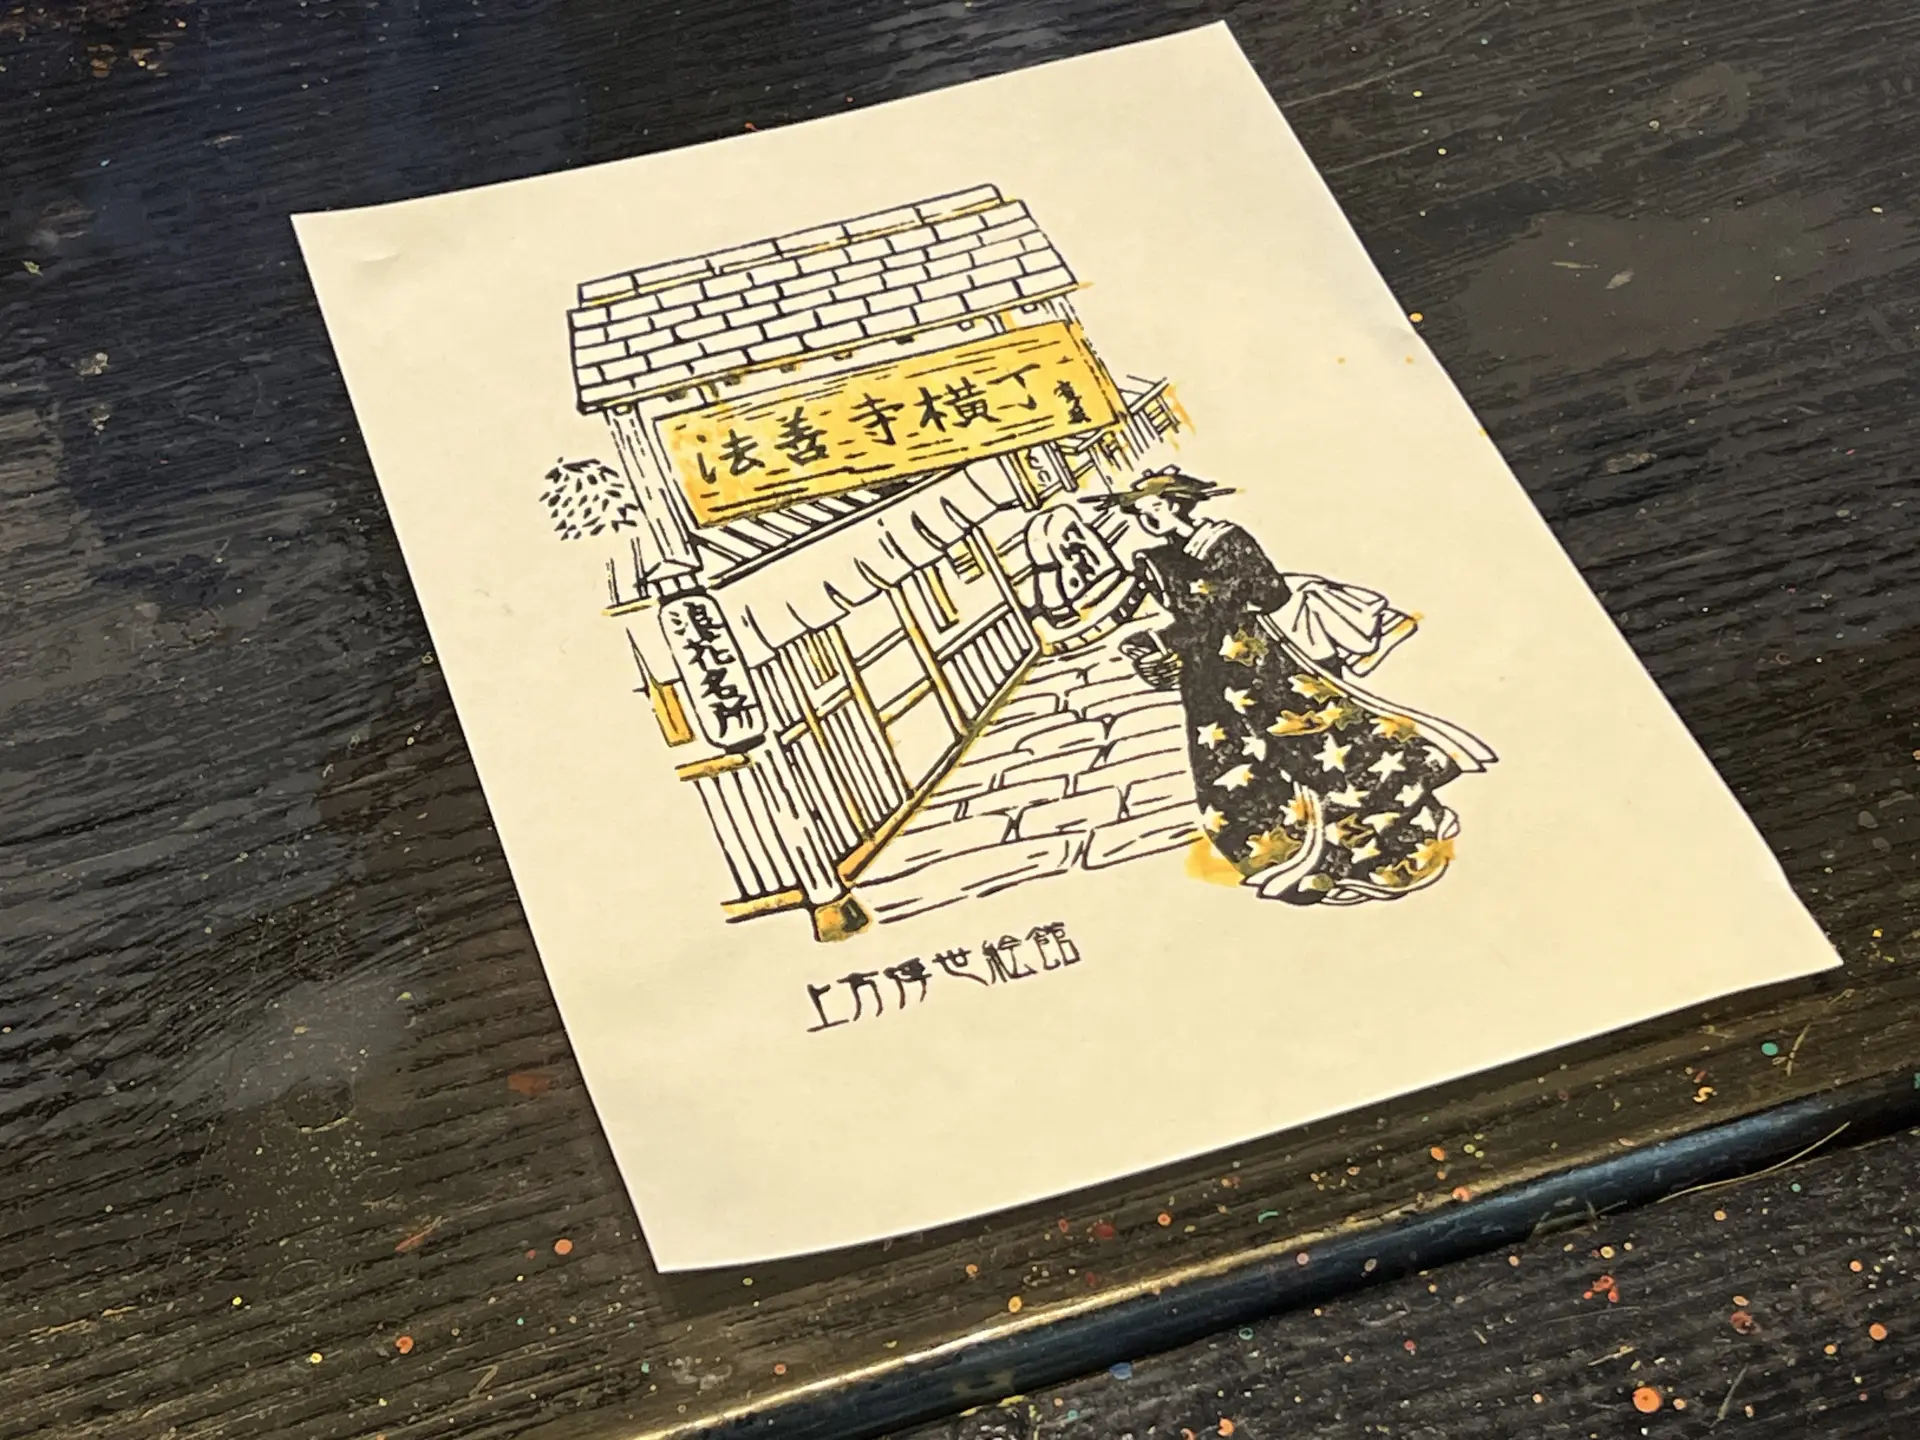
How did it turn out? It looks like it printed pretty cleanly. Even at this stage, it feels like a big accomplishment—but the image won’t be finished until you repeat this three more times. And from here on, you also have to make sure the pattern doesn’t misalign. With a bit of nervousness, we moved on to the next step.
3. Orange
Next, you print the orange color. Orange is used for the sign and parts of the kimono pattern and obi. The steps are the same as for the key block: spread the orange pigment over the block.
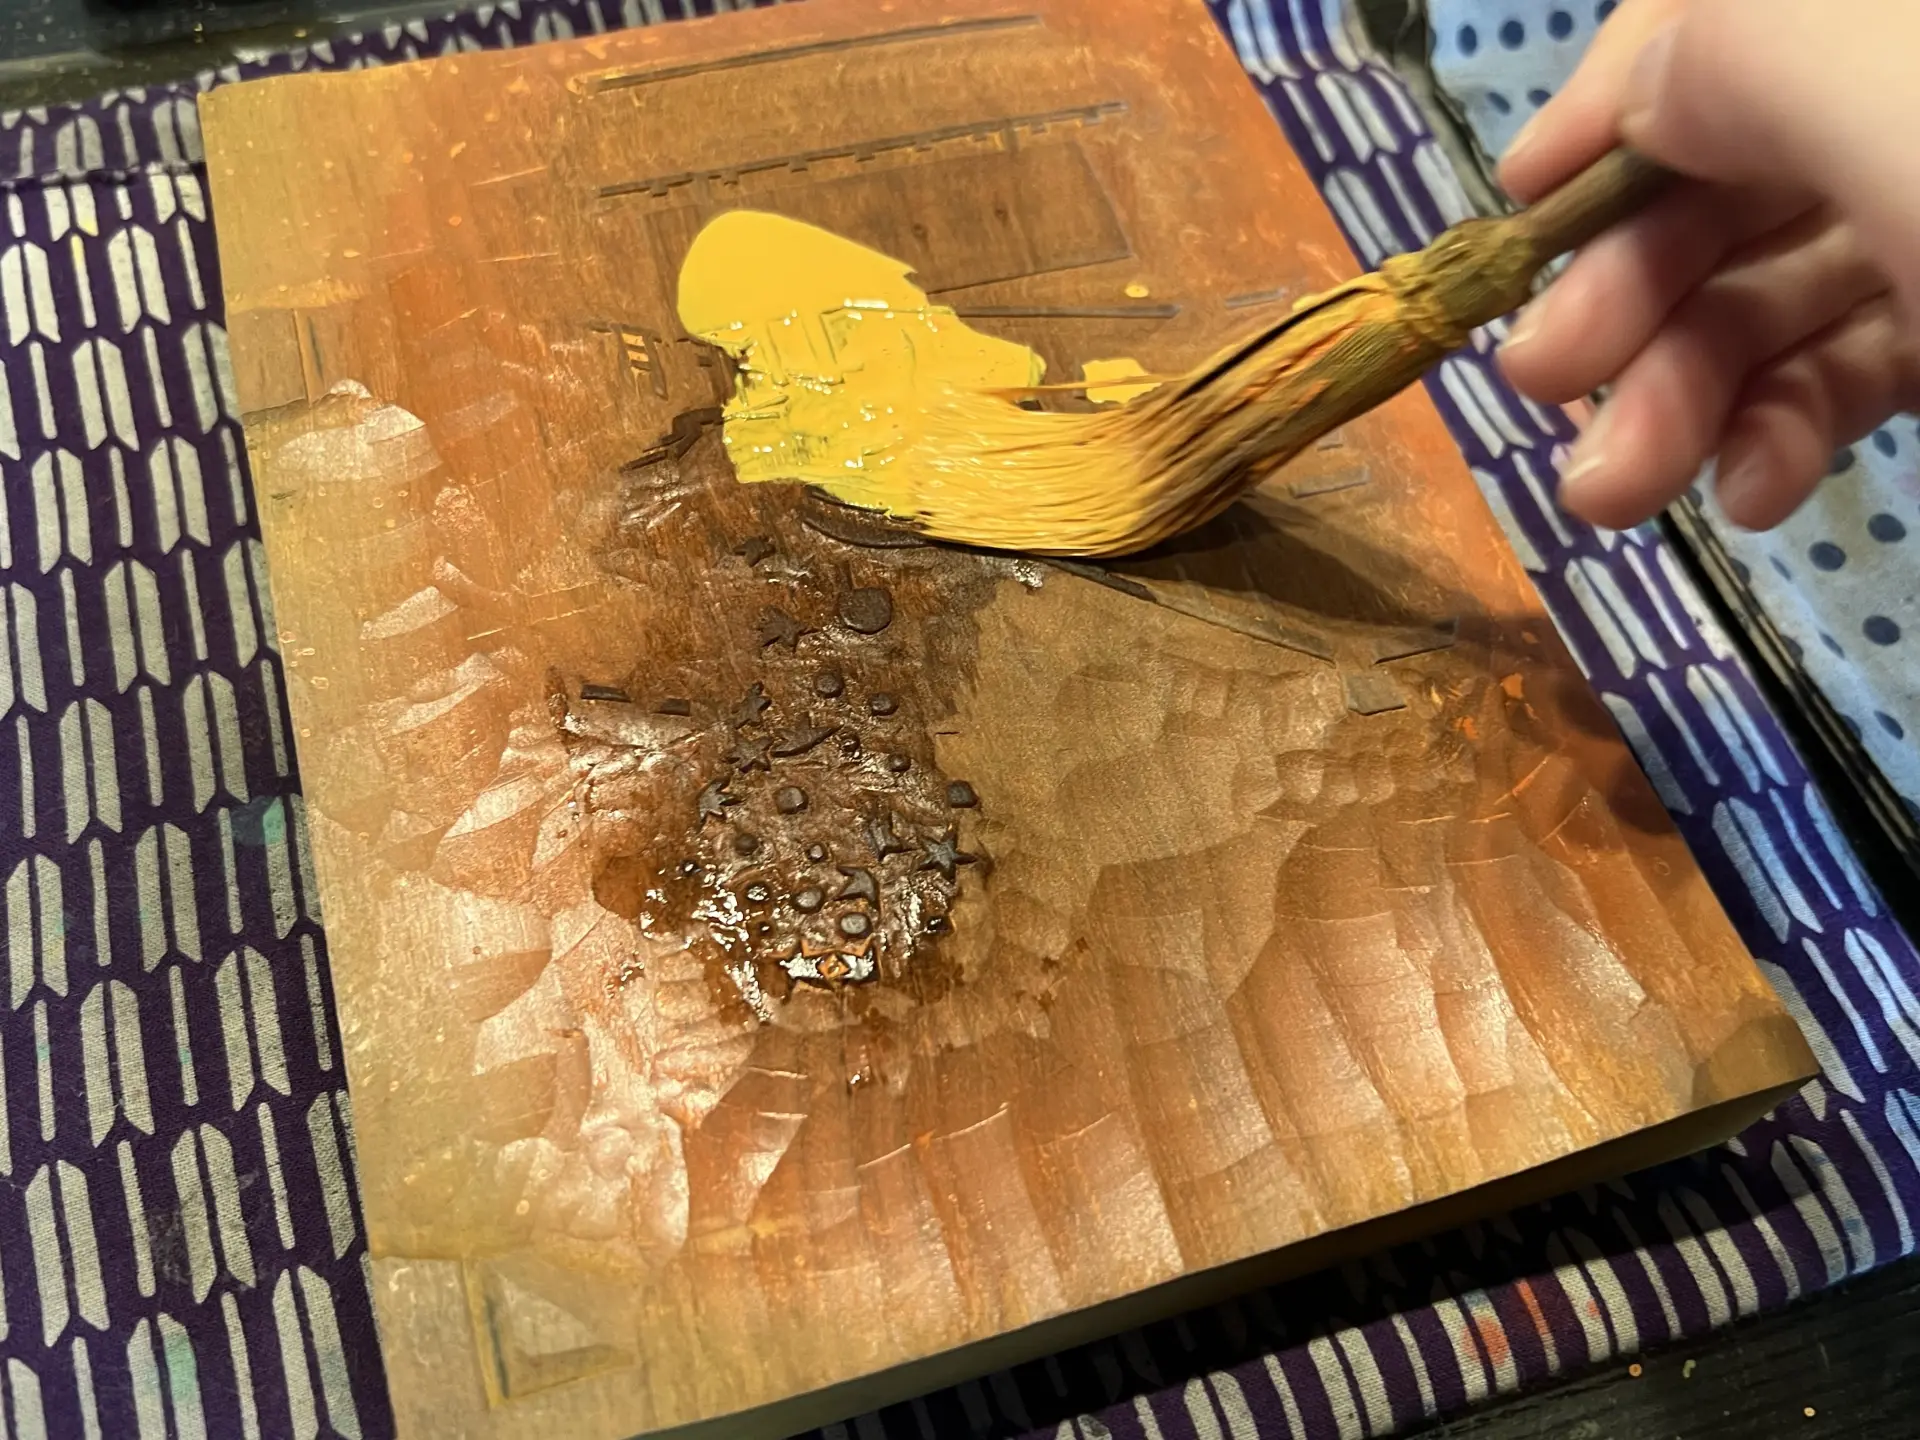
Then drop a small amount of paste near the center of the image and quickly spread it with a brush. Align the paper to the kentō marks and press firmly with your thumb and index finger. After gently setting the paper down, bend slightly again and rub while applying pressure with the baren as if using your body weight. So—how did it go?
...The kimono pattern shifted a little. Looks like we were “off the mark.”
Still, the sign that says “Hōzenji Yokocho” came out pretty well.
4. Red
Next, you print the red layer. Let’s keep going with the same method. Red is used for the lanterns, parts of the kimono pattern, and the obi. Spread the pigment, add paste, and blend it with the brush. The moment you place the paper using the kentō marks might be the most nerve-wracking of all. This time, were we able to stay “on the mark”?
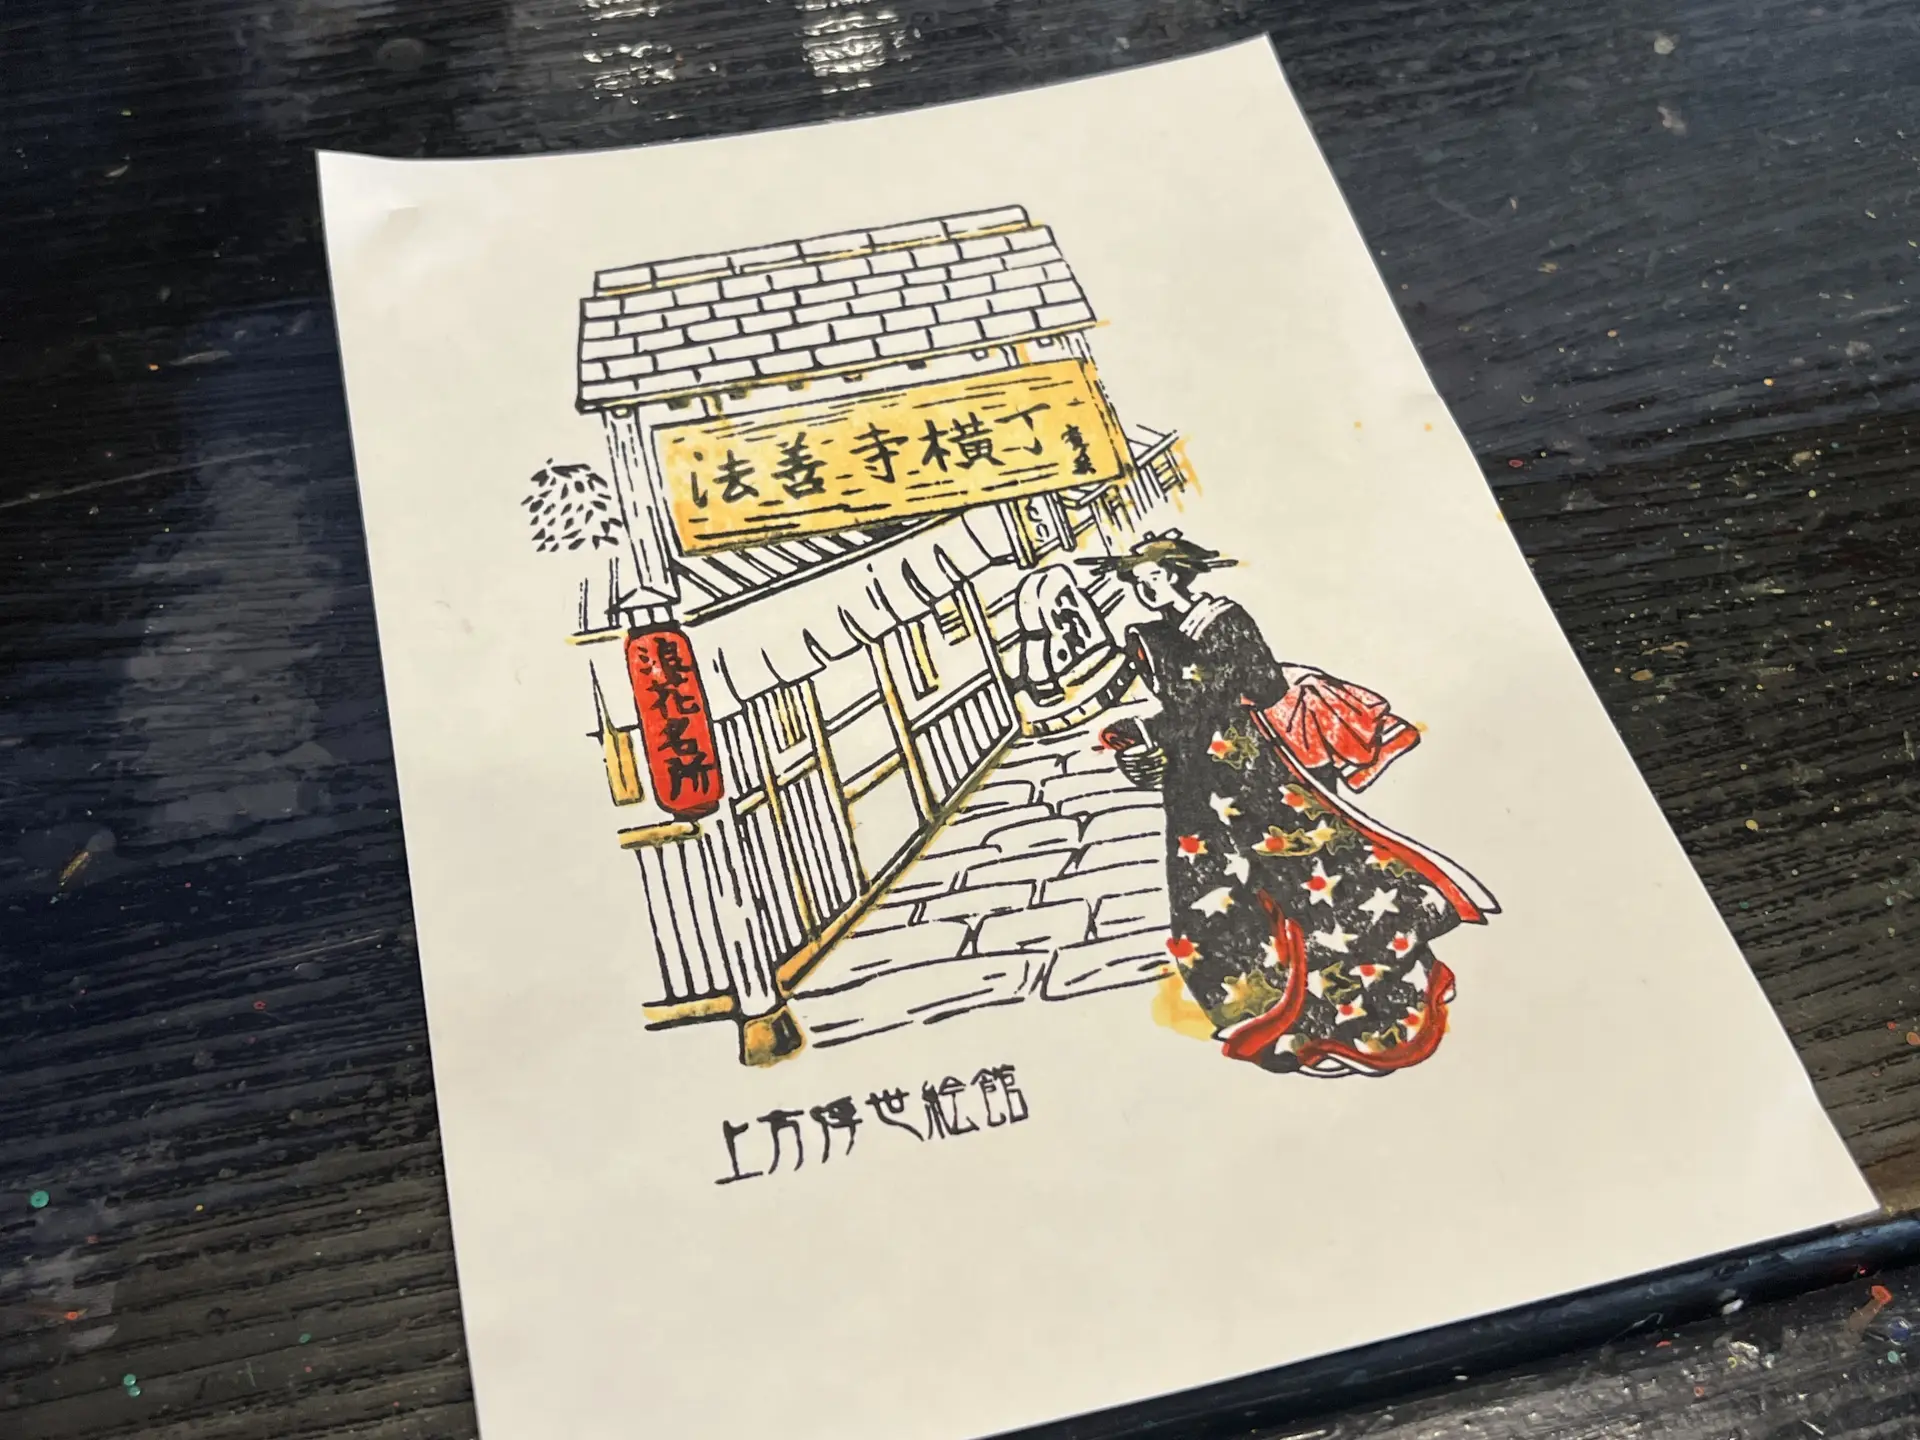
Hmm...
The kimono is still slightly misaligned. But the overall feel is coming together, so let’s call it a win.
5. Green
Now it’s finally time for the last color: green.
The roof tiles and stone pavement are expressed in green. The steps are the same, but since it’s the final layer, we put in extra effort.
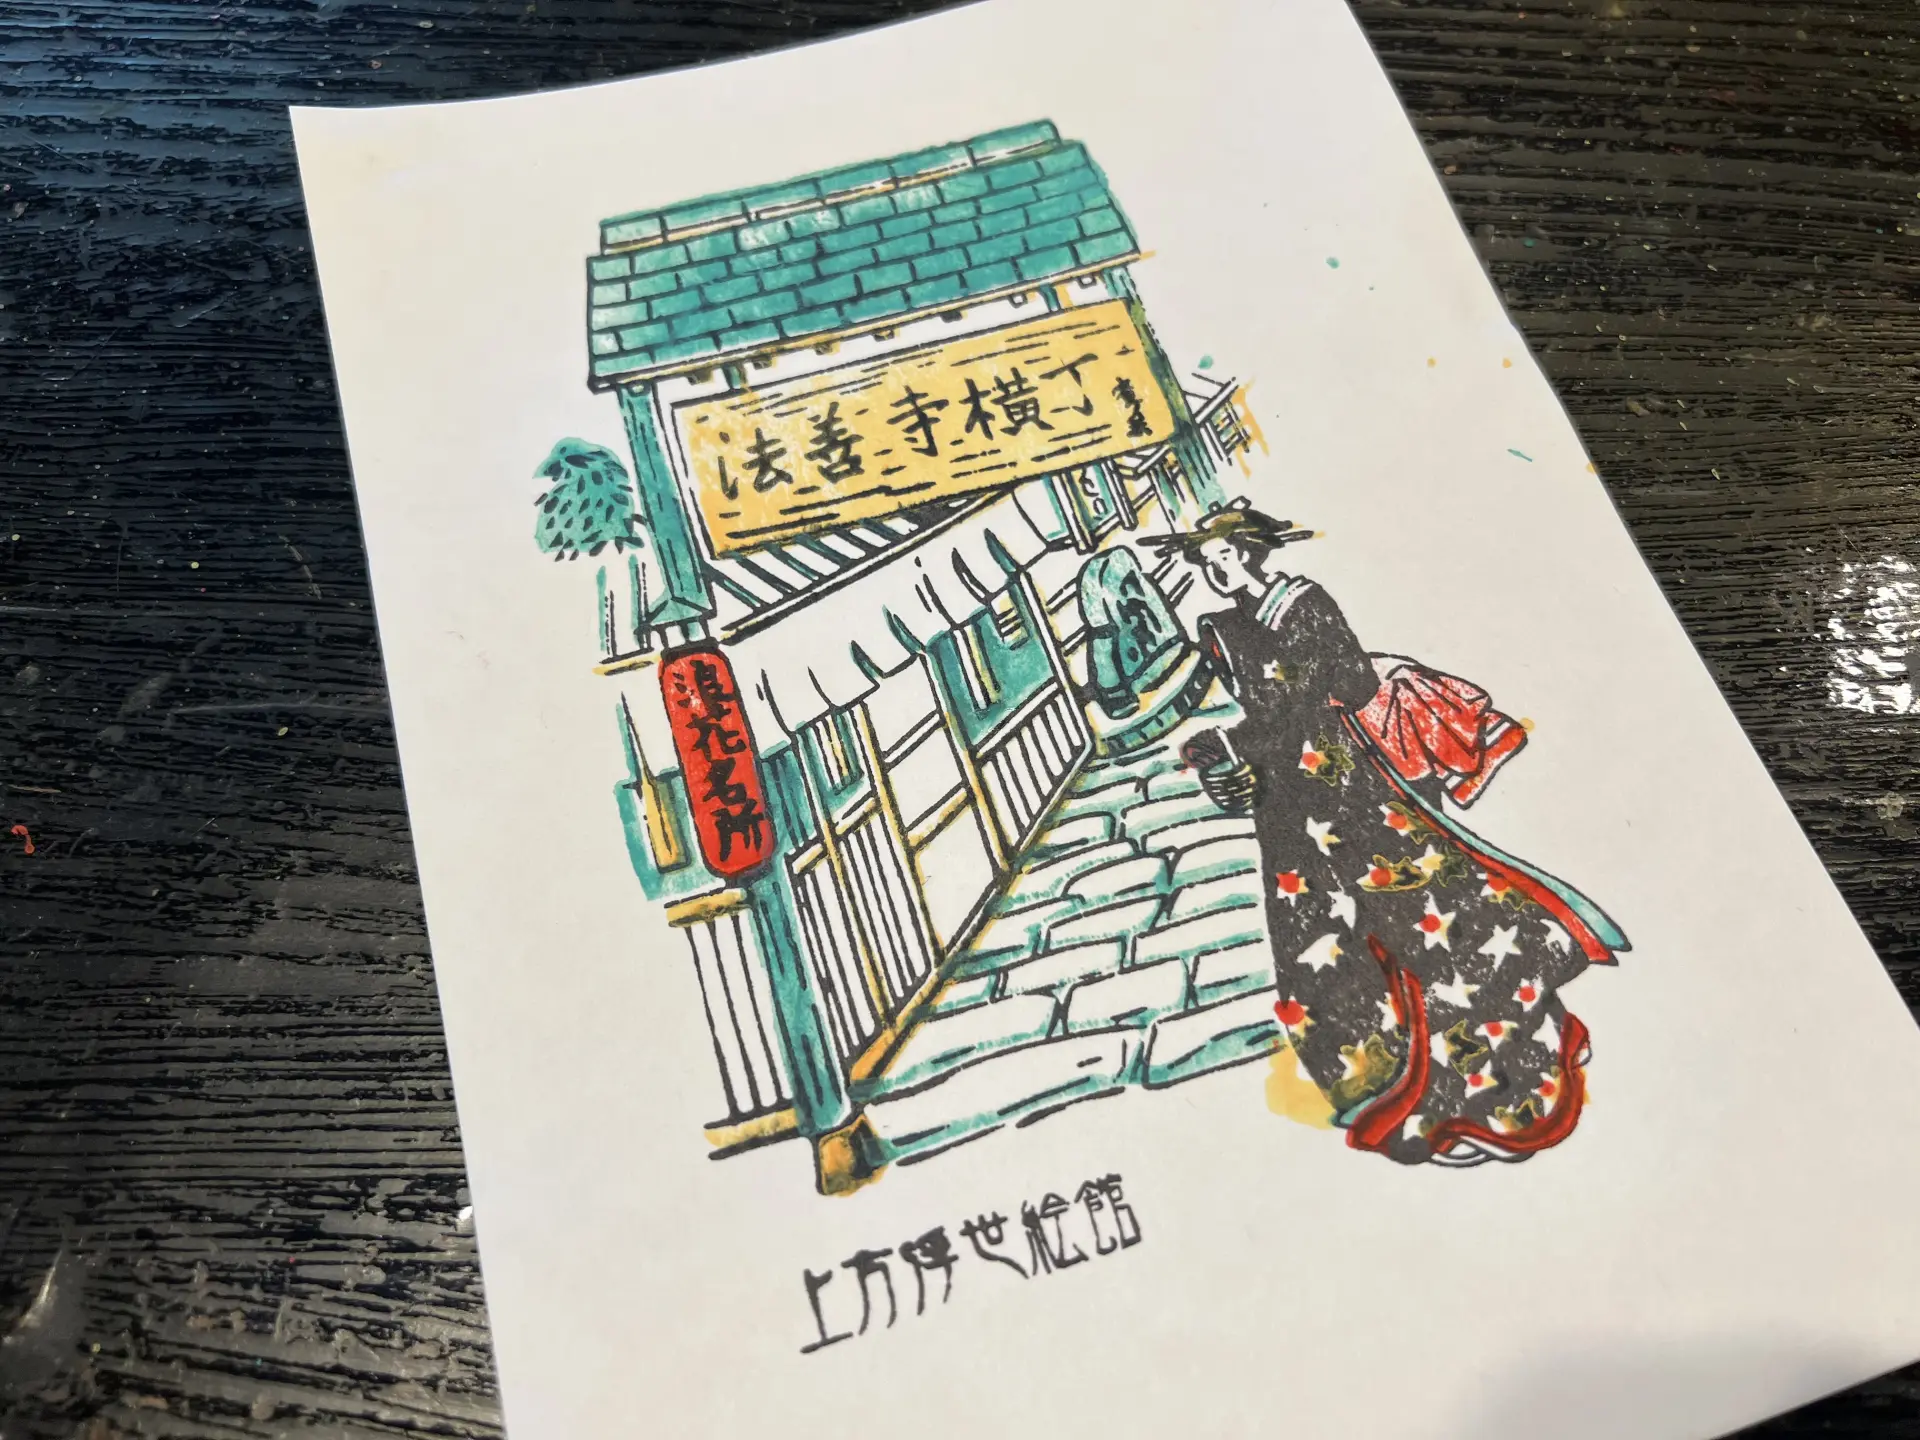
Oh! Setting aside whether the fine details turned out perfectly, it has a nice atmosphere. It feels charming and full of character. Not bad, I think. And with that—it’s complete!!
What I realized after trying it myself is that aligning the pattern is incredibly difficult. The ukiyo-e on display doesn’t look like it was printed over and over in multiple colors using several blocks—it almost looks like it was drawn and painted by hand. The displayed prints have no smudging or misalignment at all. It really made me understand just how advanced the craftsmanship was. Experiencing it firsthand helped me appreciate that precision, so if you visit the Kamigata Ukiyo-e Museum, I highly recommend trying the experience as well.
On the day I visited, travelers from Germany were also there. They watched me printing and said they really wanted to try it too—so they joined on the spot. That day happened to have an opening, but this experience is actually very popular and reservations fill up quickly since they’re taken on a first-come, first-served basis. If you want to try it, be sure to reserve before you visit.
Reservations can be made up to three days before your preferred date, via the website.
-
Applications are accepted for groups of 2 or more.
-
A separate museum admission fee is required.
-
Elementary school children and younger must be accompanied by a guardian.
-
For groups of 10 or more, participants will rotate in shifts.
What You’ll Do in the Other Courses
In addition to the Intermediate Course introduced above, there are other options as well. Here’s a quick overview.
・Beginner Course
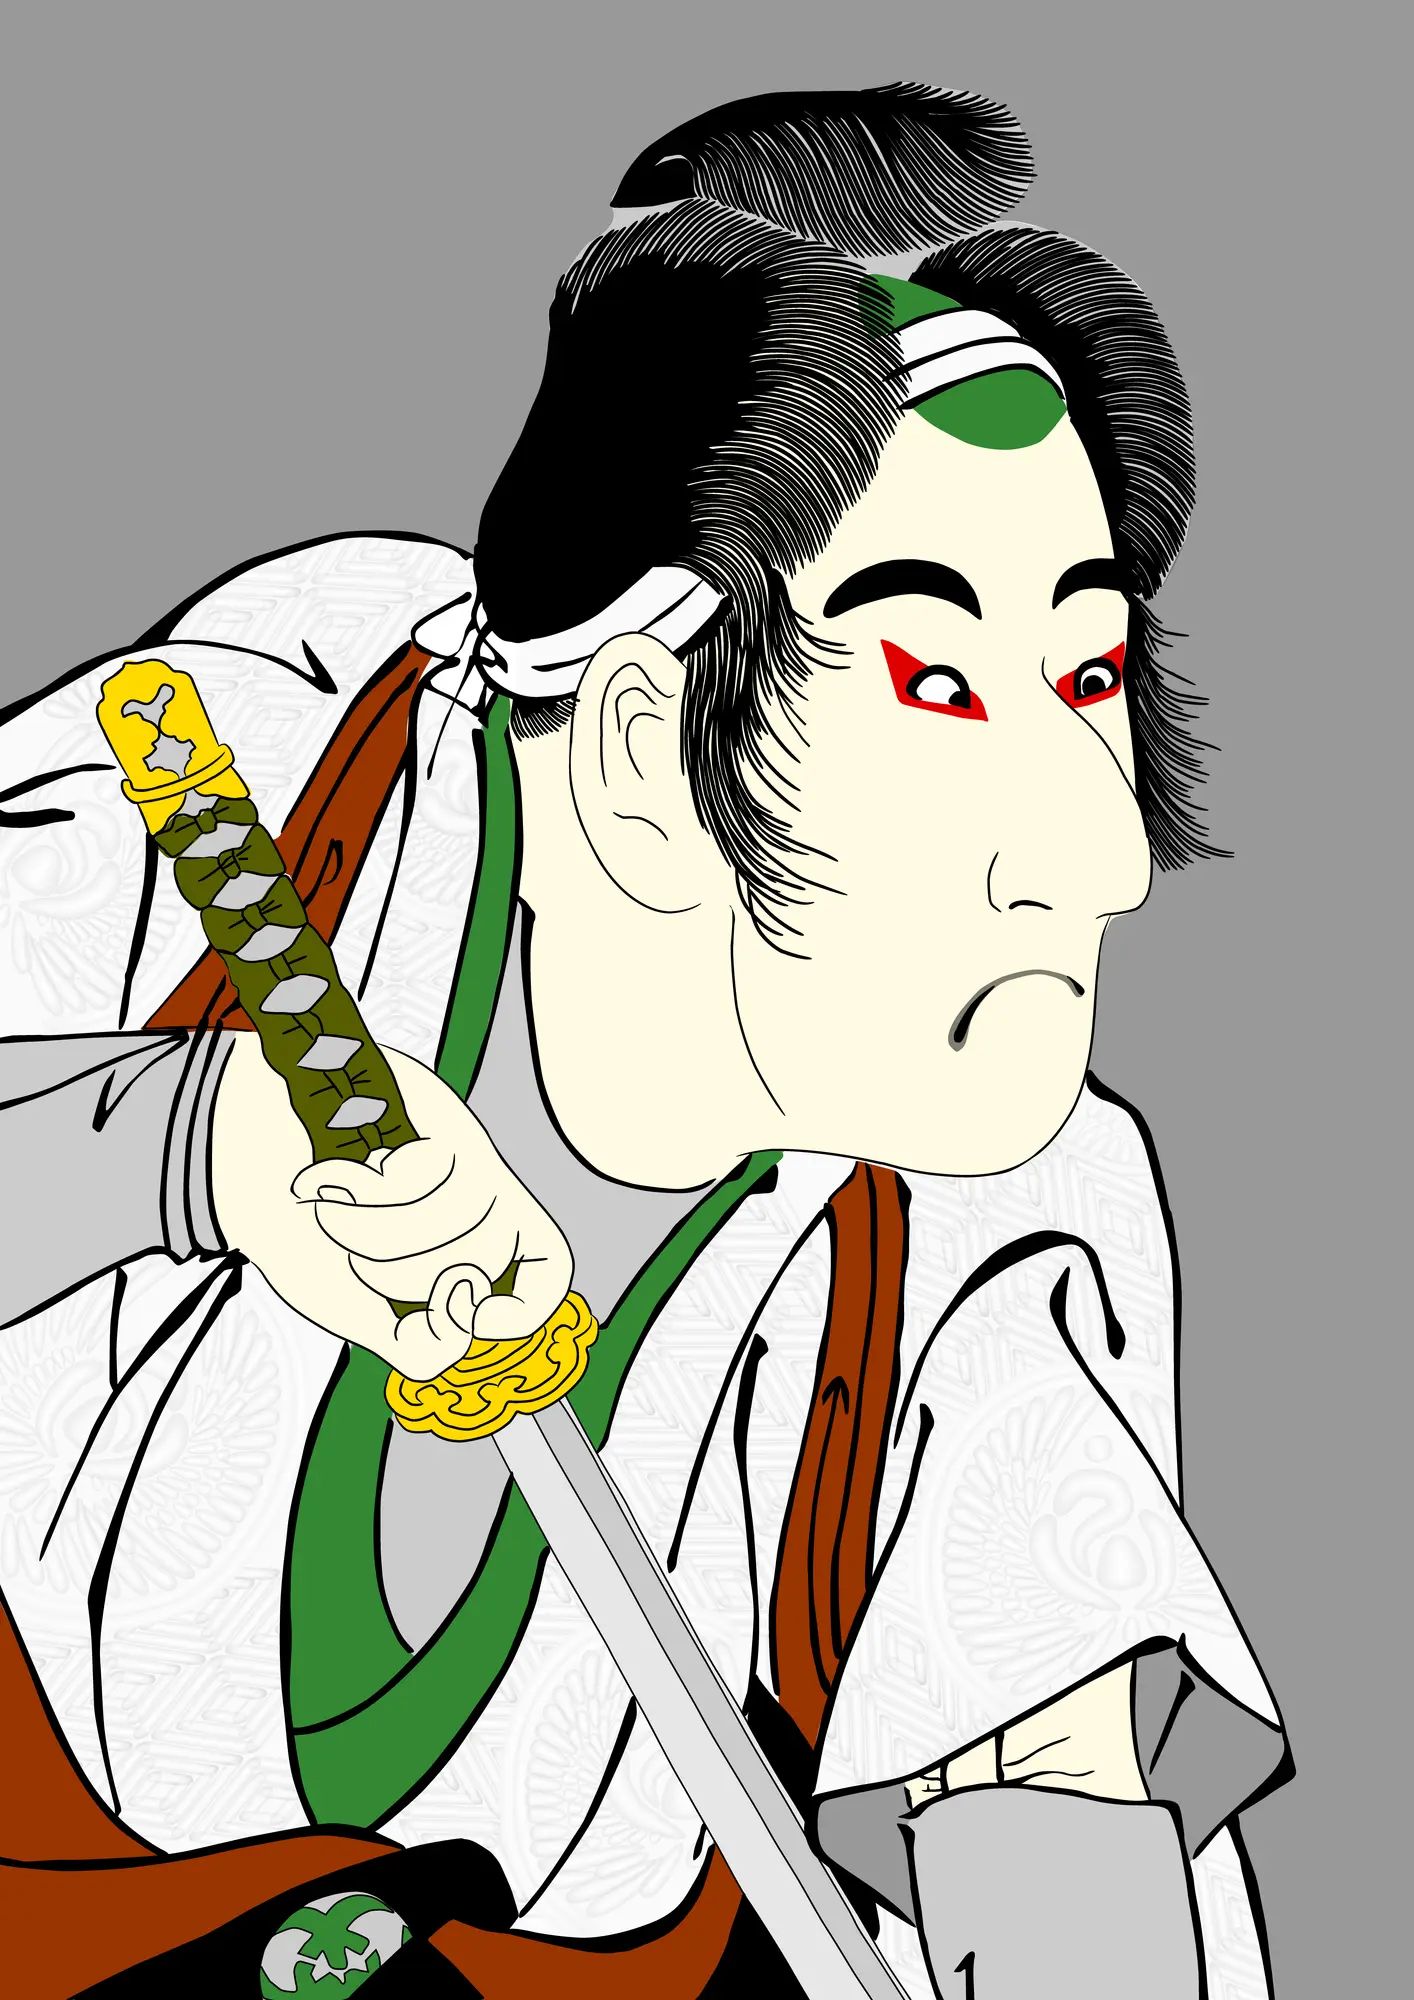
In the Beginner Course, you can try three-color printing. The design features kumadori makeup from “Kagekiyo” and “Benkei,” two of kabuki’s famous signature roles.
Kumadori refers to kabuki makeup, and the finer the lines and the stronger the eyes appear, the more it conveys a superhero-like character. Try finishing it boldly to bring out that powerful gaze.

- Admission
- 800 yen per person
- Hours
- Approx. 30 minutes (Approx. 10 minutes per person)
・Advanced Course
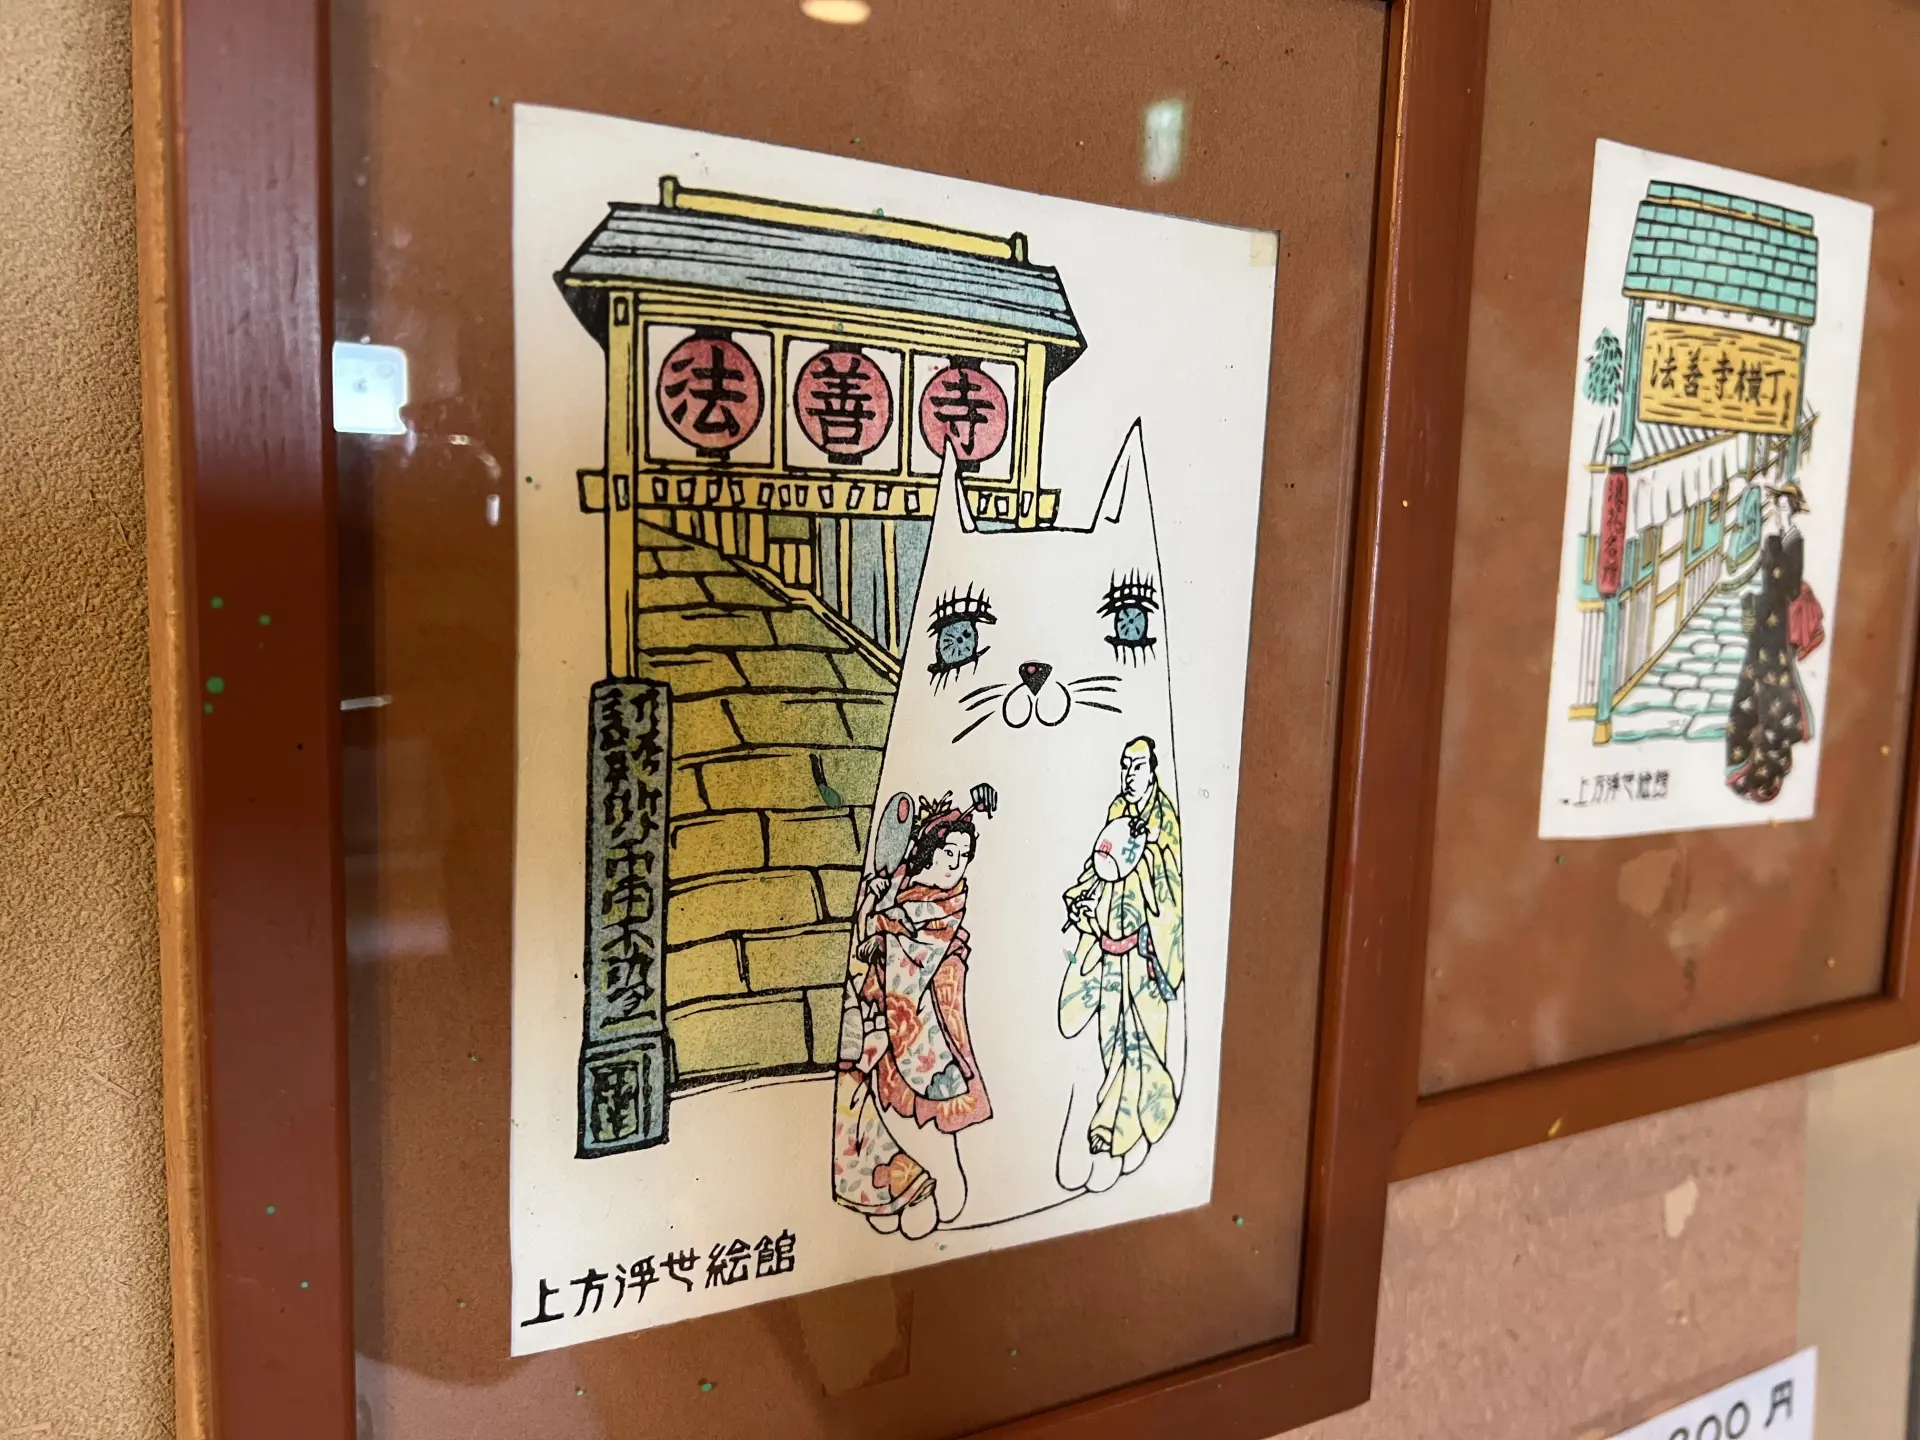
The Advanced Course challenges you with more advanced techniques. It uses four colors and expresses the stone pavement of Hōzenji Temple with a gradient.
You’ll also do a second printing on the kabuki beckoning cat, the symbolic figure on the museum’s exterior. By using advanced techniques like gradients and double printing, you can create a more three-dimensional final piece.
- Admission
- 1,500 yen per person
- Hours
- Approx. 45–60 minutes (Approx. 15–20 minutes per person)
Summary
During the Edo period, countless masterpieces were created—works so impressive they amazed the world. The way multiple woodblocks were used to build up colors with precise alignment offers a glimpse into the sincerity and meticulous care often associated with Japanese craftsmanship. Today, ukiyo-e is frequently displayed in museums as fine art, but back then, even works by popular artists were collected more like posters or idol photo cards—an intriguing contrast to how we see them now.
Until photography arrived, ukiyo-e captured “everyday life of the present.” It also serves as a valuable window into Edo-period culture and customs. To get a sense of how people in Japan lived over 150 years ago, take a moment to view ukiyo-e and see what it makes you feel.

Author
Freelance Announcer
Sayaka Motomura
Focused on sharing insights related to traditional culture, performing arts, and history.