
![[Complete Guide to Kyo-Yuzen] Dyeing My Own One-of-a-Kind Piece in Kyoto](https://static.gltjp.com/glt/data/article/22000/21403/20260624_023048_8eac56fc_w1920.webp)
[Complete Guide to Kyo-Yuzen] Dyeing My Own One-of-a-Kind Piece in Kyoto
Yuzen dyeing looks almost like a painting. It is one of the signature dyeing techniques used to make kimono, Japan’s traditional clothing. Because it uses many vivid colors, paste is applied to keep the colors from blending. This dyeing technique has been passed down since around the Edo period and developed uniquely in Japan. Bright, colorful, and elegant, Yuzen kimono are formal garments worn on special occasions.
In this article, we’ll explore the depth of Yuzen dyeing, one of Japan’s representative dyeing techniques, and introduce hands-on experience facilities. Try Yuzen dyeing and create your own original piece!
What is Yuzen Dyeing?
Yuzen dyeing is a dyeing technique unique to Japan that has existed since the Edo period. The technique began during the Genroku era of the Edo period, when townspeople’s culture flourished. It was created by Miyazaki Yuzensai, a fan painter and popular artist. Yuzen dyeing began when the painting style of Yuzensai’s fan art was incorporated into kimono. The technique was nearly established by Yuzensai during the Edo period and is still passed down today as “hand-painted Yuzen.”
Separate from this “hand-painted Yuzen,” another technique also emerged using stencils made by pasting two or three sheets of washi paper together with persimmon tannin and carving patterns into them. During the Edo period, this technique was used to dye kamishimo and hakama, formal attire worn by samurai. In the Meiji period, a method was developed in which colored paste was made using chemical dyes and paste, and hand-painted Yuzen patterns were transferred and dyed with stencils. This developed into “stencil Yuzen.” Because the process was simplified compared with traditional hand-painted Yuzen, production efficiency increased greatly and mass production became possible. As a result, Yuzen-dyed kimono spread quickly and became popular among the general public.
Yuzen dyeing techniques can be broadly divided into two types: “hand-painted Yuzen” and “stencil Yuzen.” “Hand-painted Yuzen” is exactly what it sounds like, a technique in which patterns are drawn by hand, stroke by stroke. By contrast, “stencil Yuzen” uses stencils with designed patterns to apply color. Whichever technique is used, every step is done by hand and requires the skill of experienced artisans, which is why kimono are luxury items.
Japan’s Three Major Yuzen Styles
Yuzen dyeing has three major production areas: Kyo-Yuzen, Kaga-Yuzen, and Tokyo Yuzen.
Kyo-Yuzen
Kyo-Yuzen began in the Edo period, when Miyazaki Yuzensai, a fan painter from the temple town in front of Chion-in Temple in Kyoto’s Higashiyama area, applied the motifs he painted on fans to kimono dyeing. Kyo-Yuzen is especially known for its lavish use of gold and silver foil and embroidery, and for its gorgeous designs featuring auspicious motifs. One of the most formal styles of Yuzen dyeing, it is used for kimono and furisode worn on special occasions, such as furisode for coming-of-age ceremonies and tomesode for weddings, thanks to its splendor. It is a nationally designated traditional craft.
Kaga-Yuzen
Kaga-Yuzen began when Yuzen dyeing techniques from Kyoto were introduced around the mid-Edo period to a dyeing tradition that had long existed in Kanazawa, Ishikawa Prefecture. It reached its peak from around the late Edo period to around the Taisho period. Kaga-Yuzen still carries on techniques from the Edo period, and its colors are based on the “five colors of Yuzen”: sappanwood red, indigo, ocher, grass green, and ancient purple. The designs mainly feature sketch-like paintings of flowers and birds. Beautiful gradations known as bokashi are used extensively. It is a nationally designated traditional craft.
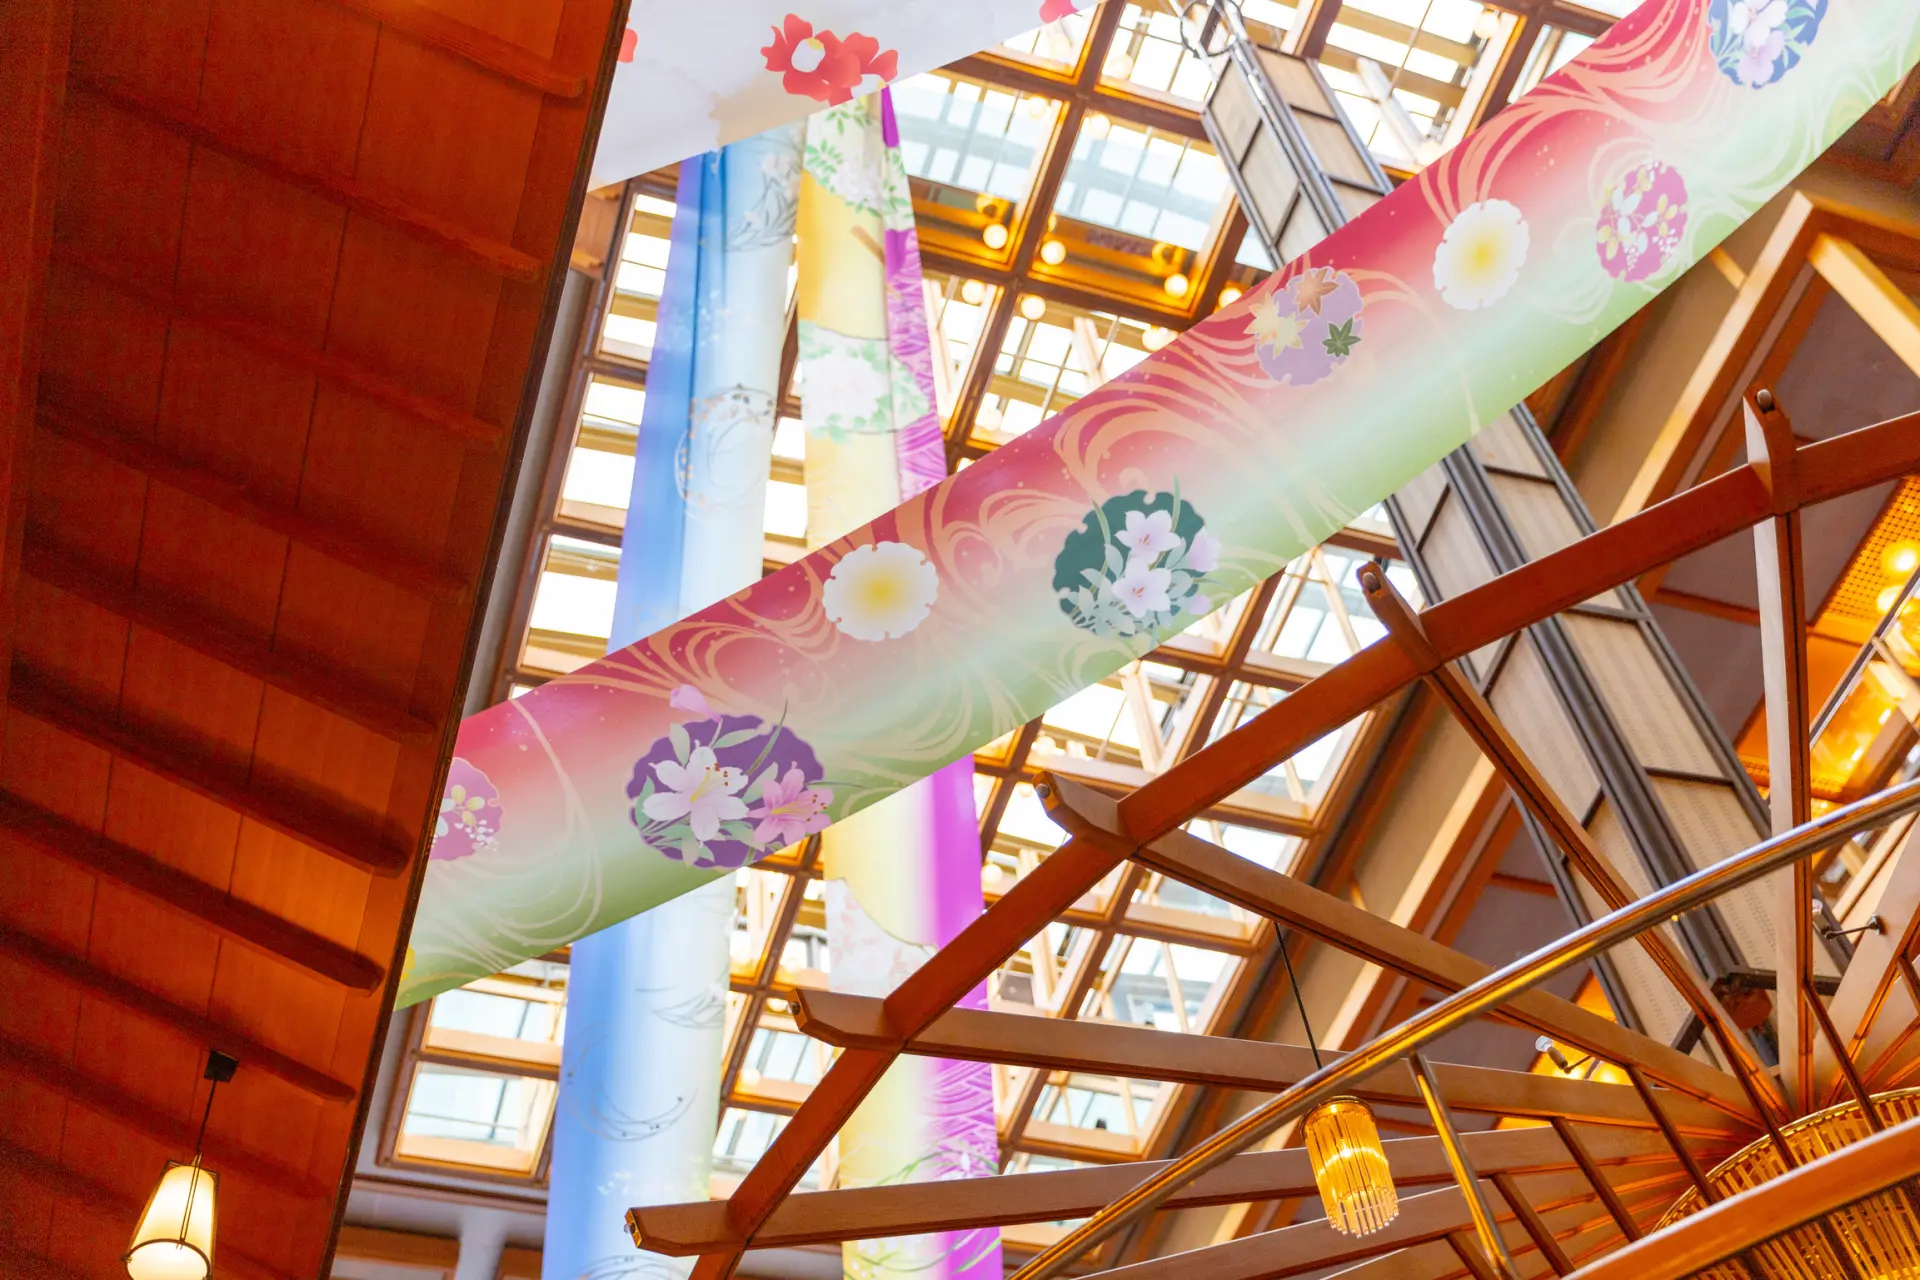
Tokyo Hand-Painted Yuzen (Tokyo Yuzen, Edo Yuzen)
In 1603, Tokugawa Ieyasu established the Edo shogunate, and the sankin-kotai system began, requiring regional daimyo to travel between Edo and their domains. As a result, Yuzen dyers and painters also moved to Edo, where the style developed in its own way as “Tokyo hand-painted Yuzen.” Yuzen dyeing is generally produced through a division of labor, but the defining feature of Tokyo hand-painted Yuzen is that almost every step is handled by a single artisan. It is a nationally designated traditional craft.
Production Process
In general, Yuzen dyeing is made through a division of labor involving many artisans. The process also differs slightly depending on whether it is hand-painted Yuzen or stencil Yuzen. In this section, we introduce the general steps for hand-painted Yuzen and stencil Yuzen in Kyo-Yuzen. You’ll see just how much effort and artisan skill go into creating a single Yuzen piece.
How “Hand-Painted Yuzen” is Made
(1) Concept and Design
The composition of the pattern, overall balance, and color scheme are turned into a design. This is such an important step that it is no exaggeration to say the quality of the design is determined at the concept stage.
(2) Under-drawing
An under-drawing is made with aobana blue pigment. Because aobana liquid can be washed away with water, it has been valued for generations.
(3) Applying Itome Paste
Itome paste is made by kneading glutinous rice with rice bran and other ingredients. It is applied along the lines of the under-drawing to prevent dye from bleeding into other areas when color is added. The fabric is stretched tightly with bamboo shinshi stretchers, and the itome paste is applied over the under-drawing.
(4) Preparing the Itome Ground
To fix the itome paste, the back of the fabric is treated with a mixture of soybean extract and funori seaweed glue.
(5) Sashi-Yuzen Coloring
The dye colors are matched and mixed to the desired shades.
Color is applied to the pattern areas enclosed by itome paste using brushes and similar tools. The dyeing is done from lighter colors to darker colors. Great care is taken to prevent the dye liquid from bleeding. To create bokashi gradation, a hallmark of Yuzen, the artisan adjusts the concentration of dye at the tip of the brush.
(6) Yuzen Steaming
The fabric is steamed in a steaming box to fix the colors in the patterned areas.
(7) Applying Protective Paste
Protective paste is applied so the patterned areas are not dyed together with the ground color.
(8) Hikizome Dyeing
The ground color is dyed onto the fabric. The fabric is stretched between pillars, then stretched with shinshi, thin bamboo rods with needles at both ends. After that, the ground preparation liquid is applied with a brush. The areas outside the pattern are then dyed with the dye mixed to the desired shade.
(9) Steaming and Mizumoto Washing
The fabric is steamed to fix the dye liquid to the fabric and bring out the color. Afterward, any remaining paste and excess dye are washed away in running water. Until the 1950s, the mizumoto washing process was carried out using natural rivers such as the Kamo River in Kyoto. This is called Yuzen Nagashi.
(10) Yunoshii Finishing, Gold Decoration, Embroidery, and Completion
Steam is applied to soften the fabric and smooth out wrinkles, adjusting the width and length of the textile. Gold and silver foil are added with adhesive processing, and embroidery is applied to make the piece even more luxurious. This completes the process.
How “Stencil Yuzen” is Made
(1) Concept and Design
The dyeing workshop in charge of production turns the general design into a concrete pattern. The design is created based on the intended use of the kimono and the overall composition.
(2) Stencil Carving
The design is transferred onto stencil paper made by layering several sheets of washi paper and coating them with persimmon tannin, then the stencil is carved with carving knives.
(3) Color Matching
Colored paste is made. Dyes are dissolved to create concentrated dye solutions. These solutions are then blended to achieve the desired concentration, saturation, and color.
(4) Mounting the Fabric
The fabric is mounted on a Yuzen board. To keep the finished pattern from becoming distorted, the fabric is carefully smoothed by hand as it is attached so there is no warping or slack.
(5) Placing the Stencil, Suri-Yuzen, and Utsushi-Yuzen
The dye liquid is worked into a rubbing brush and rubbed over the stencil to dye the fabric. The artisan’s touch is extremely important in controlling color density and other details. The pattern is dyed by combining rubbing techniques that create a range of light and dark tones. In some cases, hundreds of stencils are used.
(6) Protective Paste
Resist paste is applied over the stenciled areas so the parts dyed with the stencil are not stained by the ground dye.
(7) Hikizome Dyeing and Ground Preparation
The fabric is stretched between fixed pillars, and shinshi stretchers are placed horizontally. Ground preparation liquid for hikizome is applied evenly with a brush. After drying, dye liquid is applied with a brush over the prepared ground. When adding a dark color, the fabric is dyed twice.
(8) Steaming and Mizumoto Washing
After that, the fabric is placed in a steaming box and steamed. The steam transfers the dye, bonds it with the fibers of the textile, and brings out the color. After steaming, the fabric is rinsed in running water for a long time.
(9) Yunoshii Finishing, Gold Decoration, Embroidery, and Completion
Steam is applied to soften the fabric and smooth out wrinkles, adjusting the width and length of the textile. Gold and silver foil are added with adhesive processing, and embroidery is applied to make the piece even more luxurious. This completes the process.
See Mizumoto, Also Known as Yuzen Nagashi, in Kyoto!
Mizumoto is one step in the Yuzen dyeing process. For Kyo-Yuzen, mizumoto washing had been carried out in rivers within Kyoto, such as the Kamo River, Kamiya River, Shirakawa River, and Katsura River, since around 1902. At the time, natural rivers were used for mizumoto to wash excess dye and paste from the fabric. The sight of colorful bolts of fabric floating in the river was called Yuzen Nagashi and was one of Kyoto’s beautiful scenes, fitting for a city known for kimono.
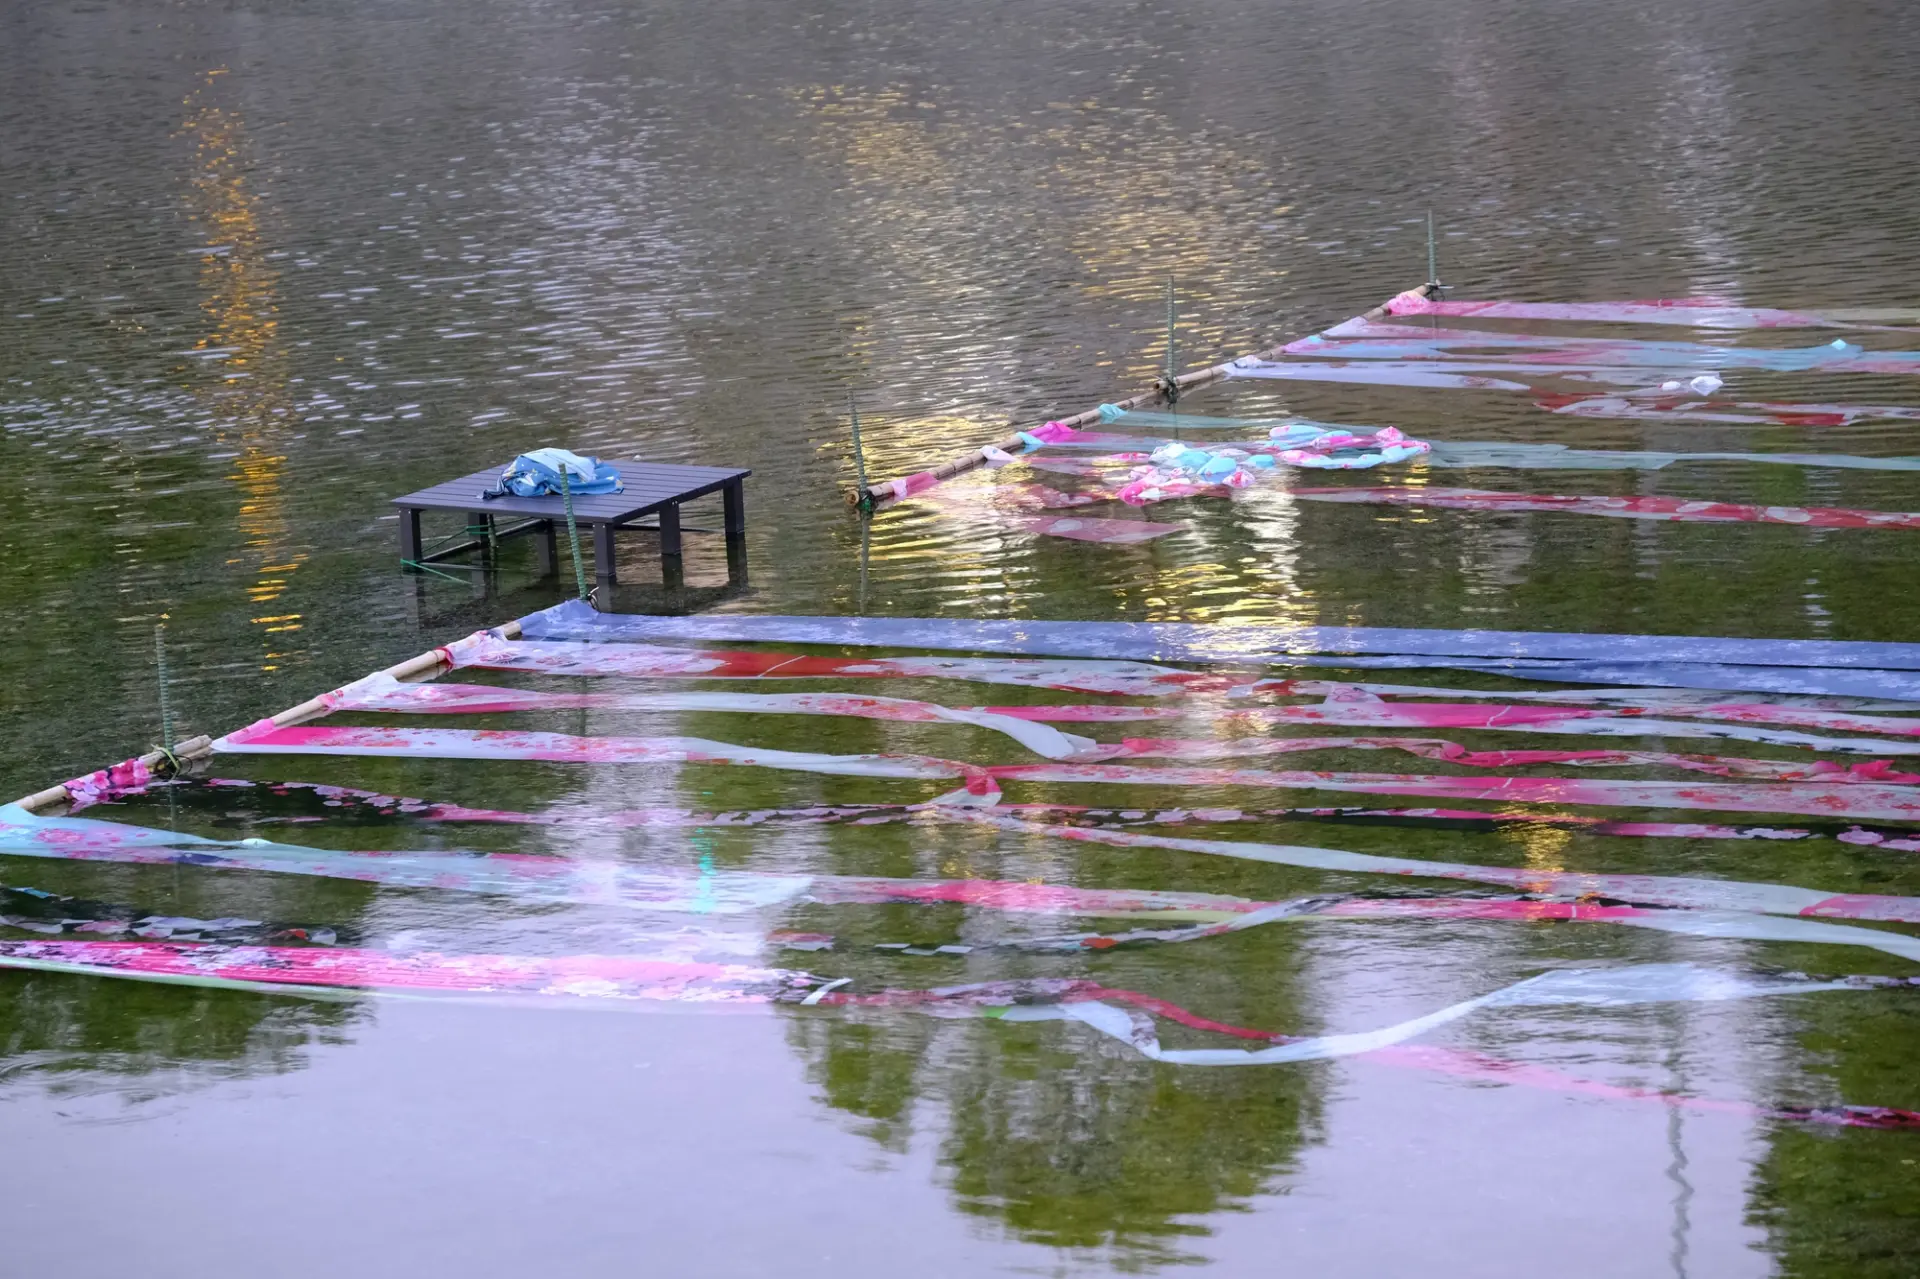
However, changes in Japan’s industries led to laws prohibiting the discharge of industrial wastewater and similar practices. The same applied to Yuzen Nagashi, making it impossible to use natural rivers for mizumoto work, and by around 1955, this beautiful scene could no longer be seen.
Today, in the hope of passing on this Kyoto-like scene of a kimono town to future generations, Yuzen Nagashi is held as an event during Kamogawa Noryo, Kyoto’s summer festival, on the Kamo River in central Kyoto every year in early August. Visitors can watch the demonstration up close. Colorful bolts of fabric spread across the Kamo River and swaying with the current create a stunning sight! If you can, plan your visit to Kyoto around this special event.
Try Kyo-Yuzen for Yourself!
As times have changed, even Japanese people have far fewer chances to wear kimono. Recently, facilities where visitors can try Yuzen dyeing have opened, hoping to help more people discover the beauty and appeal of the craft.
You can stencil-dye Kyo-Yuzen patterns onto your favorite items, from handkerchiefs to bags. Experiences where you can make a set of chopsticks, which Japanese people use at every meal, and a chopstick case for them are also very popular. Try it casually and bring a piece of Kyo-Yuzen home with you!
Kyo-Yuzen Workshop Marumasu Nishimuraya
There is a workshop in Kyoto’s Nakagyo Ward where you can try Kyo-Yuzen yourself: Kyo-Yuzen Workshop Marumasu Nishimuraya. In Kyoto, it began more than 110 years ago as a workshop specializing in hikizome, one of the Kyo-Yuzen processes. The workshop has long pursued the craft of dyeing, but as times changed and people wore kimono less often in daily life, Kyo-Yuzen became less familiar. Believing that people today should also have the chance to learn about the appeal of Kyo-Yuzen, the workshop began offering Kyo-Yuzen experiences Approx. 30 years ago.
At this workshop, you can try surikomi Yuzen, a form of stencil Yuzen within Kyo-Yuzen. This is Yuzen dyeing using stencils, and some experiences take only around one hour. That makes it easy even for beginners to join.
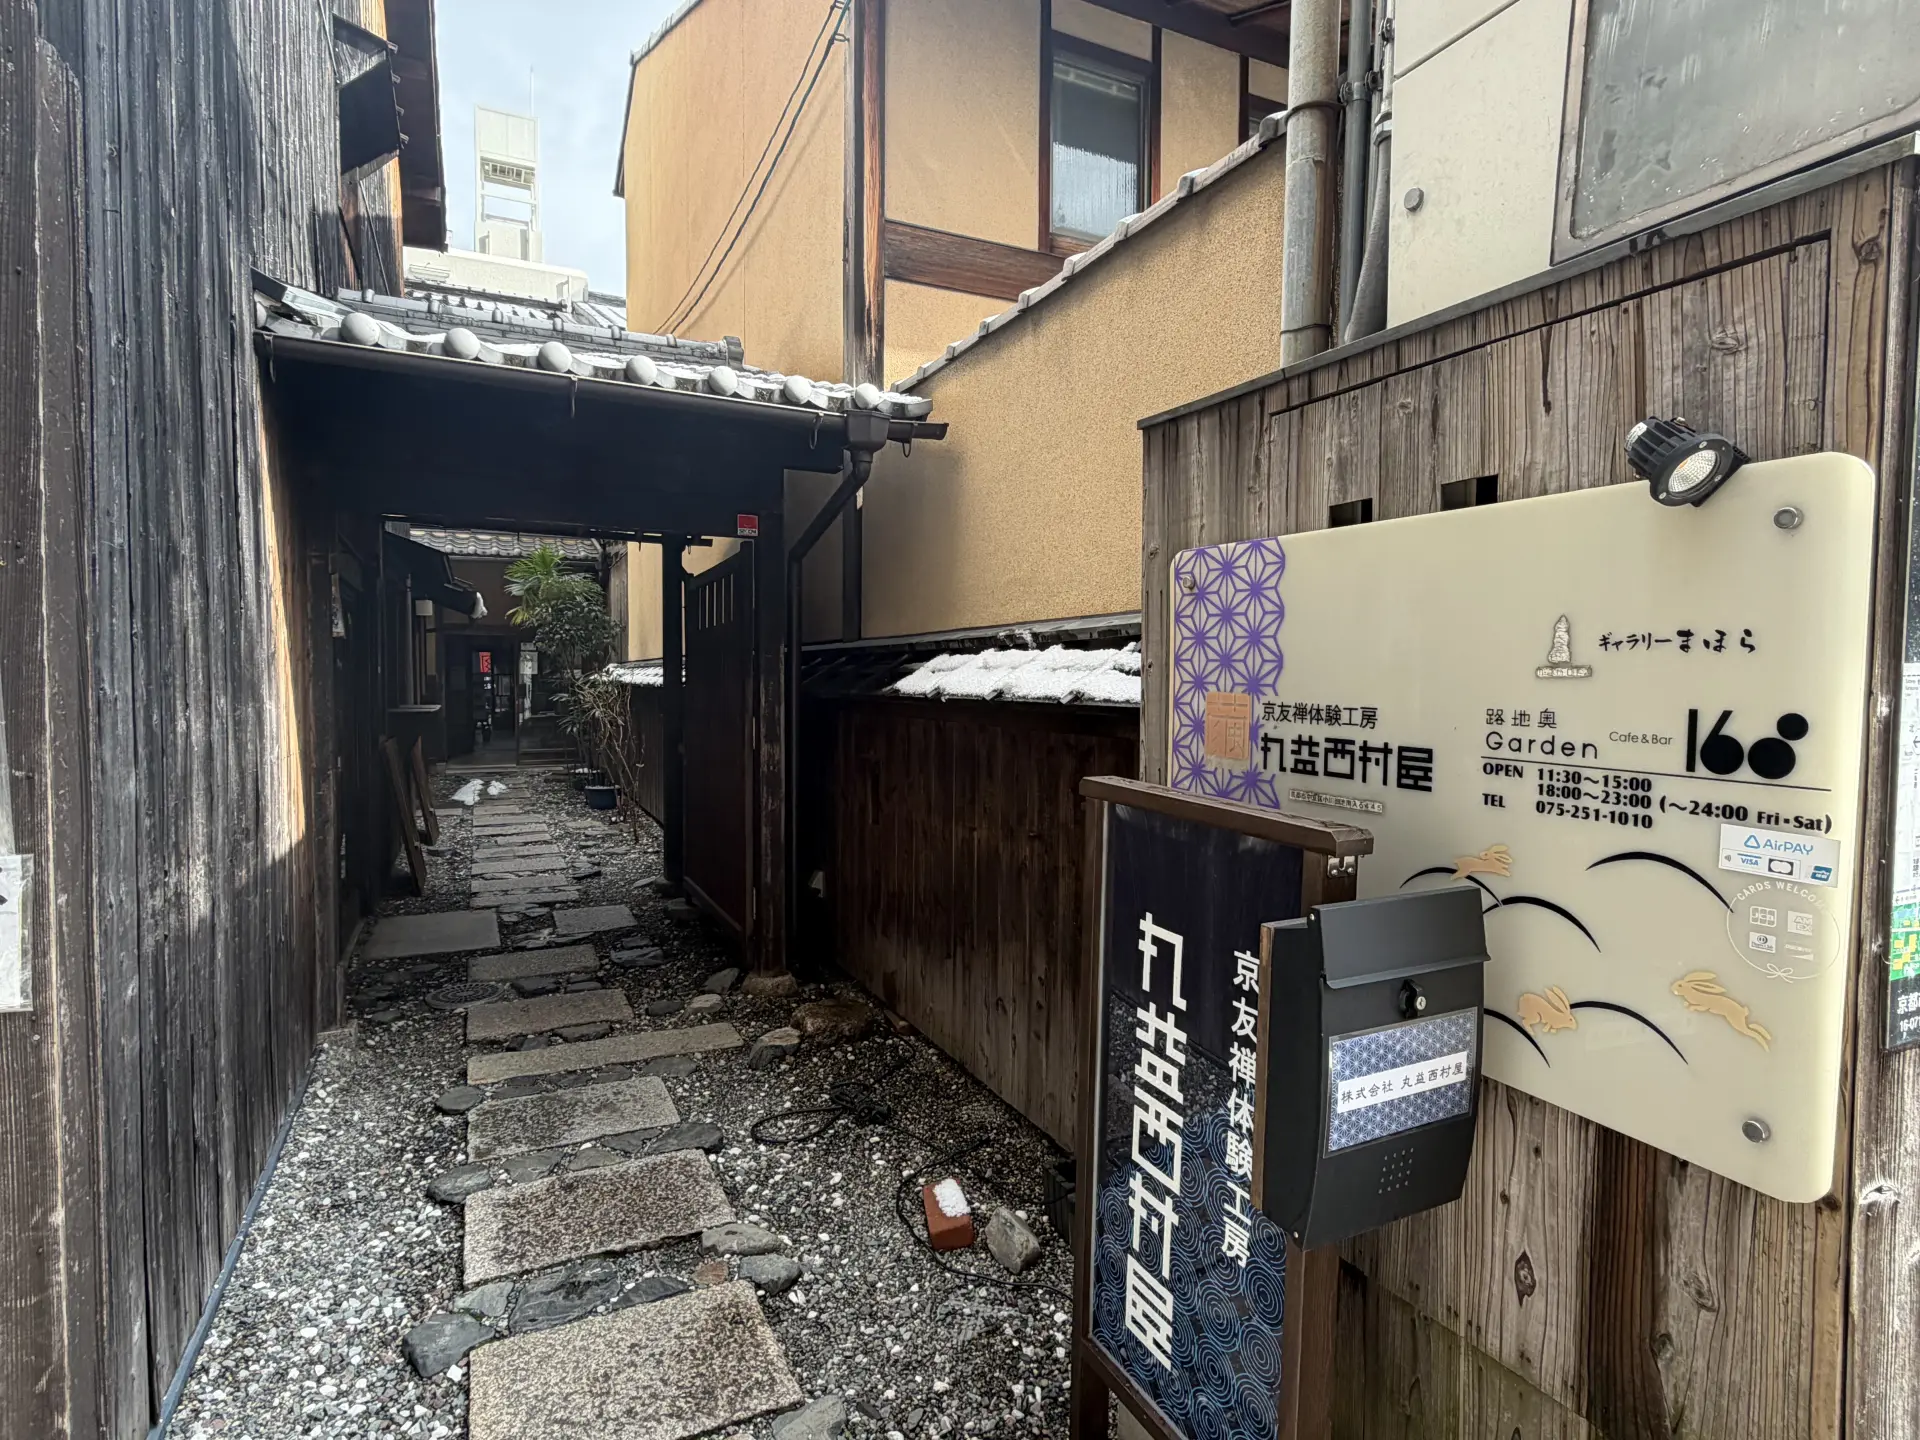
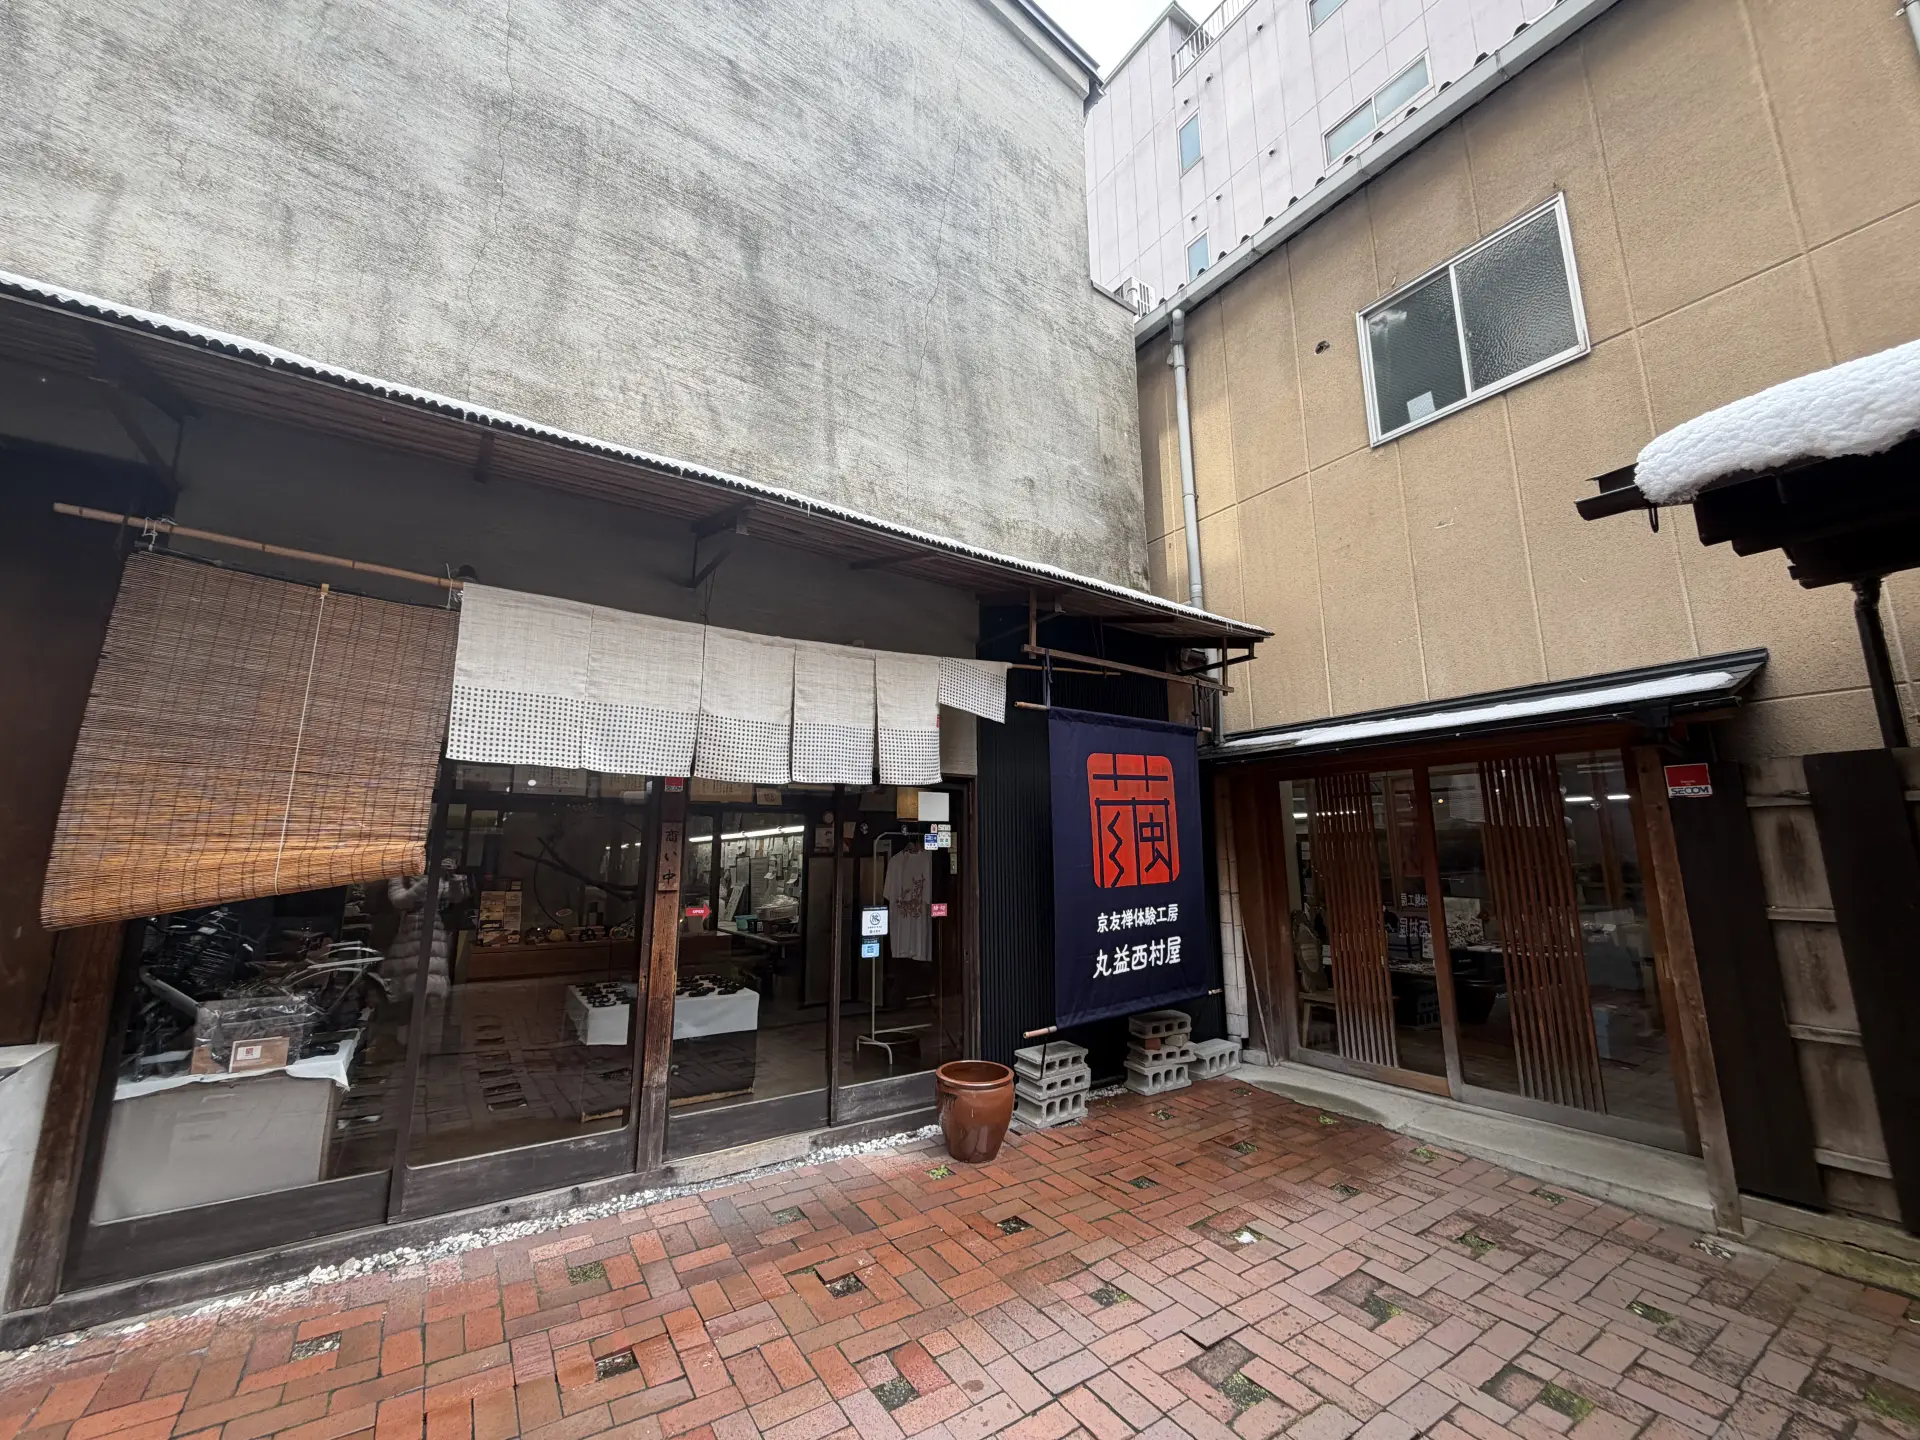
It is about a 10-minute walk from Karasuma Oike Station. Nearby is the popular sightseeing spot Nijo Castle. As you walk deeper in from the street, the workshop of Kyo-Yuzen Workshop Marumasu Nishimuraya appears. Its long, narrow layout is characteristic of Kyoto machiya townhouses, often called “eel’s bed” homes.
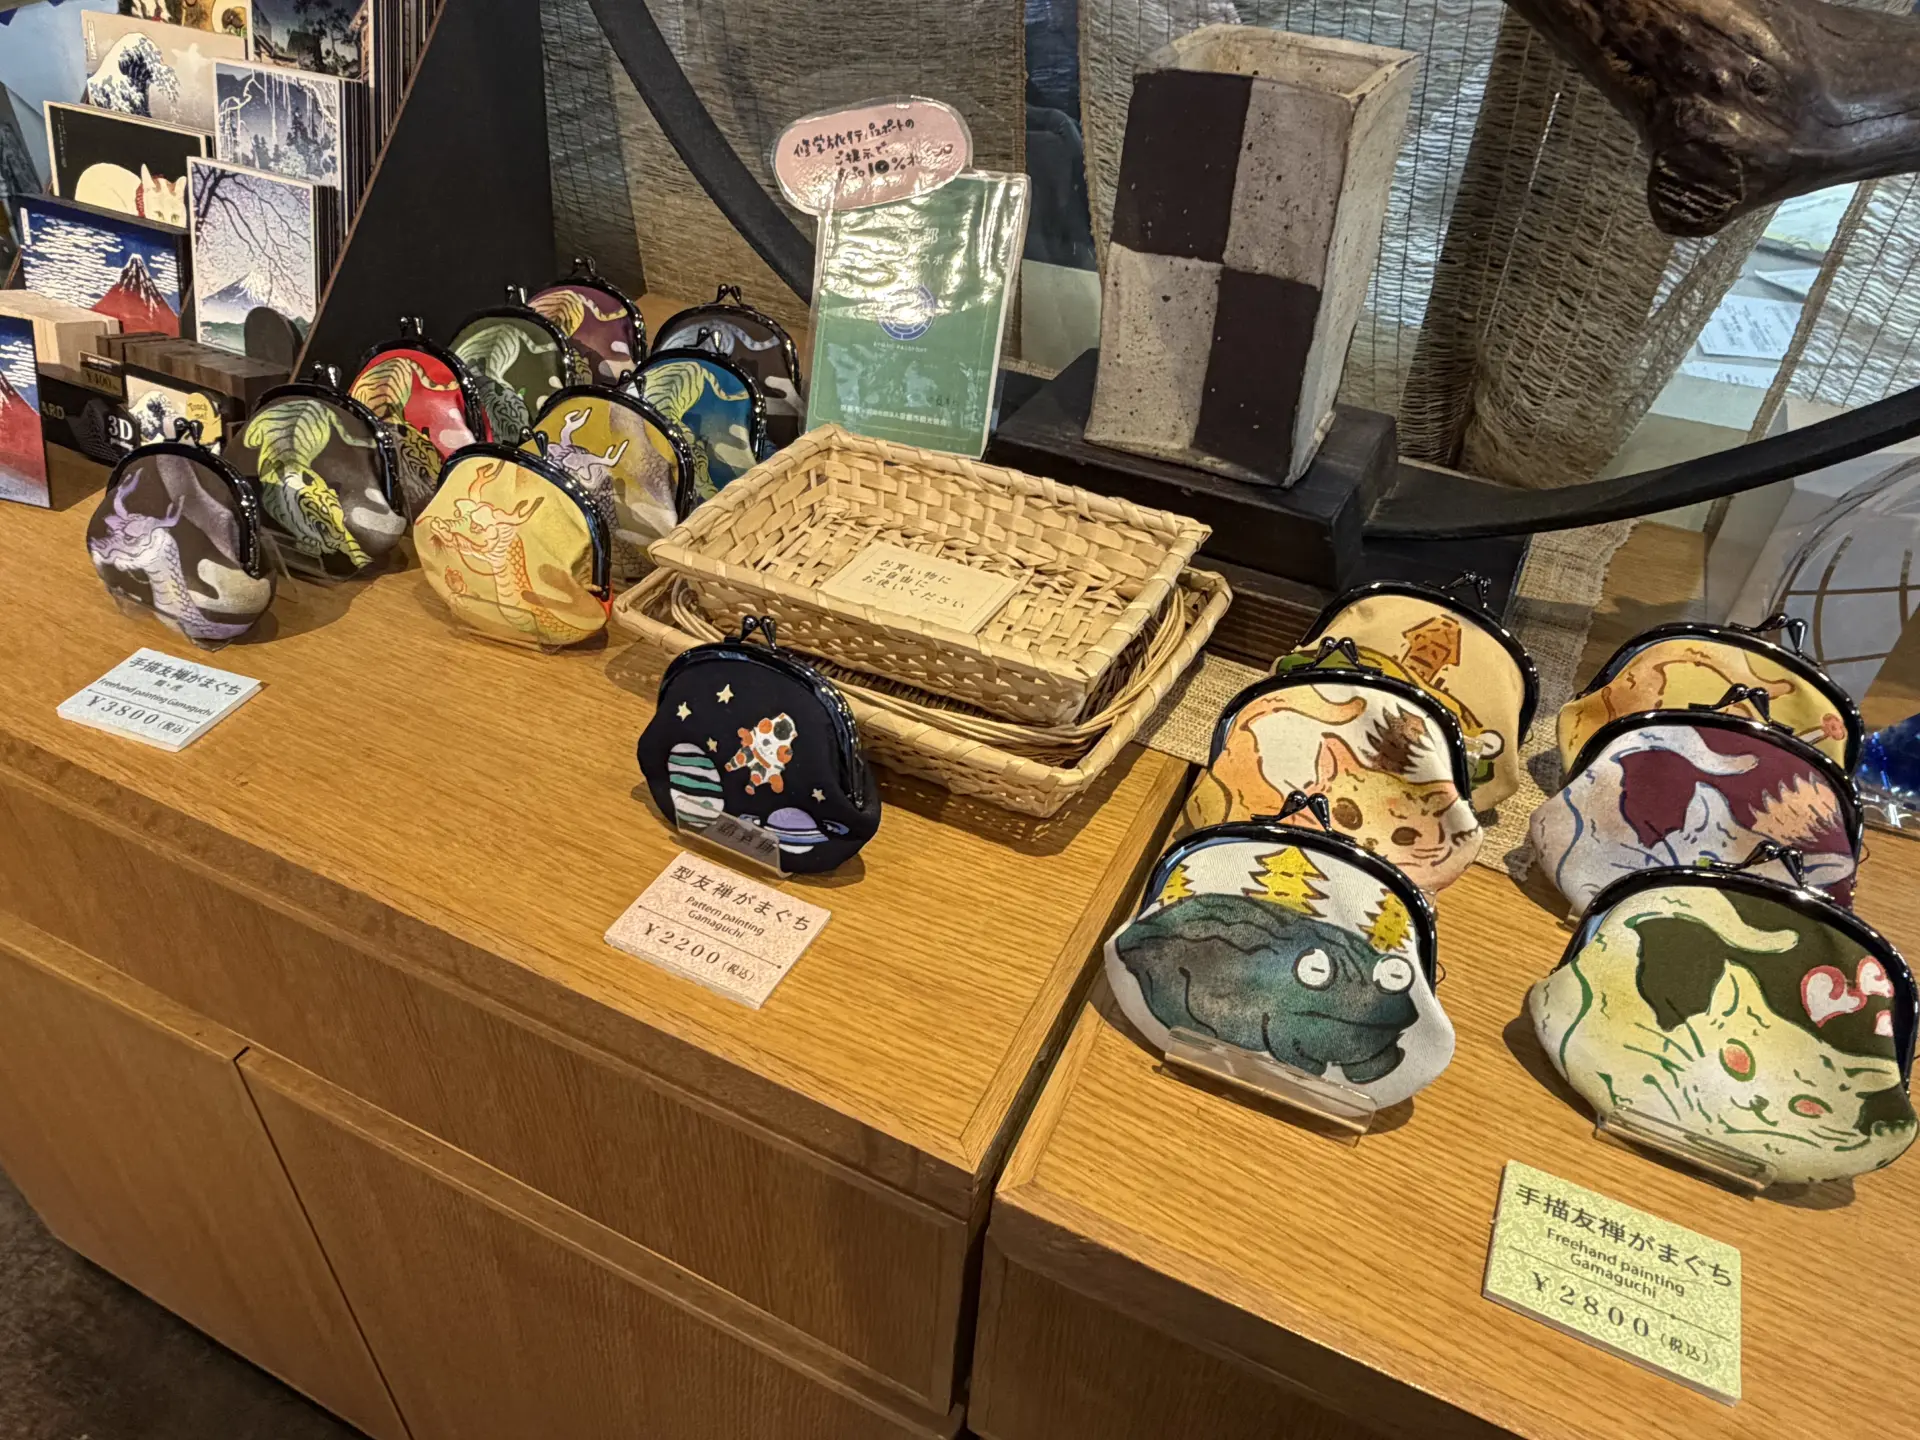
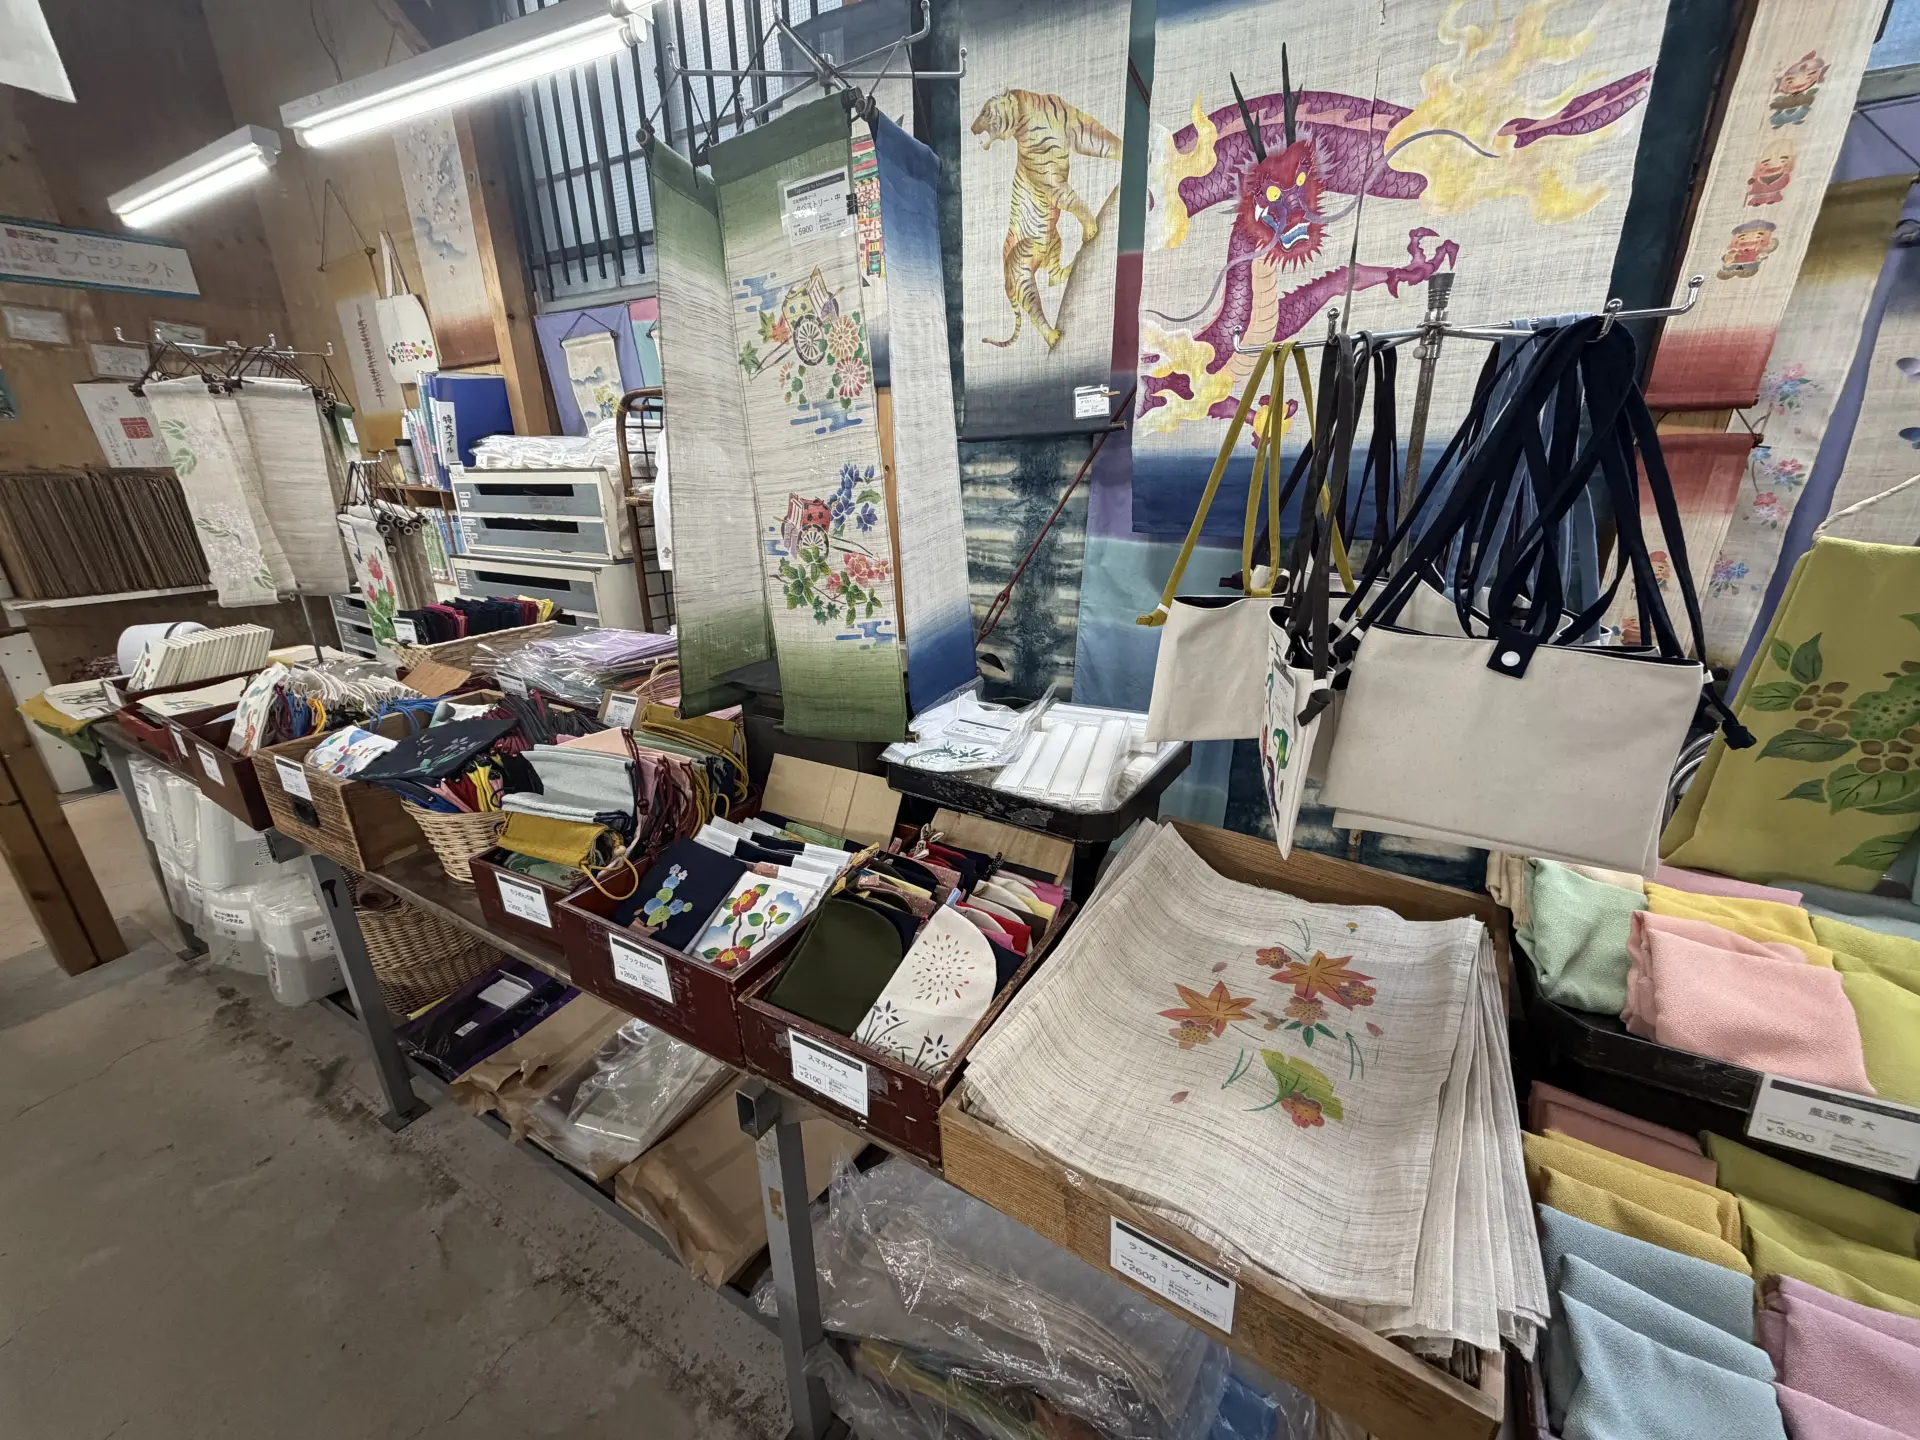
When you enter the shop, you’ll see rows of coin purses, pouches, smartphone cases, and other items made with stencil Yuzen and hand-painted Yuzen near the entrance. You can purchase them as well. Each piece is handmade, and you can feel that warmth.
Try “Stencil Yuzen” for Yourself!
(1) Choose Your Material!
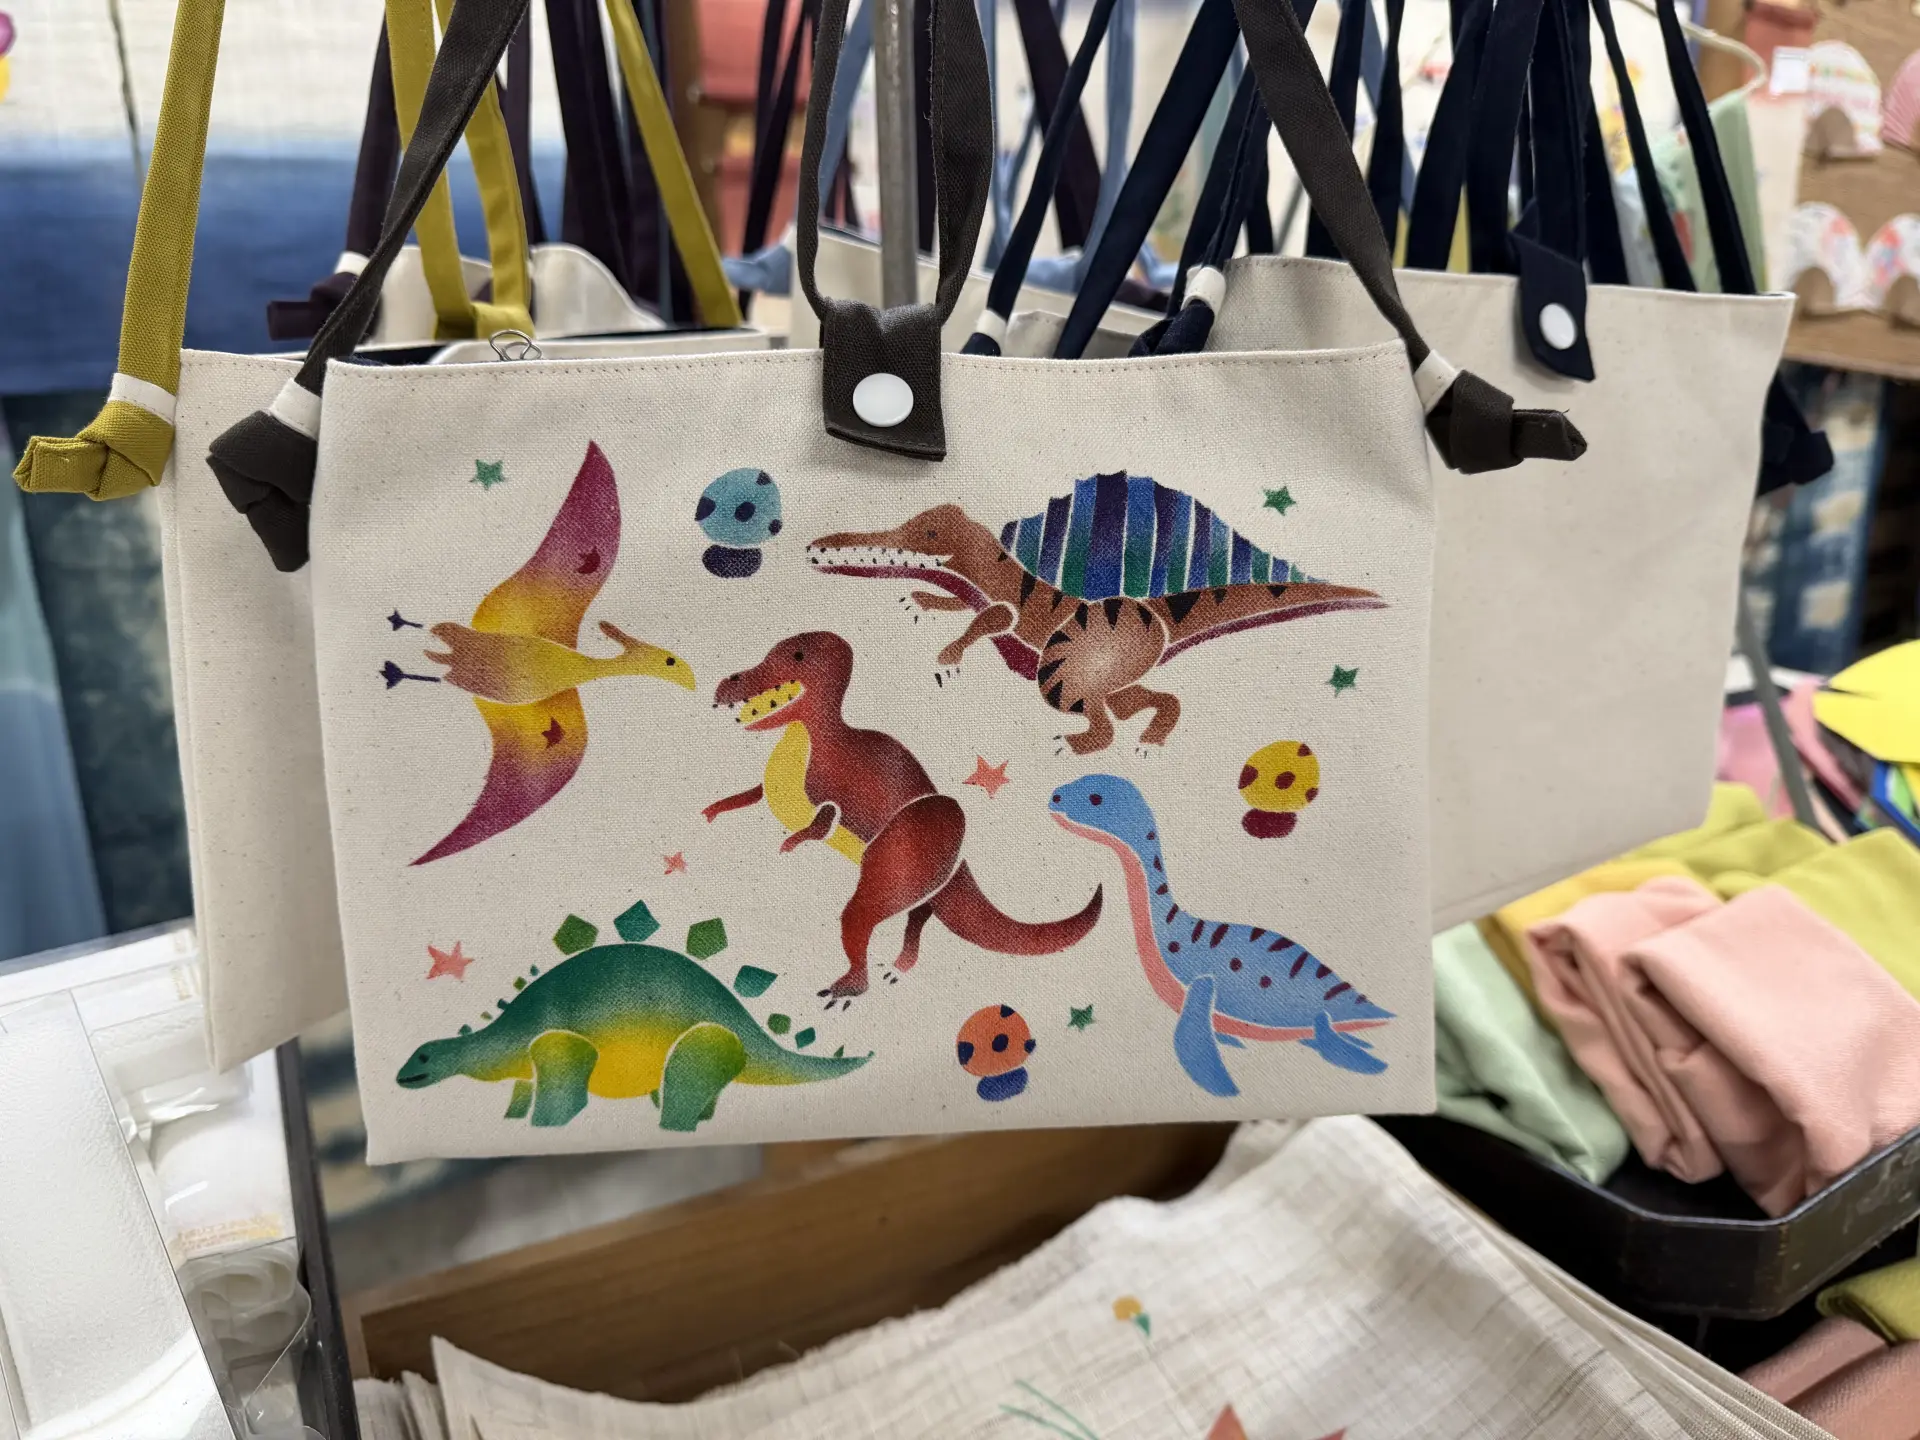
First, decide which material you want to decorate with stencil Yuzen. Popular choices include pencil cases, school totes, tumblers, and cotton drawstring bags. Prices vary depending on the material, but they start at 1,600 yen, making the experience easy to try. For this visit, we chose a handkerchief.
(2) Choose Your Stencil!
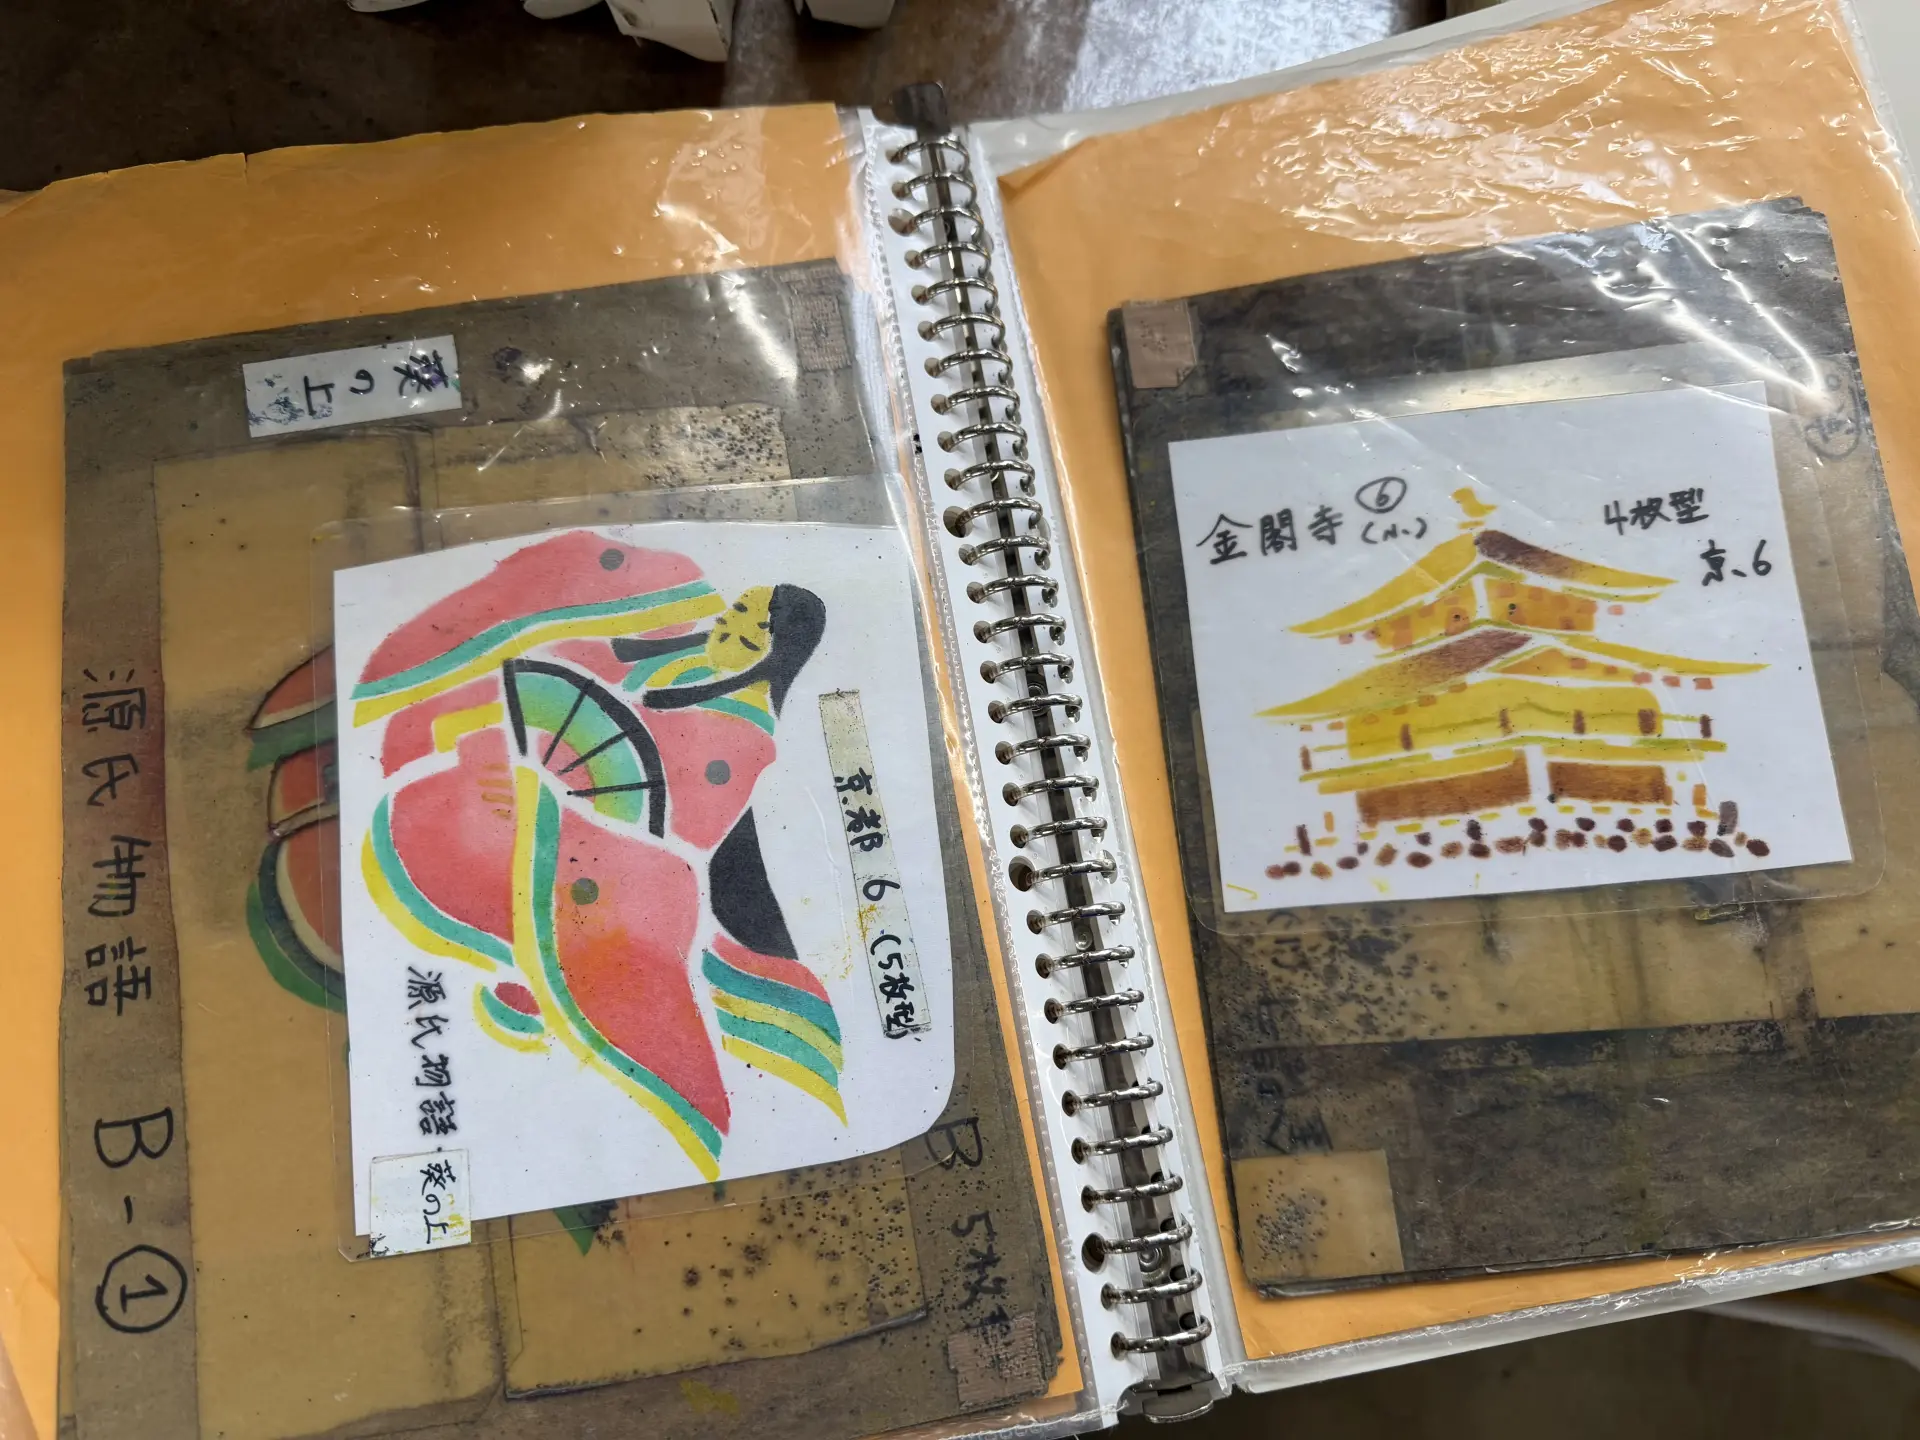
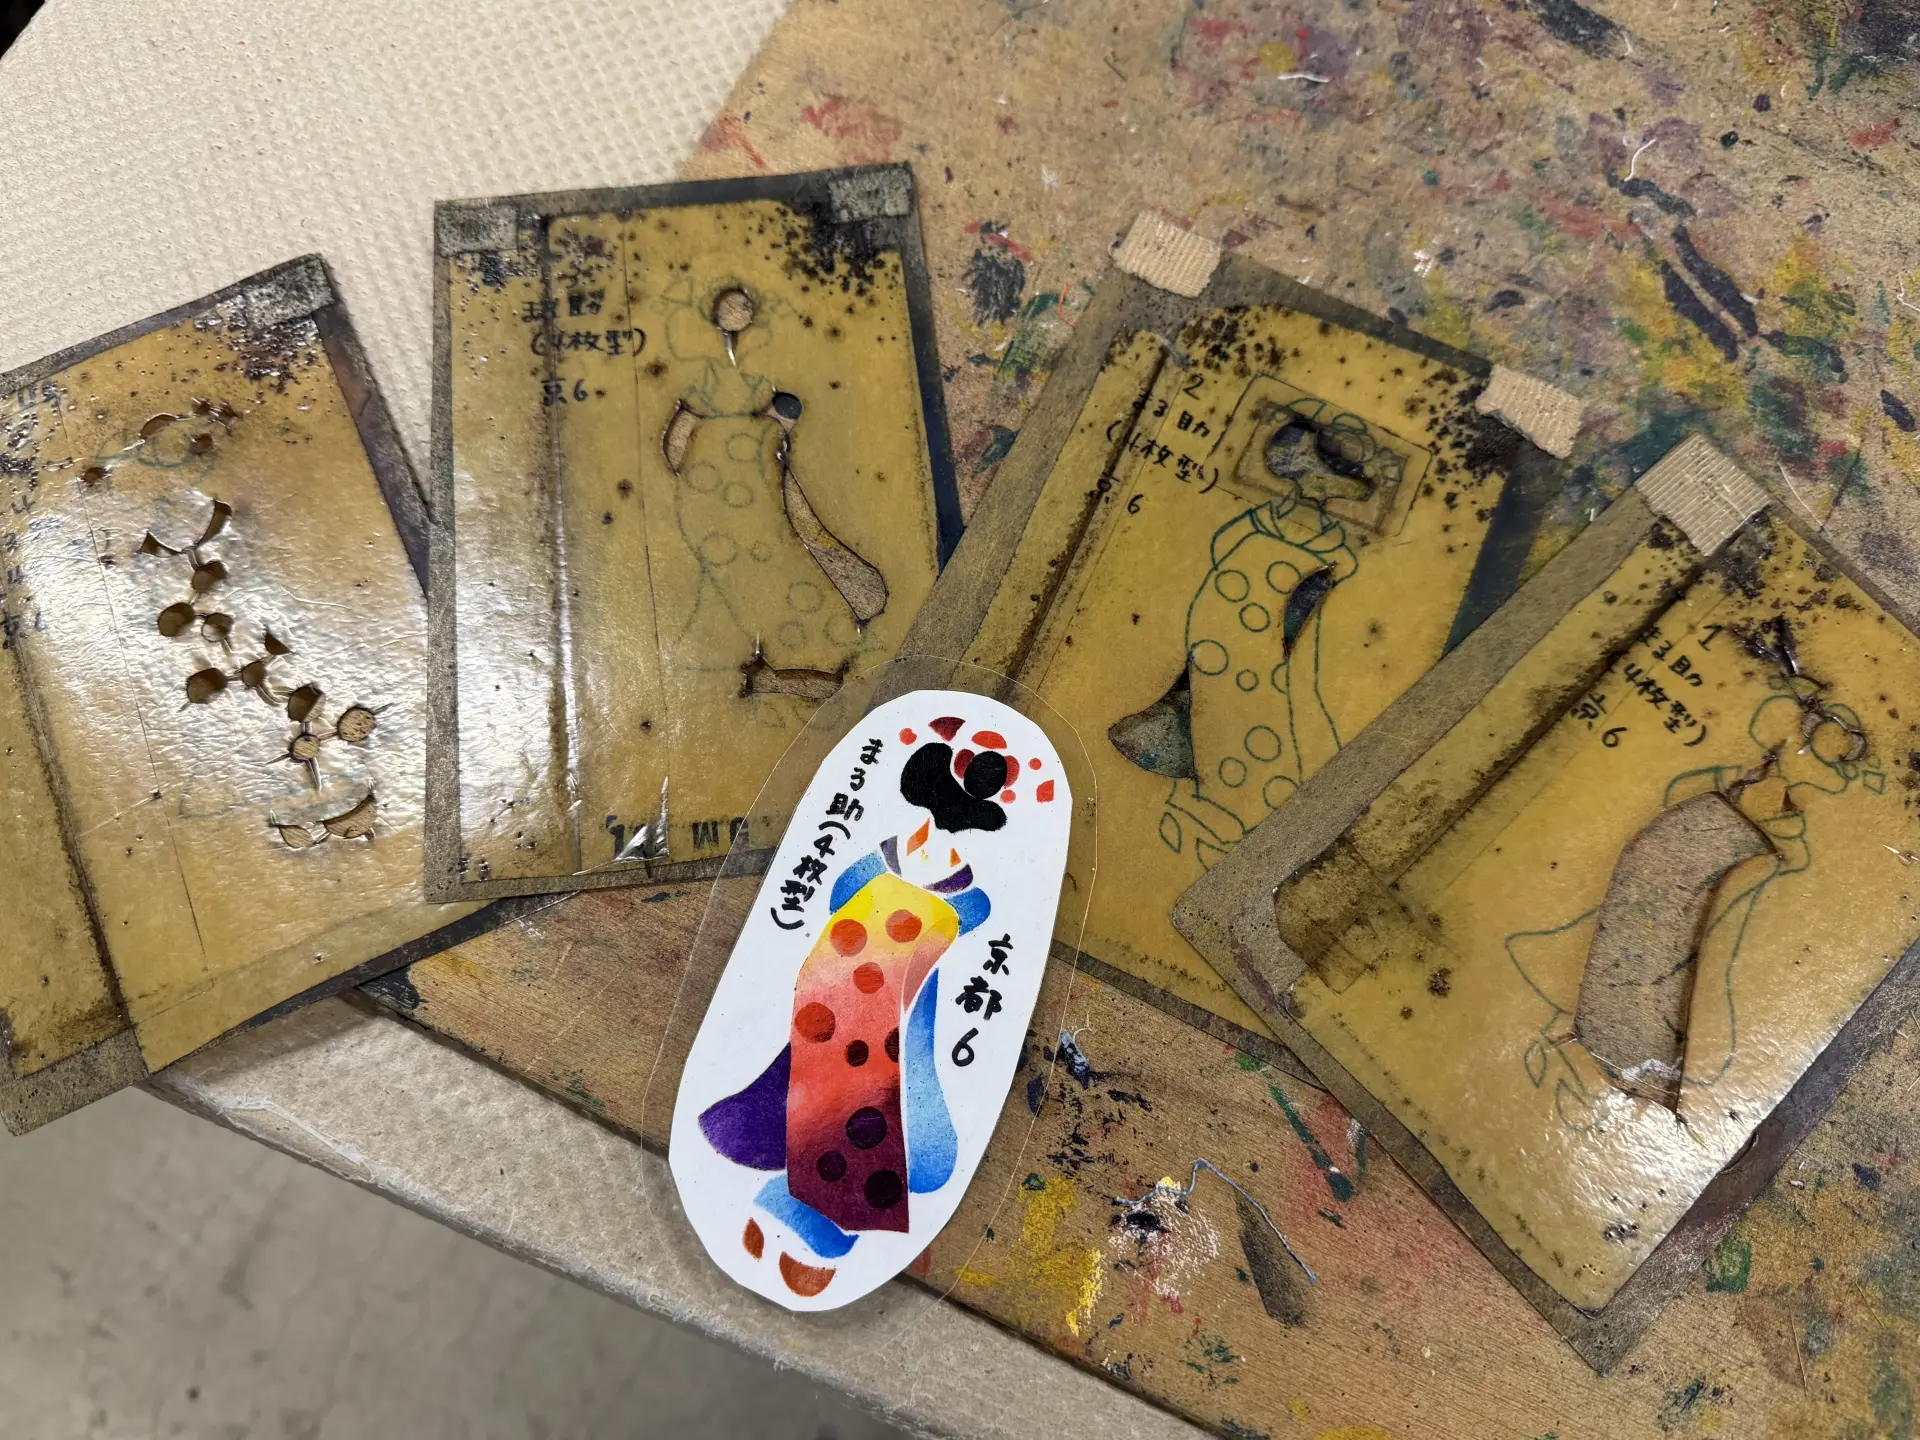
Once you have chosen your material, decide which stencil to use for dyeing. Stencils are selected from 240 stencil files divided by type, such as plants and flowers, animals, mythical beasts, and the Four Symbols. The workshop has about 80 files, and each file contains around 20 stencils, so even a rough calculation gives you 1,600 stencil designs. The artisan said there are other stencils as well, so there may be around 3,000 types. What’s more, they continue to create new designs and turn them into stencils every day. From this huge selection, you can decide what kind of design you want. To make a Kyoto-style handkerchief, we chose the back view of a maiko and the torii gates of Fushimi.
-
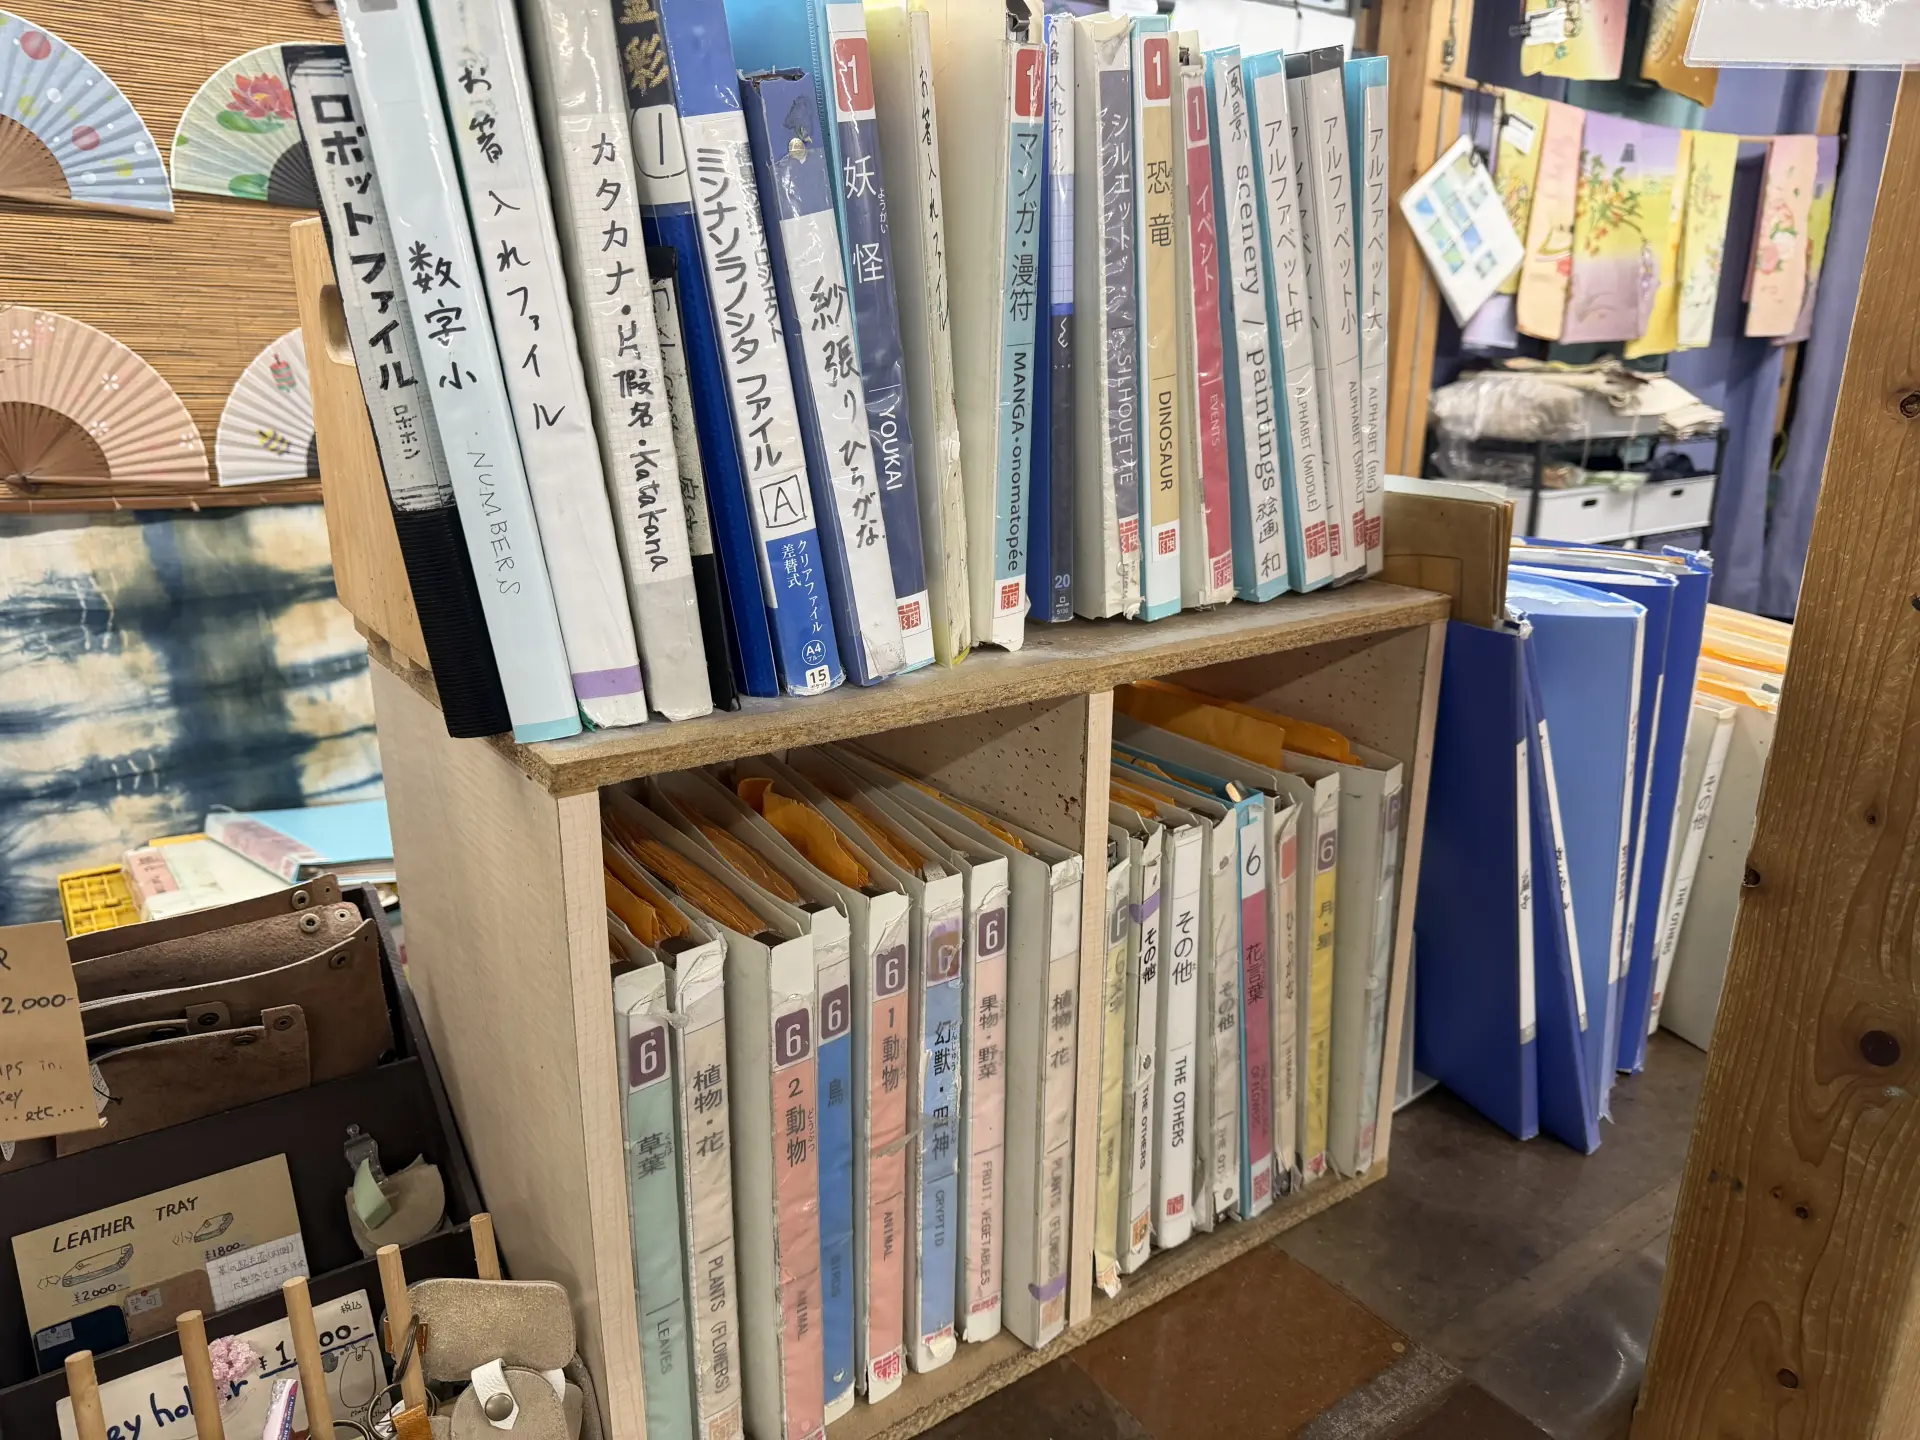
Stencil files organized by type
-
Various stencils
-
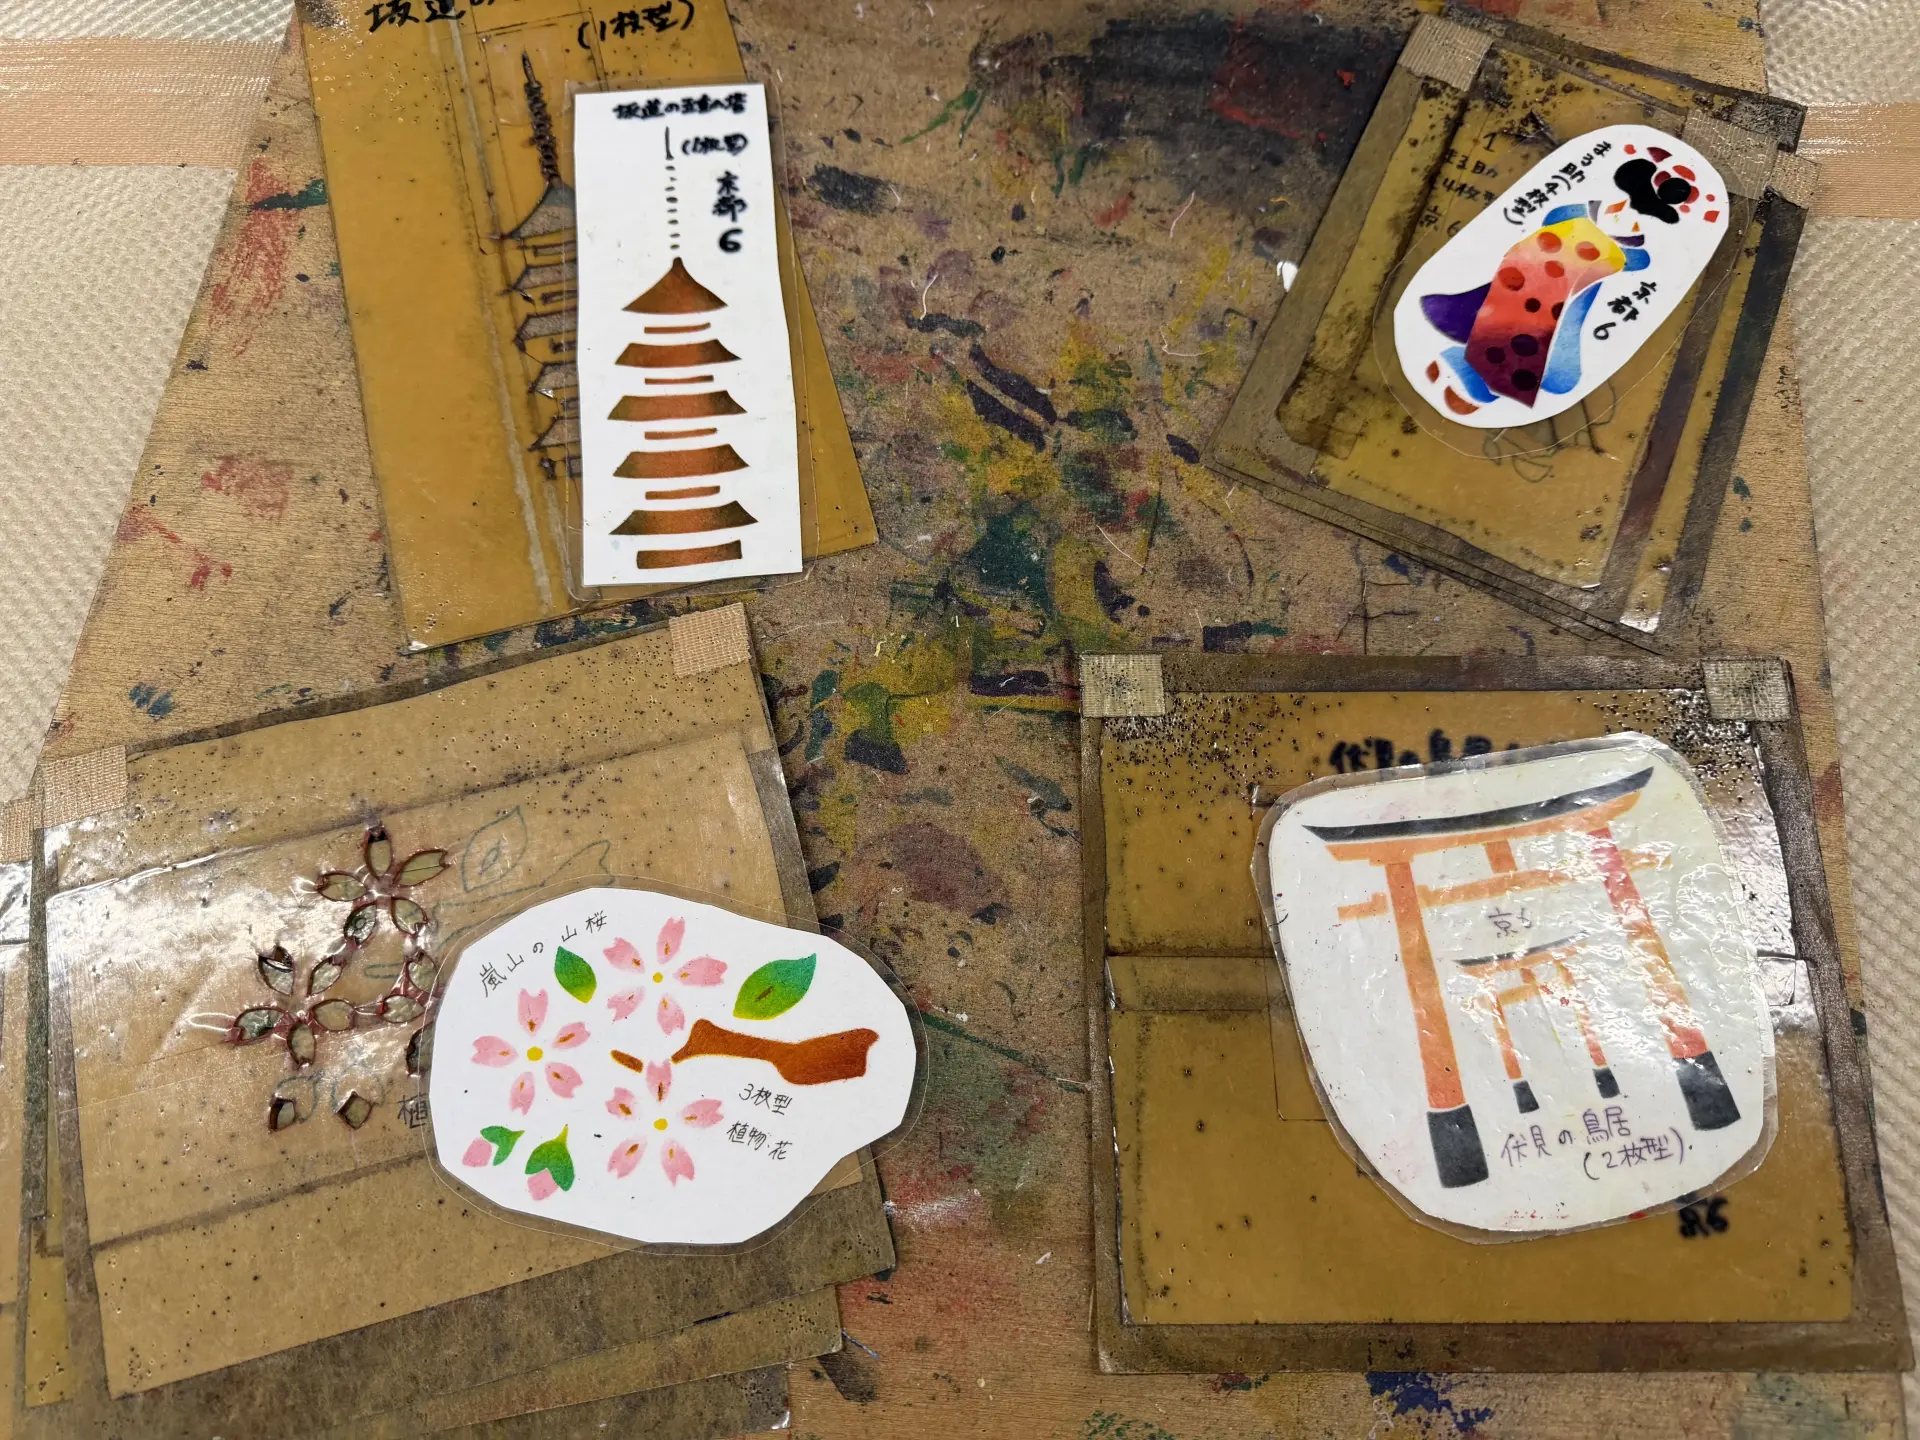
The stencils we chose
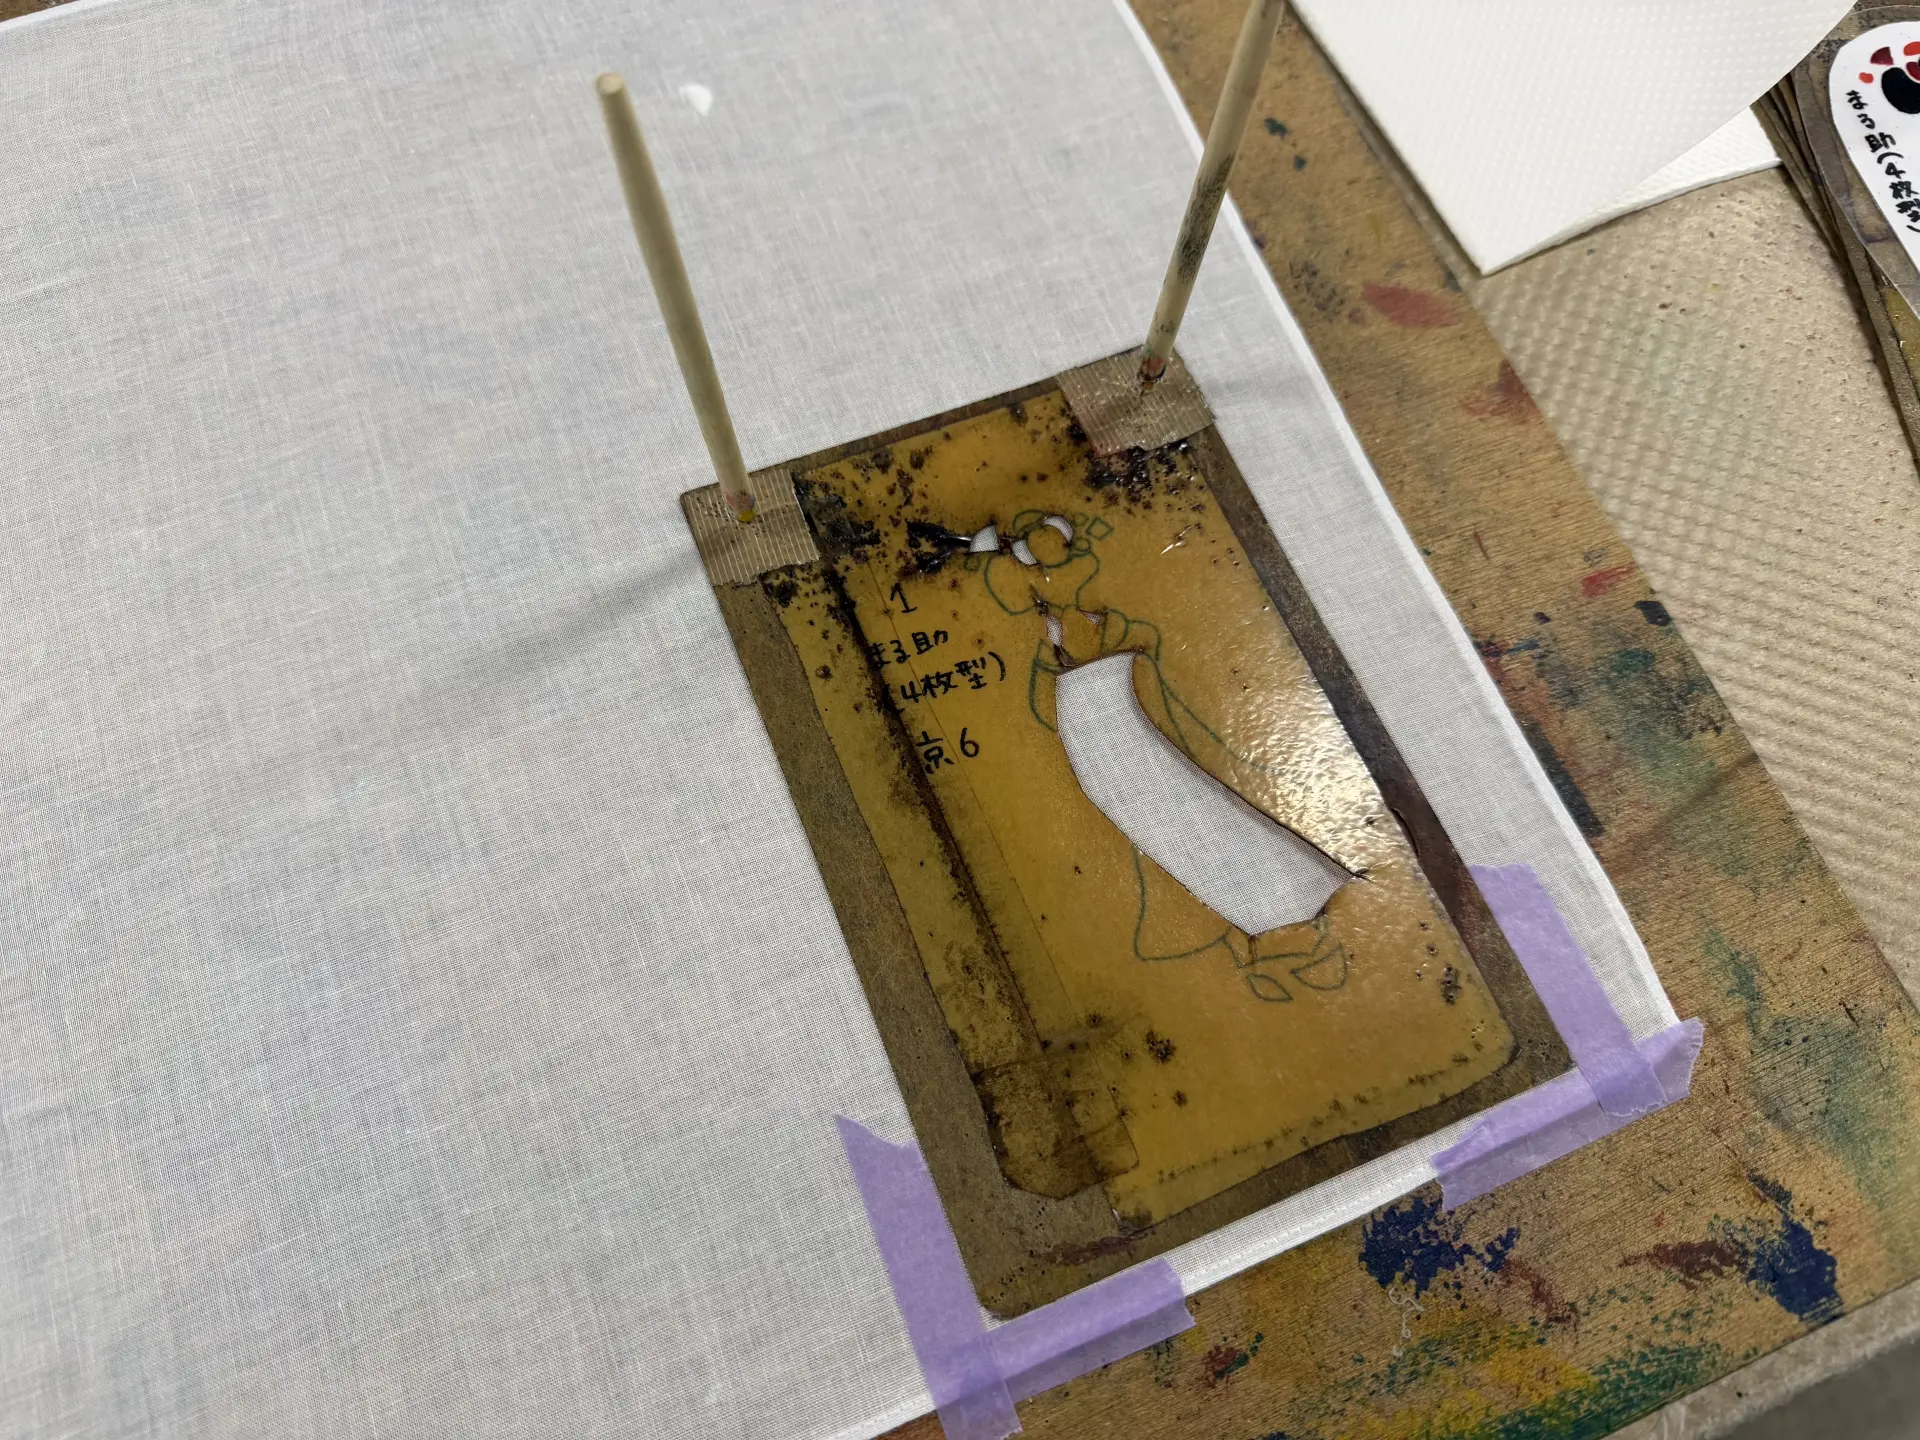
Each design comes with one to five stencils, which are layered as you dye. The stencils are numbered, so it is easy to see the order in which to dye them.
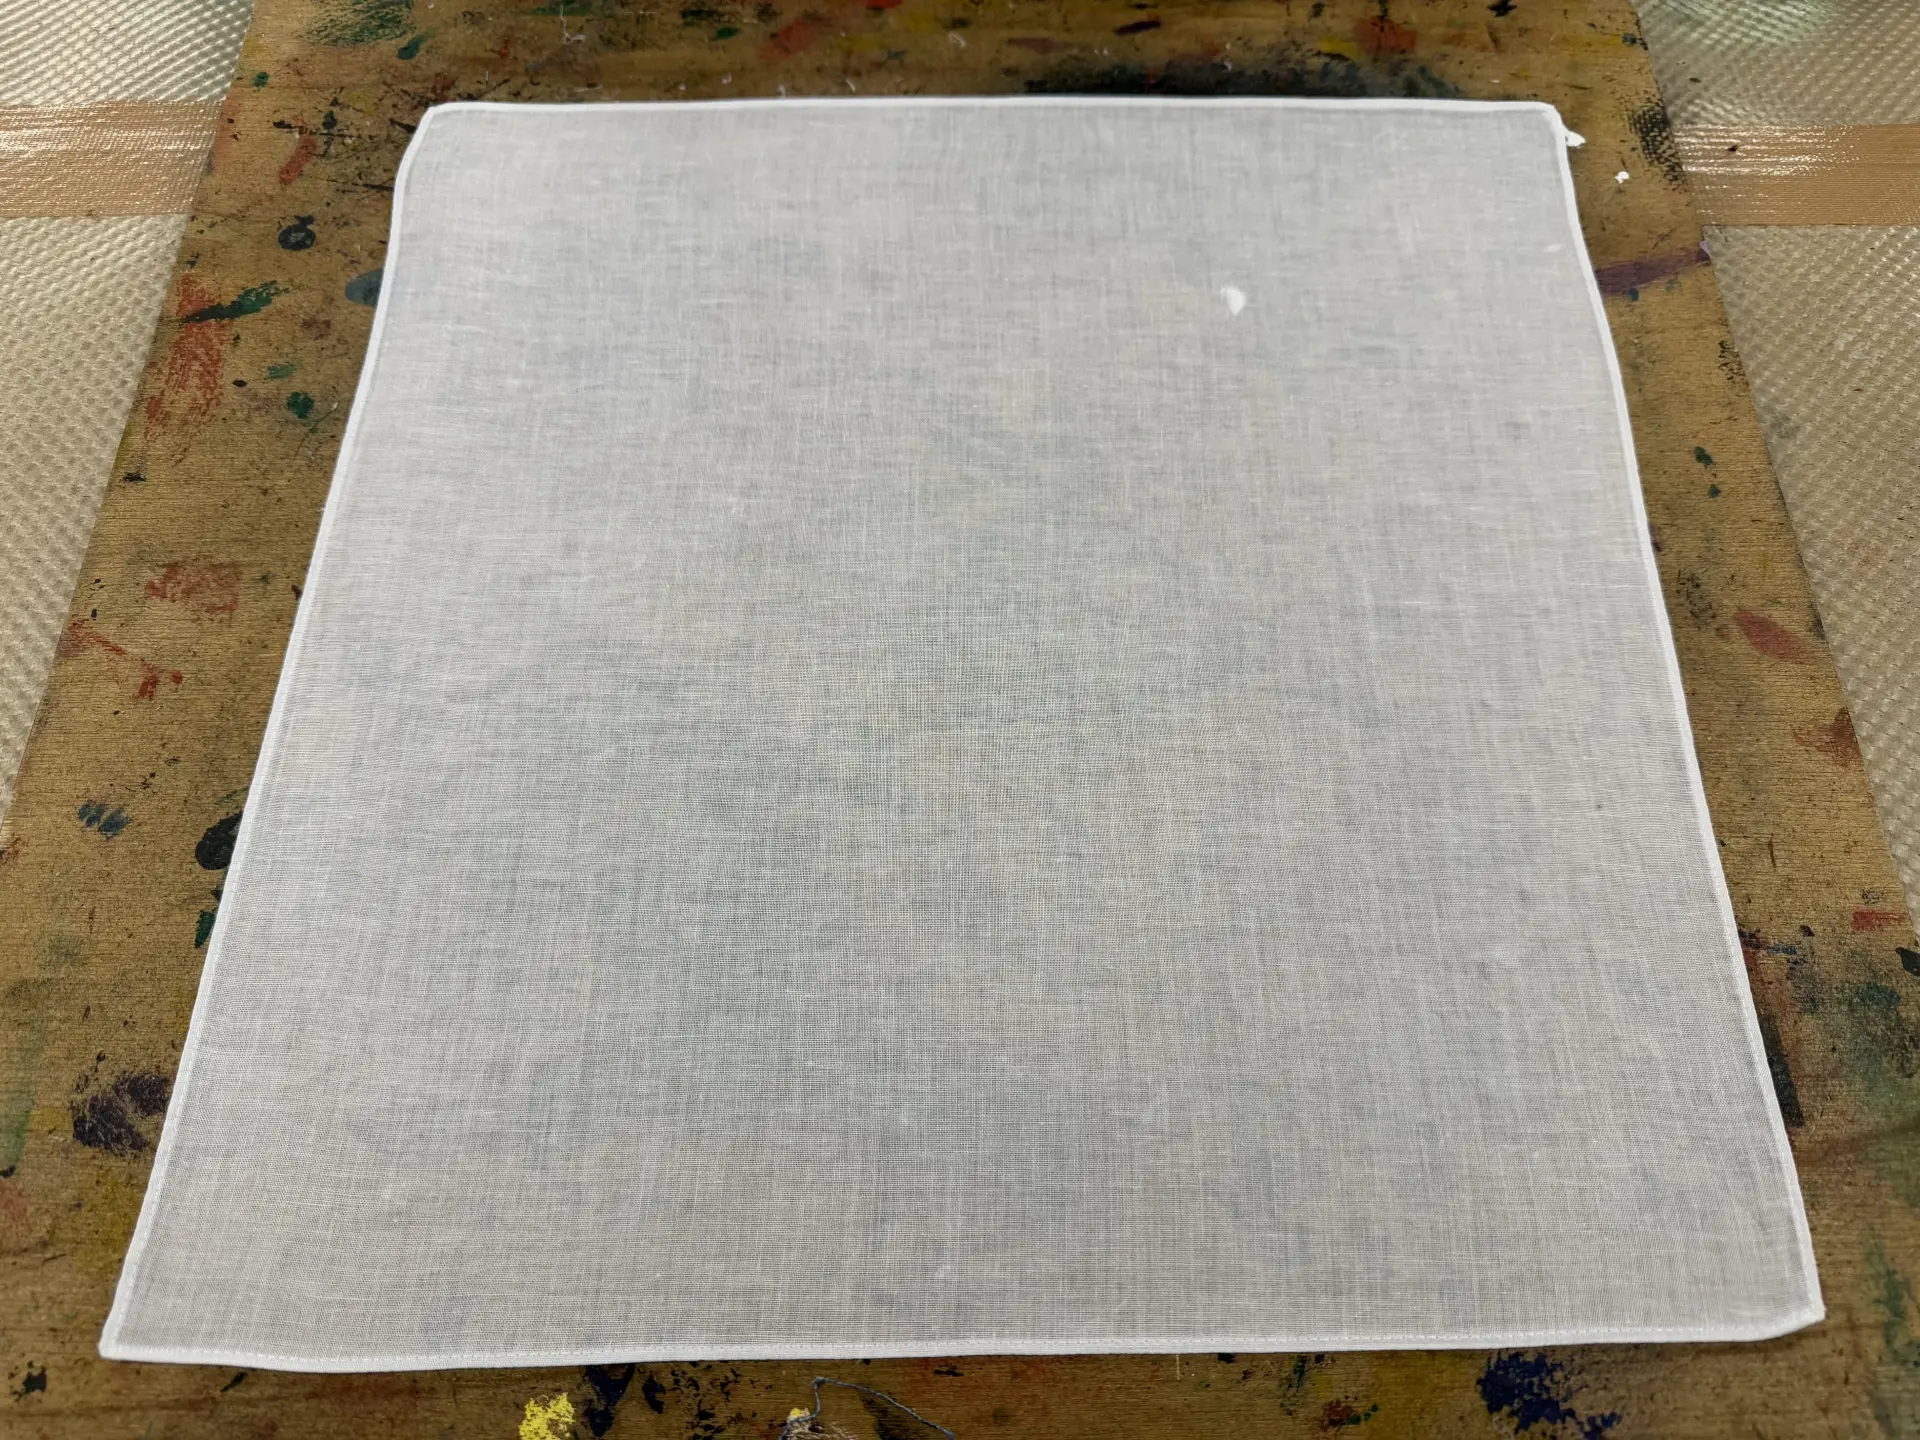
(3) Smooth Out the Wrinkles in the Material!
Next, place the material on the table and smooth out any wrinkles. The key is to do this carefully. If the wrinkles are not smoothed out, those areas will not dye properly. Be careful!
(4) Secure the First Stencil!
After deciding where to dye, place only the first stencil and use pins to fasten it in two places near the top. To keep the second and later stencils from shifting, mark the two lower corners with masking tape.
(5) Pick Up the Dye
There are 10 dye colors: yellow, red, pink, light blue, pale purple, purple, blue, brown, black, and green. You can also combine them. When layering colors, dyeing from light colors to dark colors produces a beautiful finish.
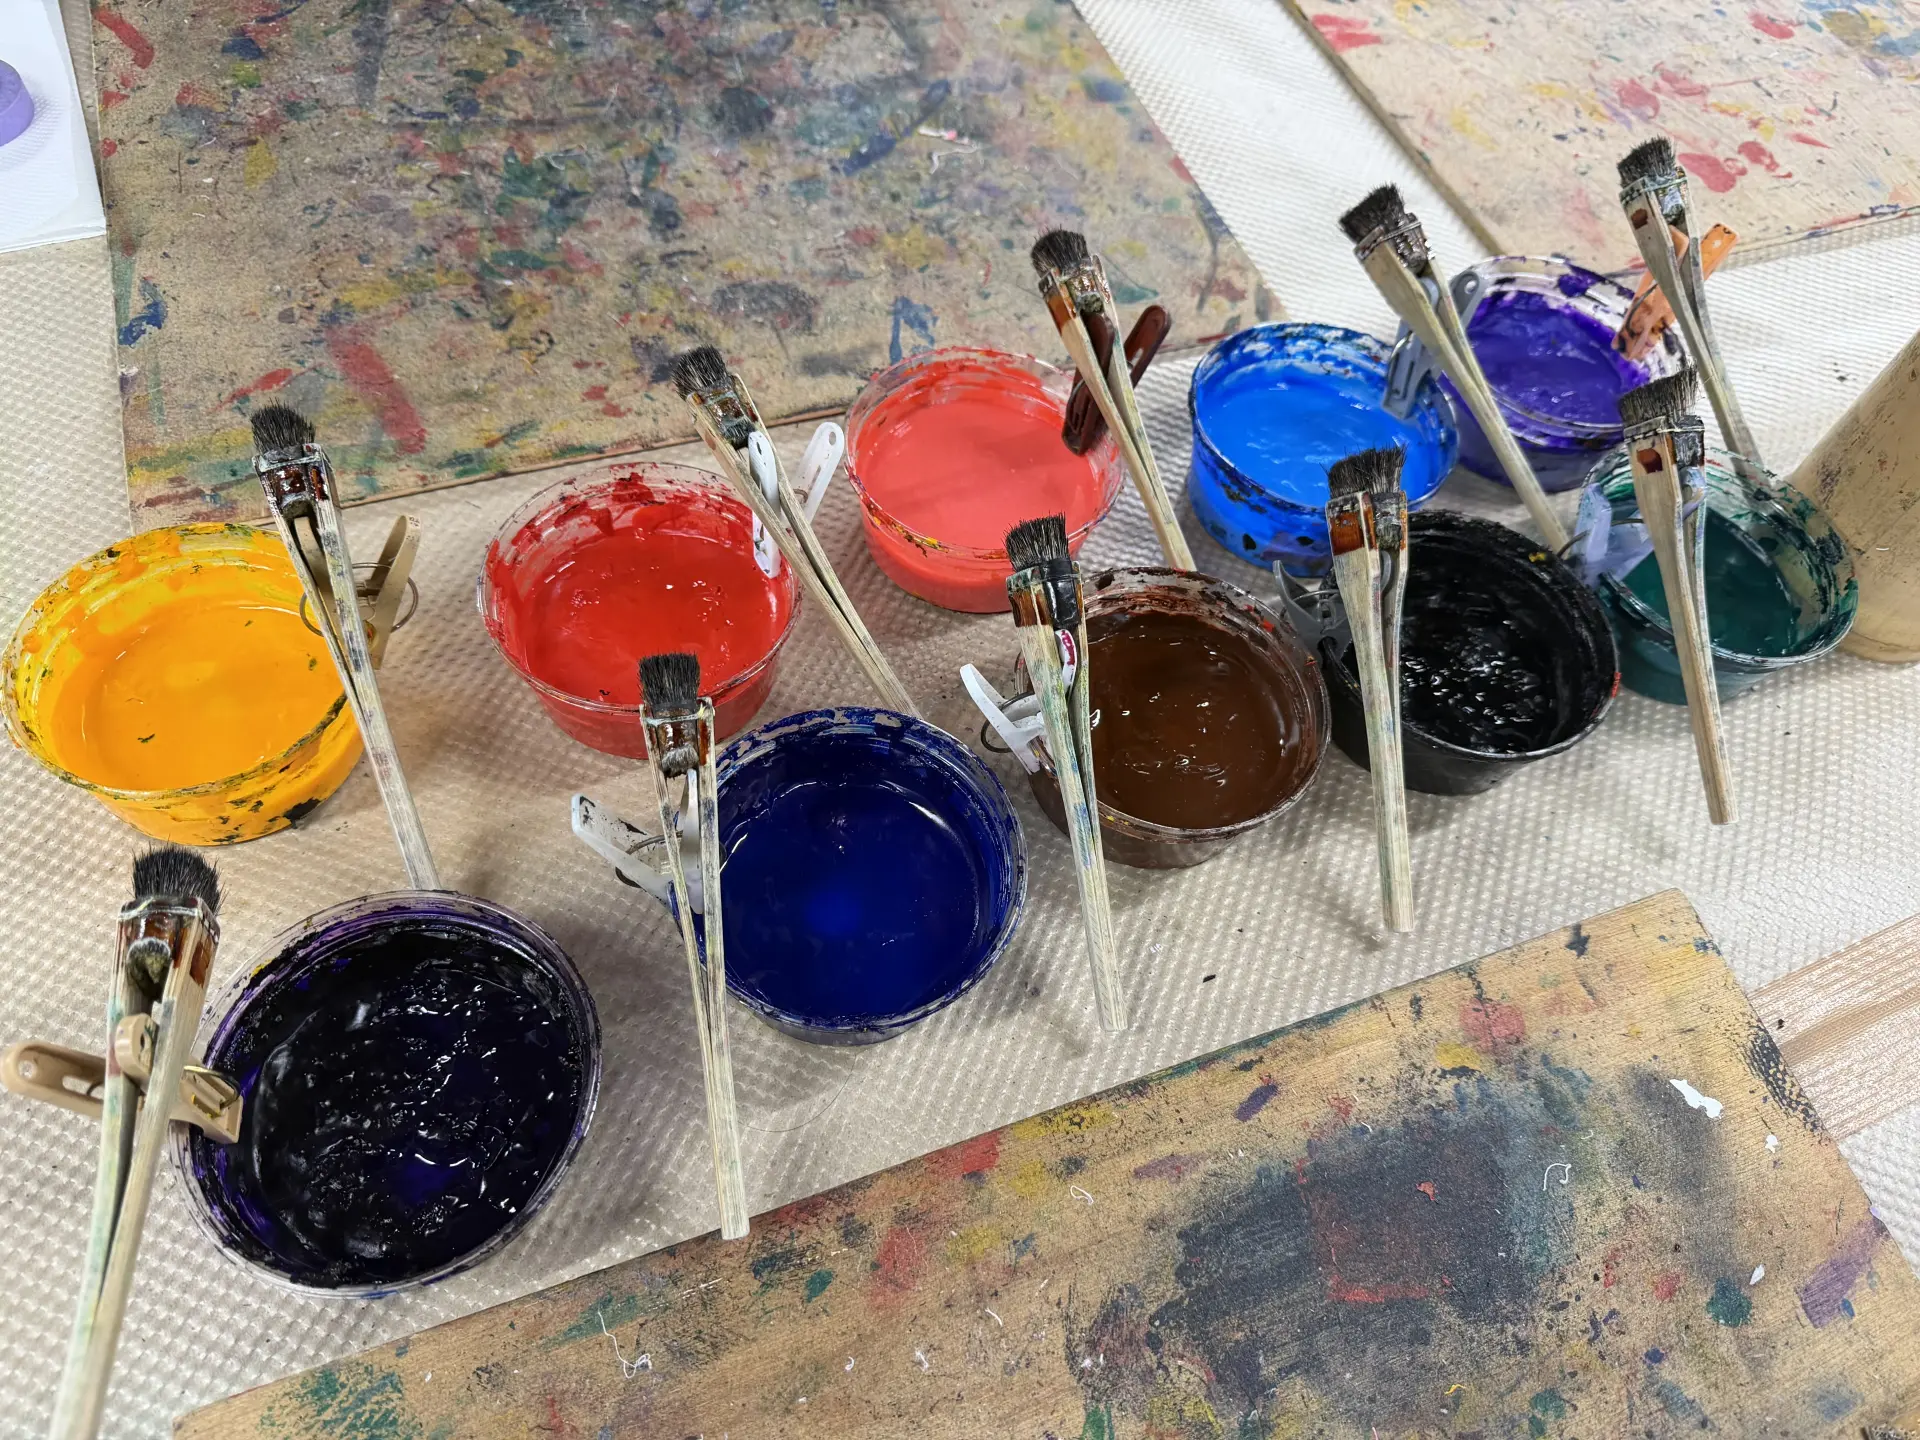
Hold the brush at an angle and scoop up about a bean-sized amount of dye.
(6) Spread the Dye Until It Looks Almost Dry
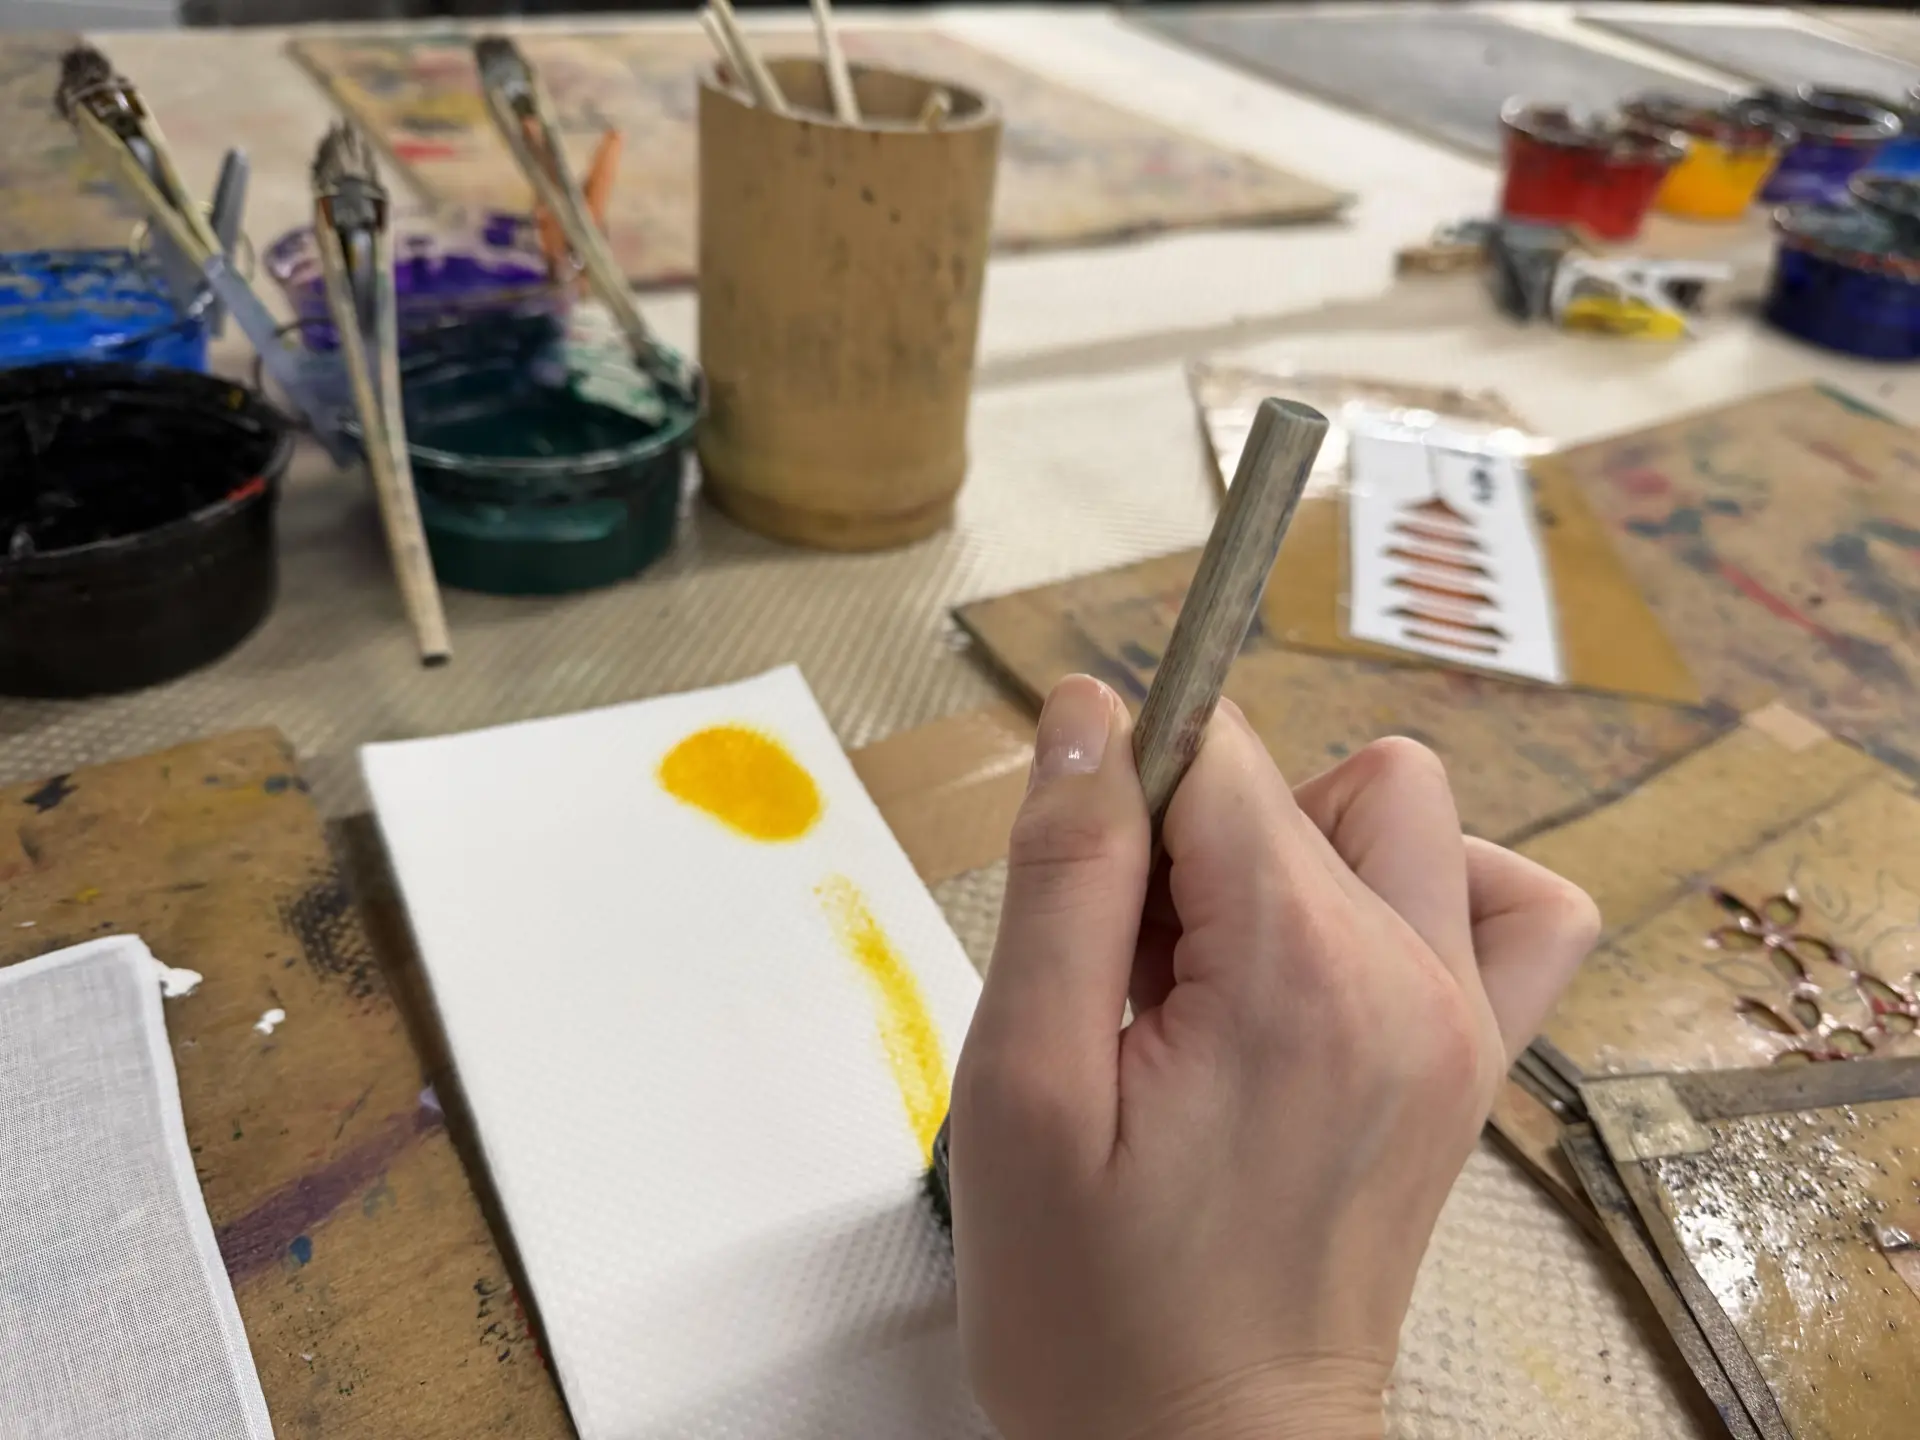
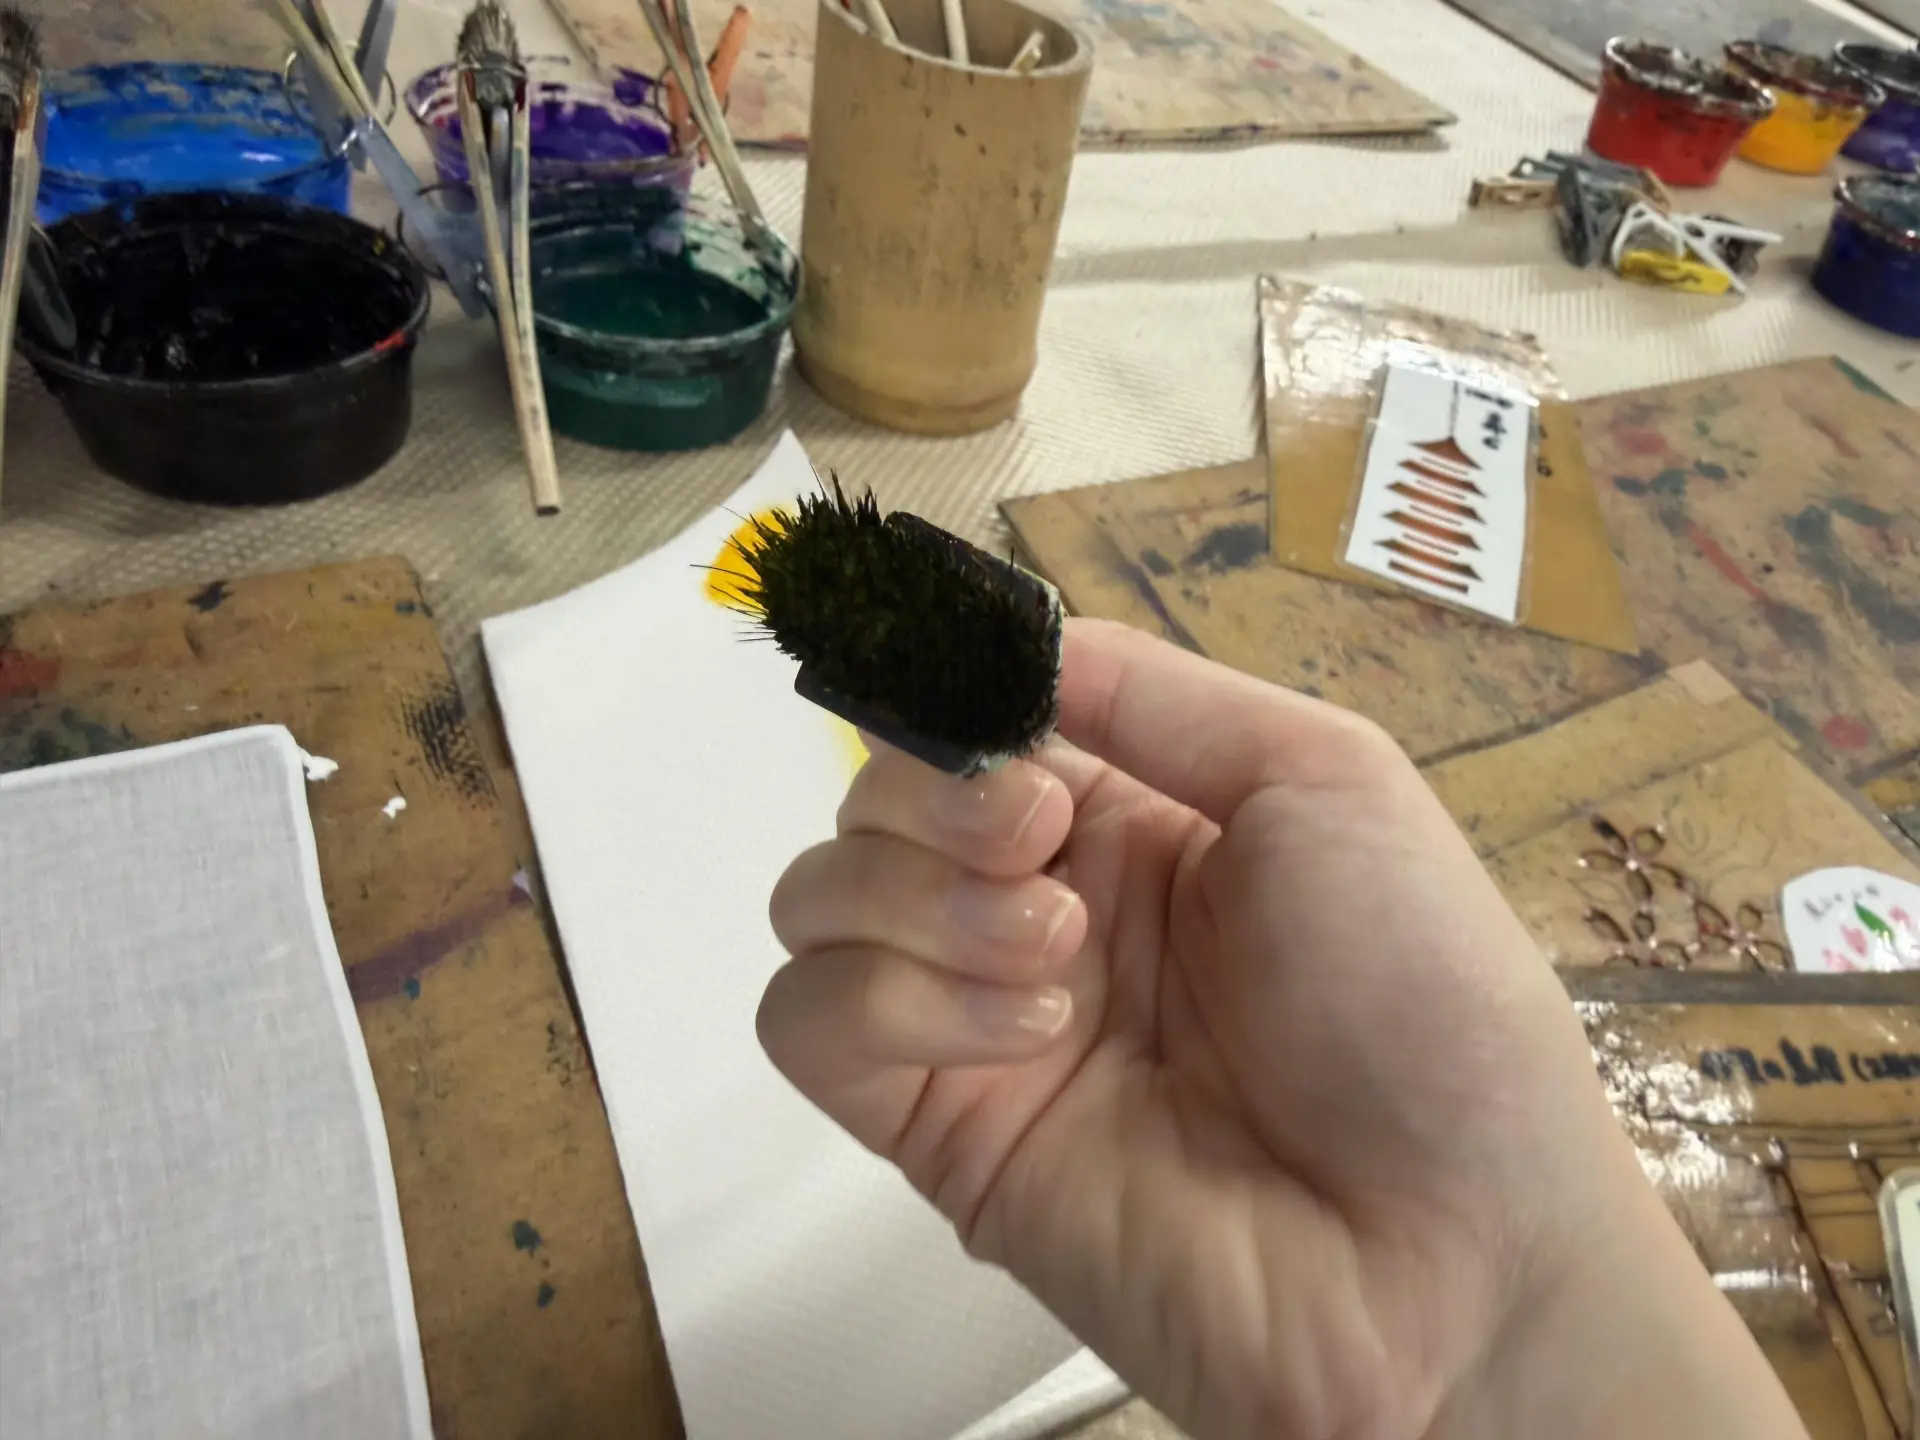
If you apply the color directly to the material, you will not get the light and dark shading that gives Kyo-Yuzen its character. First, spread the dye you picked up with the brush on a paper towel until it looks almost dry, allowing the dye to soak into the brush. The key is to hold the brush upright and scrub firmly. Be sure to remove even the dye on the edges of the brush. If you look at the brush and wonder whether there is really any dye on it, you have removed enough.
(7) Dye the Design
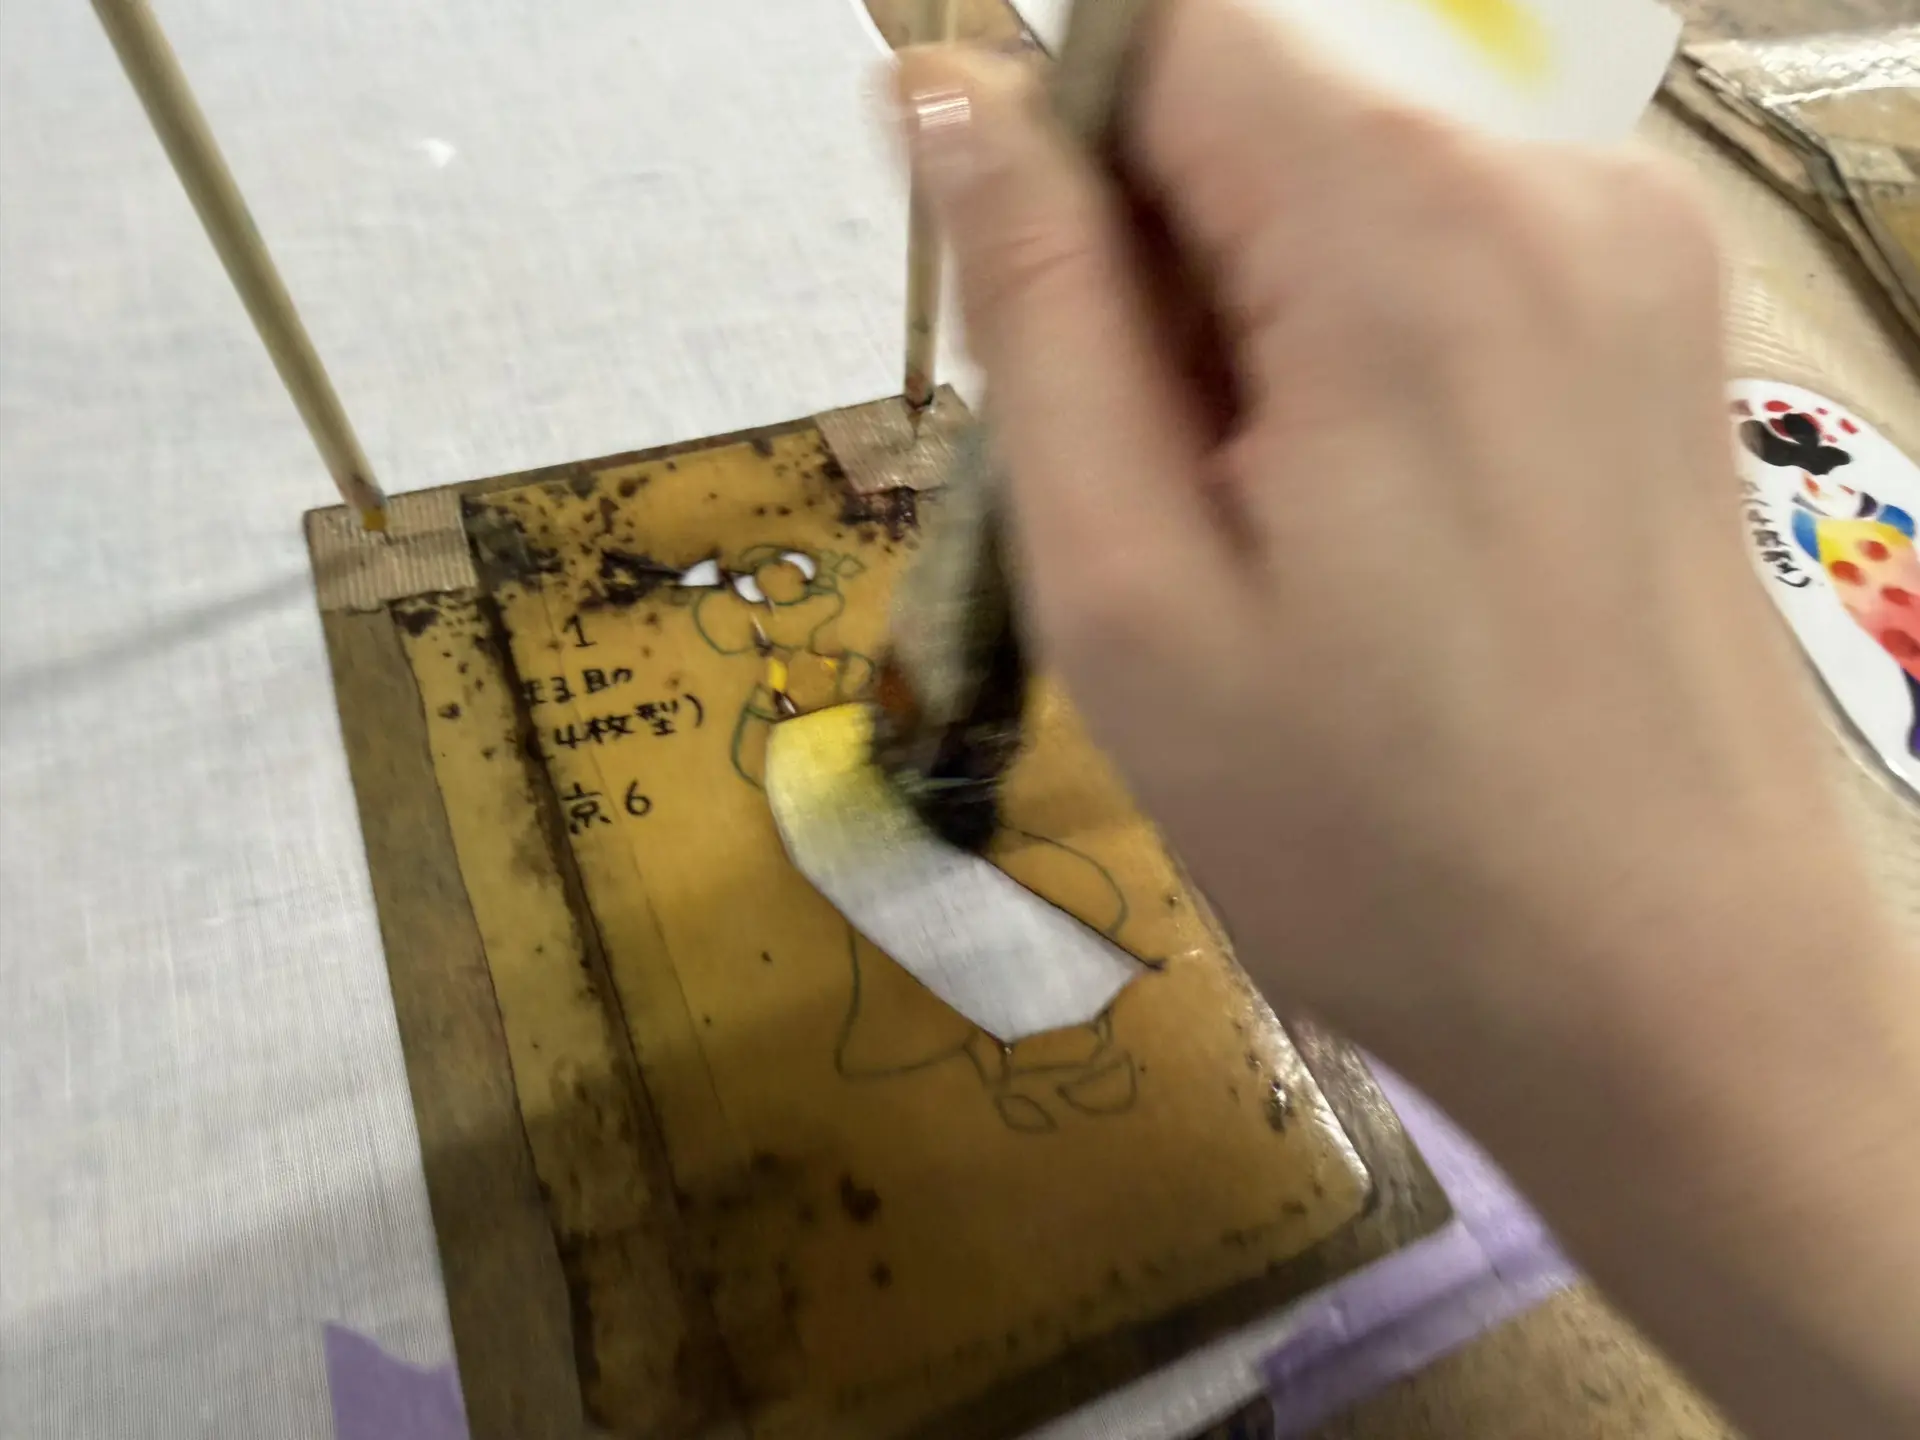
Hold the brush upright and dye in small circular motions. Rubbing the color in repeatedly makes it darker. Adding this kind of shading, or bokashi, creates a sense of depth. You can combine colors however you like, so dye freely and create your own original Kyo-Yuzen piece!
(8) Layer the Colors
This time, we decided to dye the maiko’s obi in three colors. After dyeing the upper part of the obi with yellow dye, we picked up red dye, spread it again until it looked almost dry, and dyed while slightly overlapping the area colored yellow.
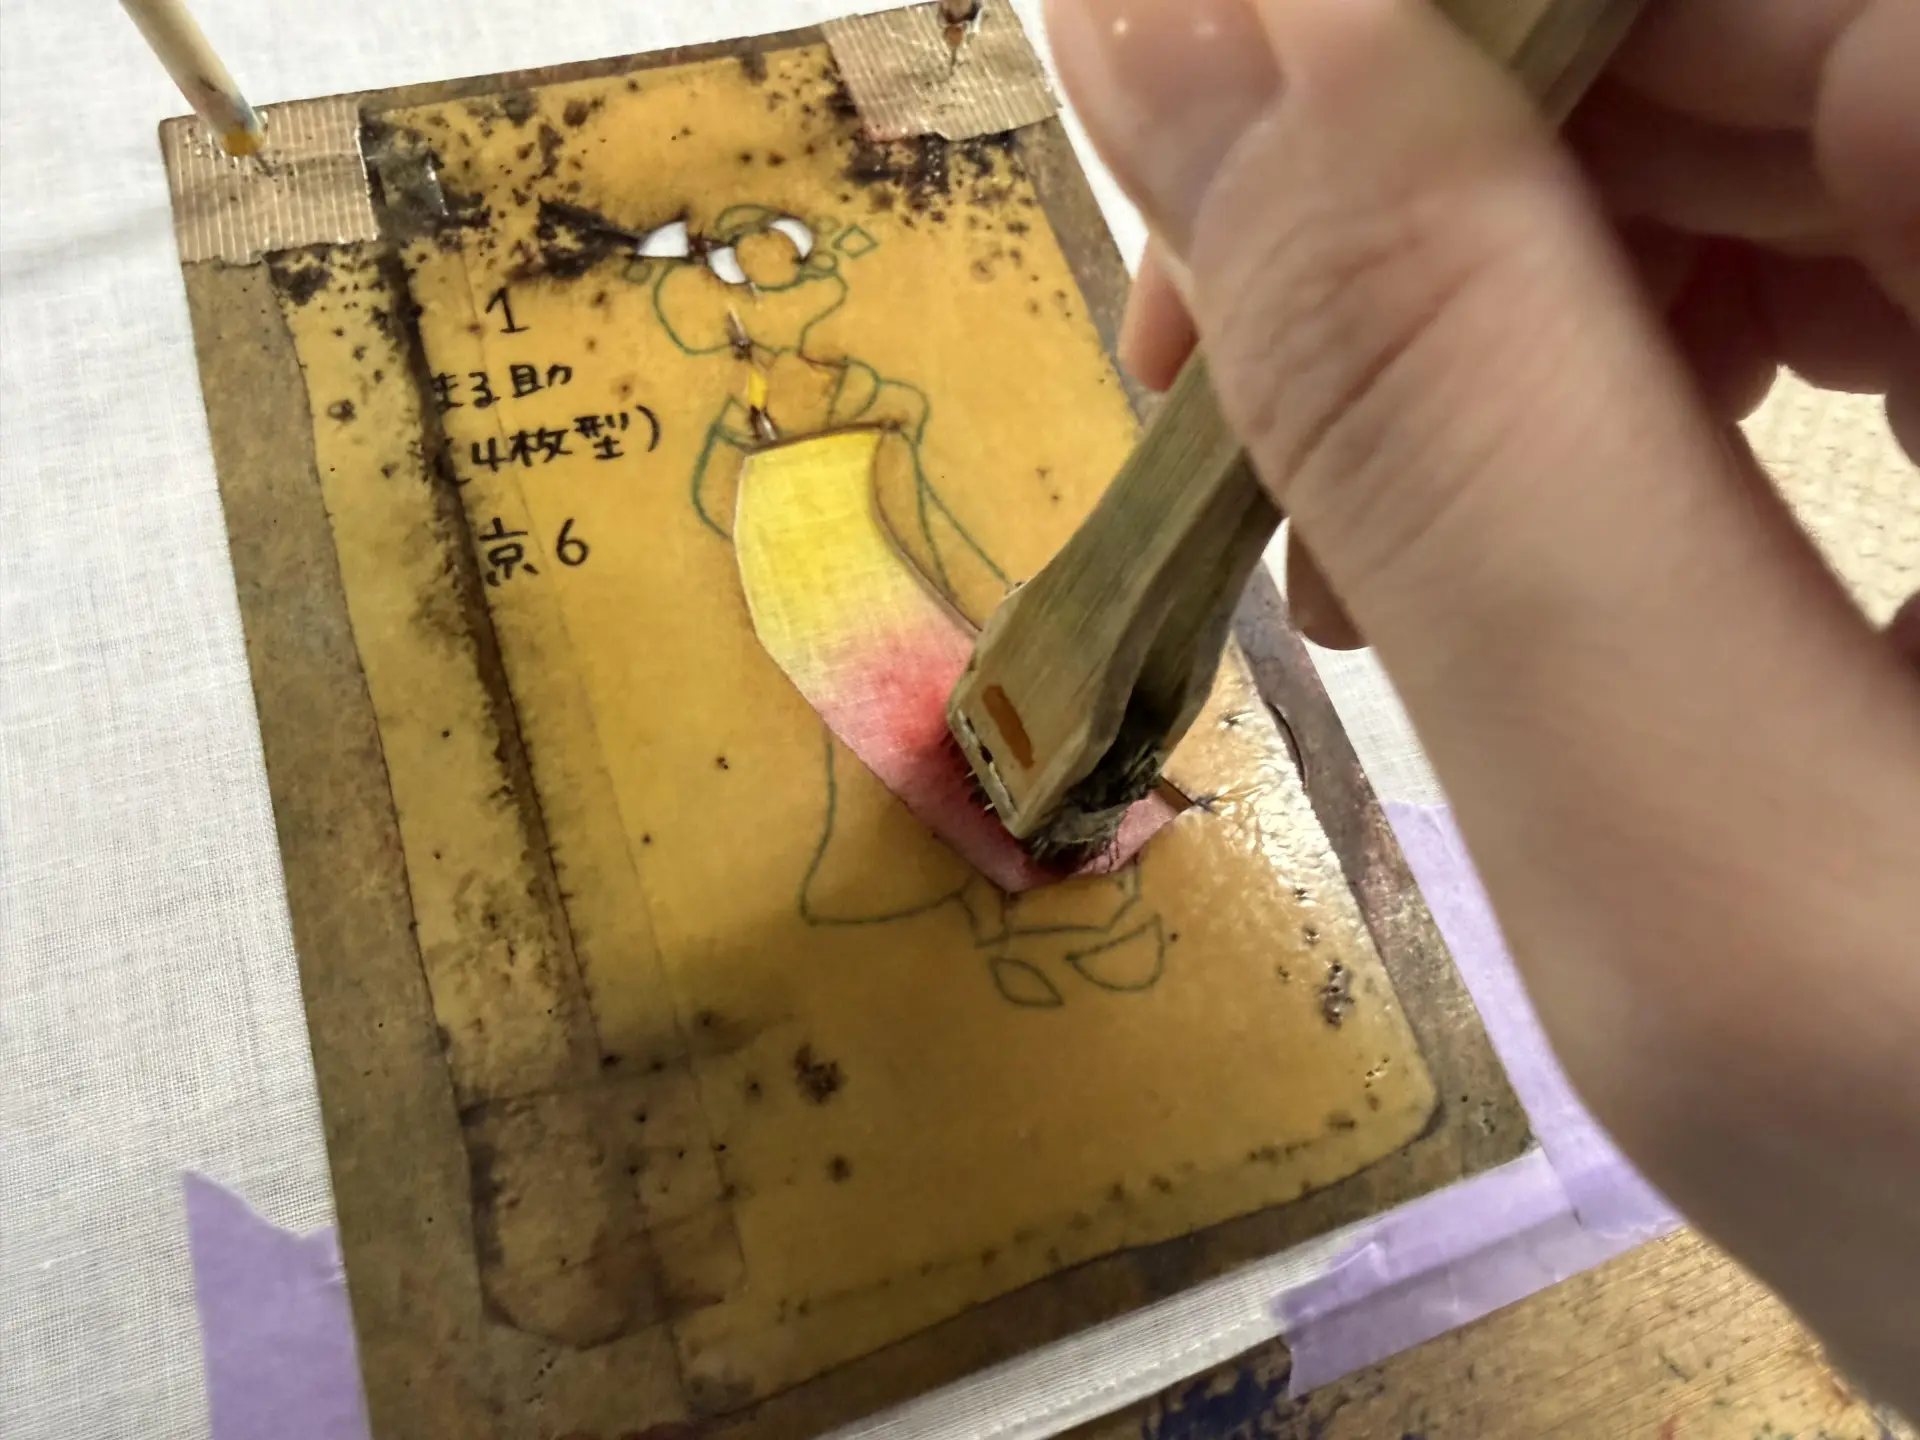
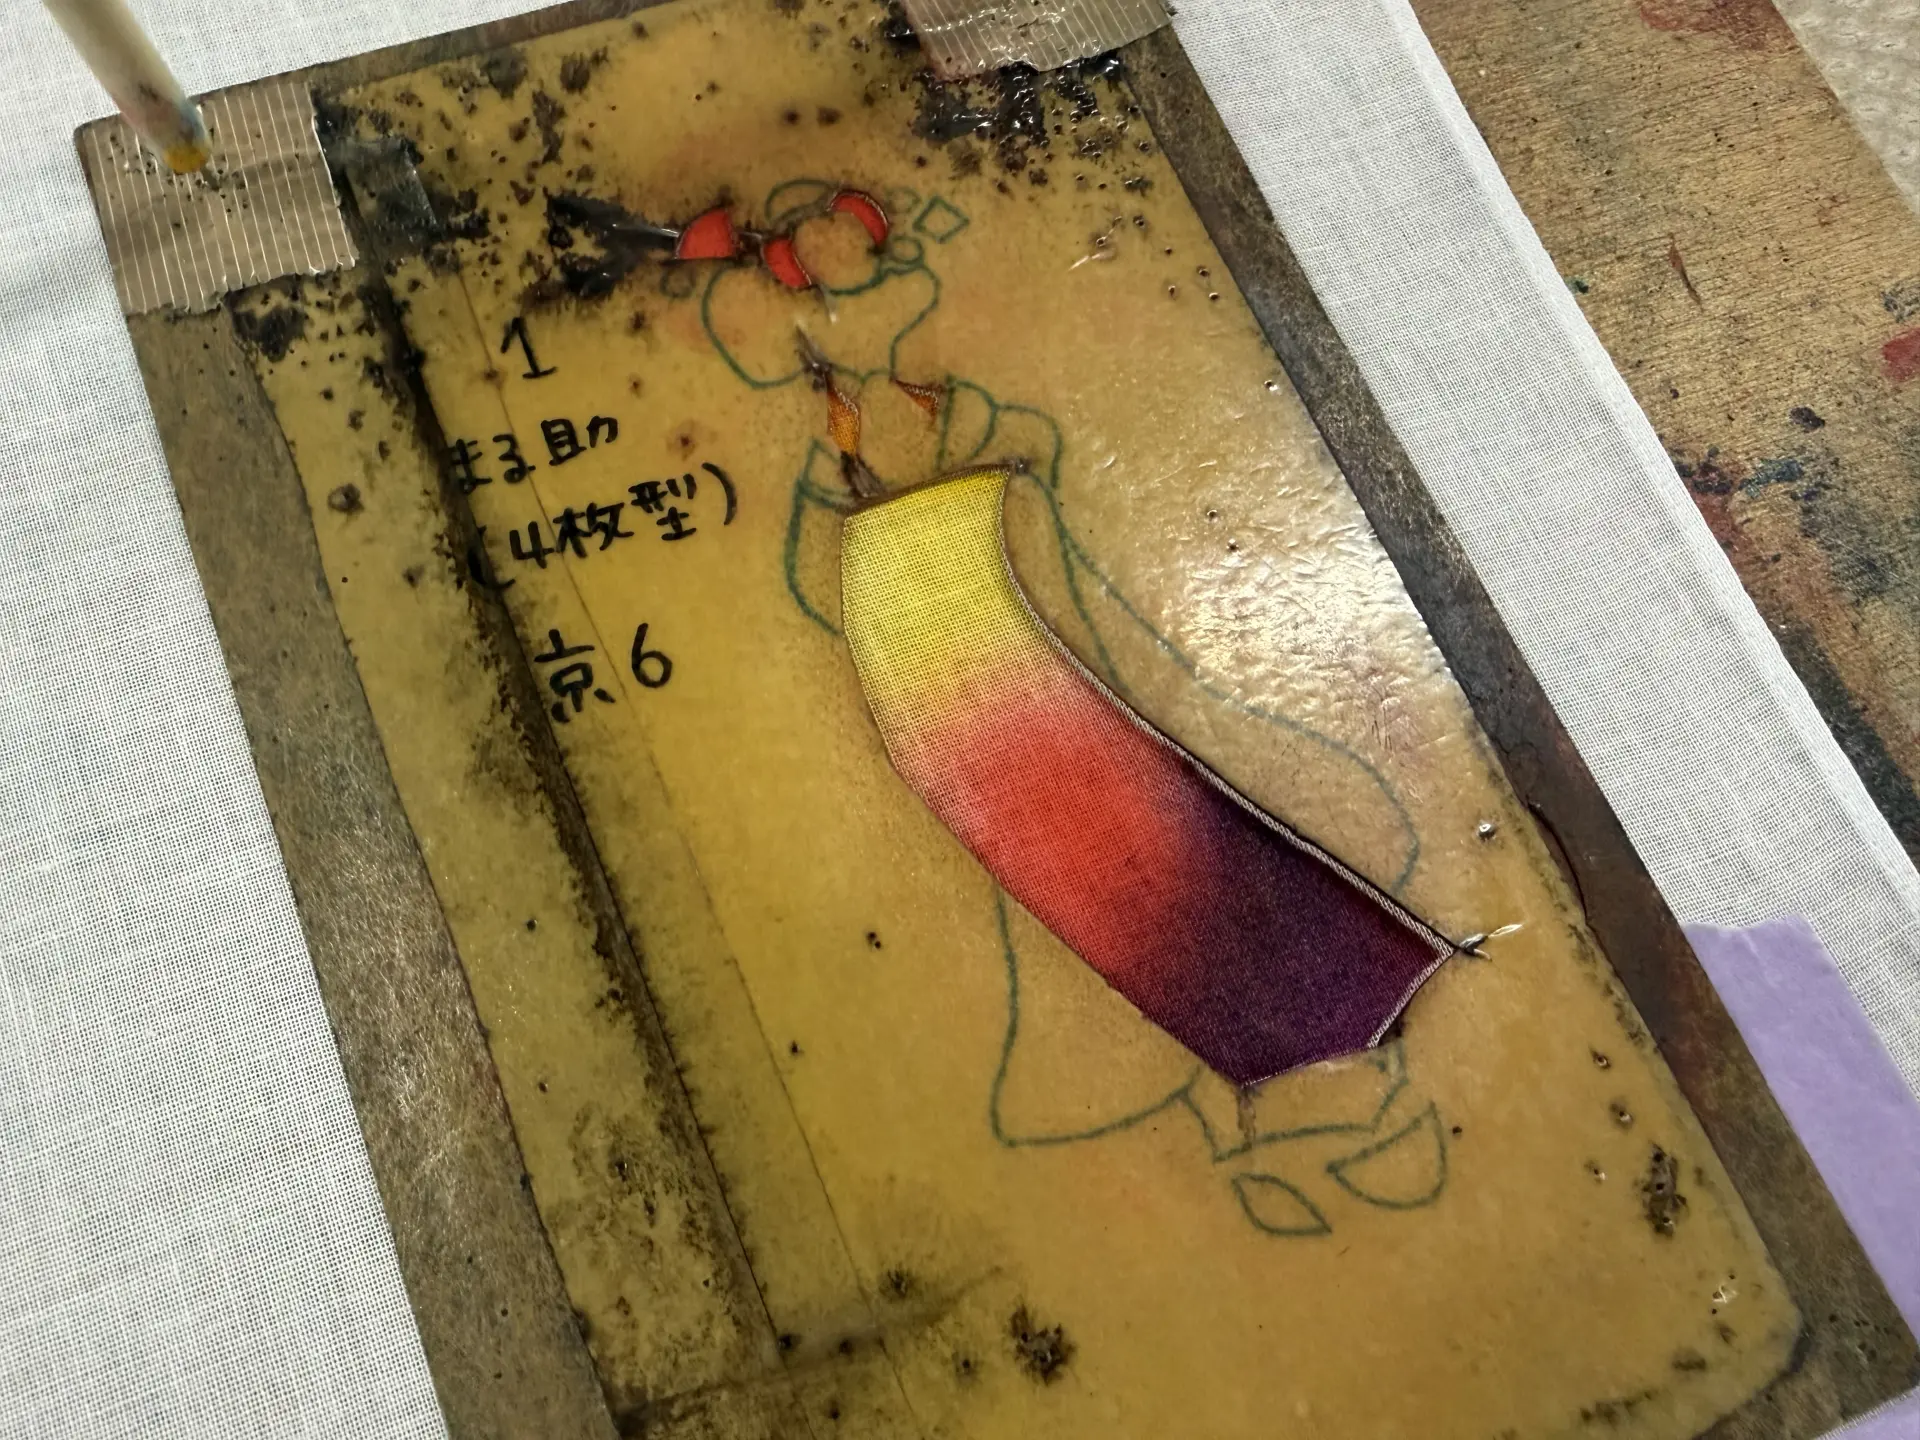
Here, too, hold the brush upright and move it in small circles. We dyed the lower part of the obi purple. Here is the finished obi. The areas where yellow and red, and red and purple, overlap have formed beautiful gradations. Continue layering the second and later stencils in the same way.
(9) Continue Layering and Dyeing the Second and Later Stencils
After finishing the first stencil, dye the second stencil. Use the masking tape applied during the first stencil as a guide, place the second stencil, and secure it with pins. Then pick up the dye again, spread it until it looks almost dry, and dye in small circular motions. Repeat this through the final stencil to complete one design.
(10) The Maiko Kyo-Yuzen is Complete!
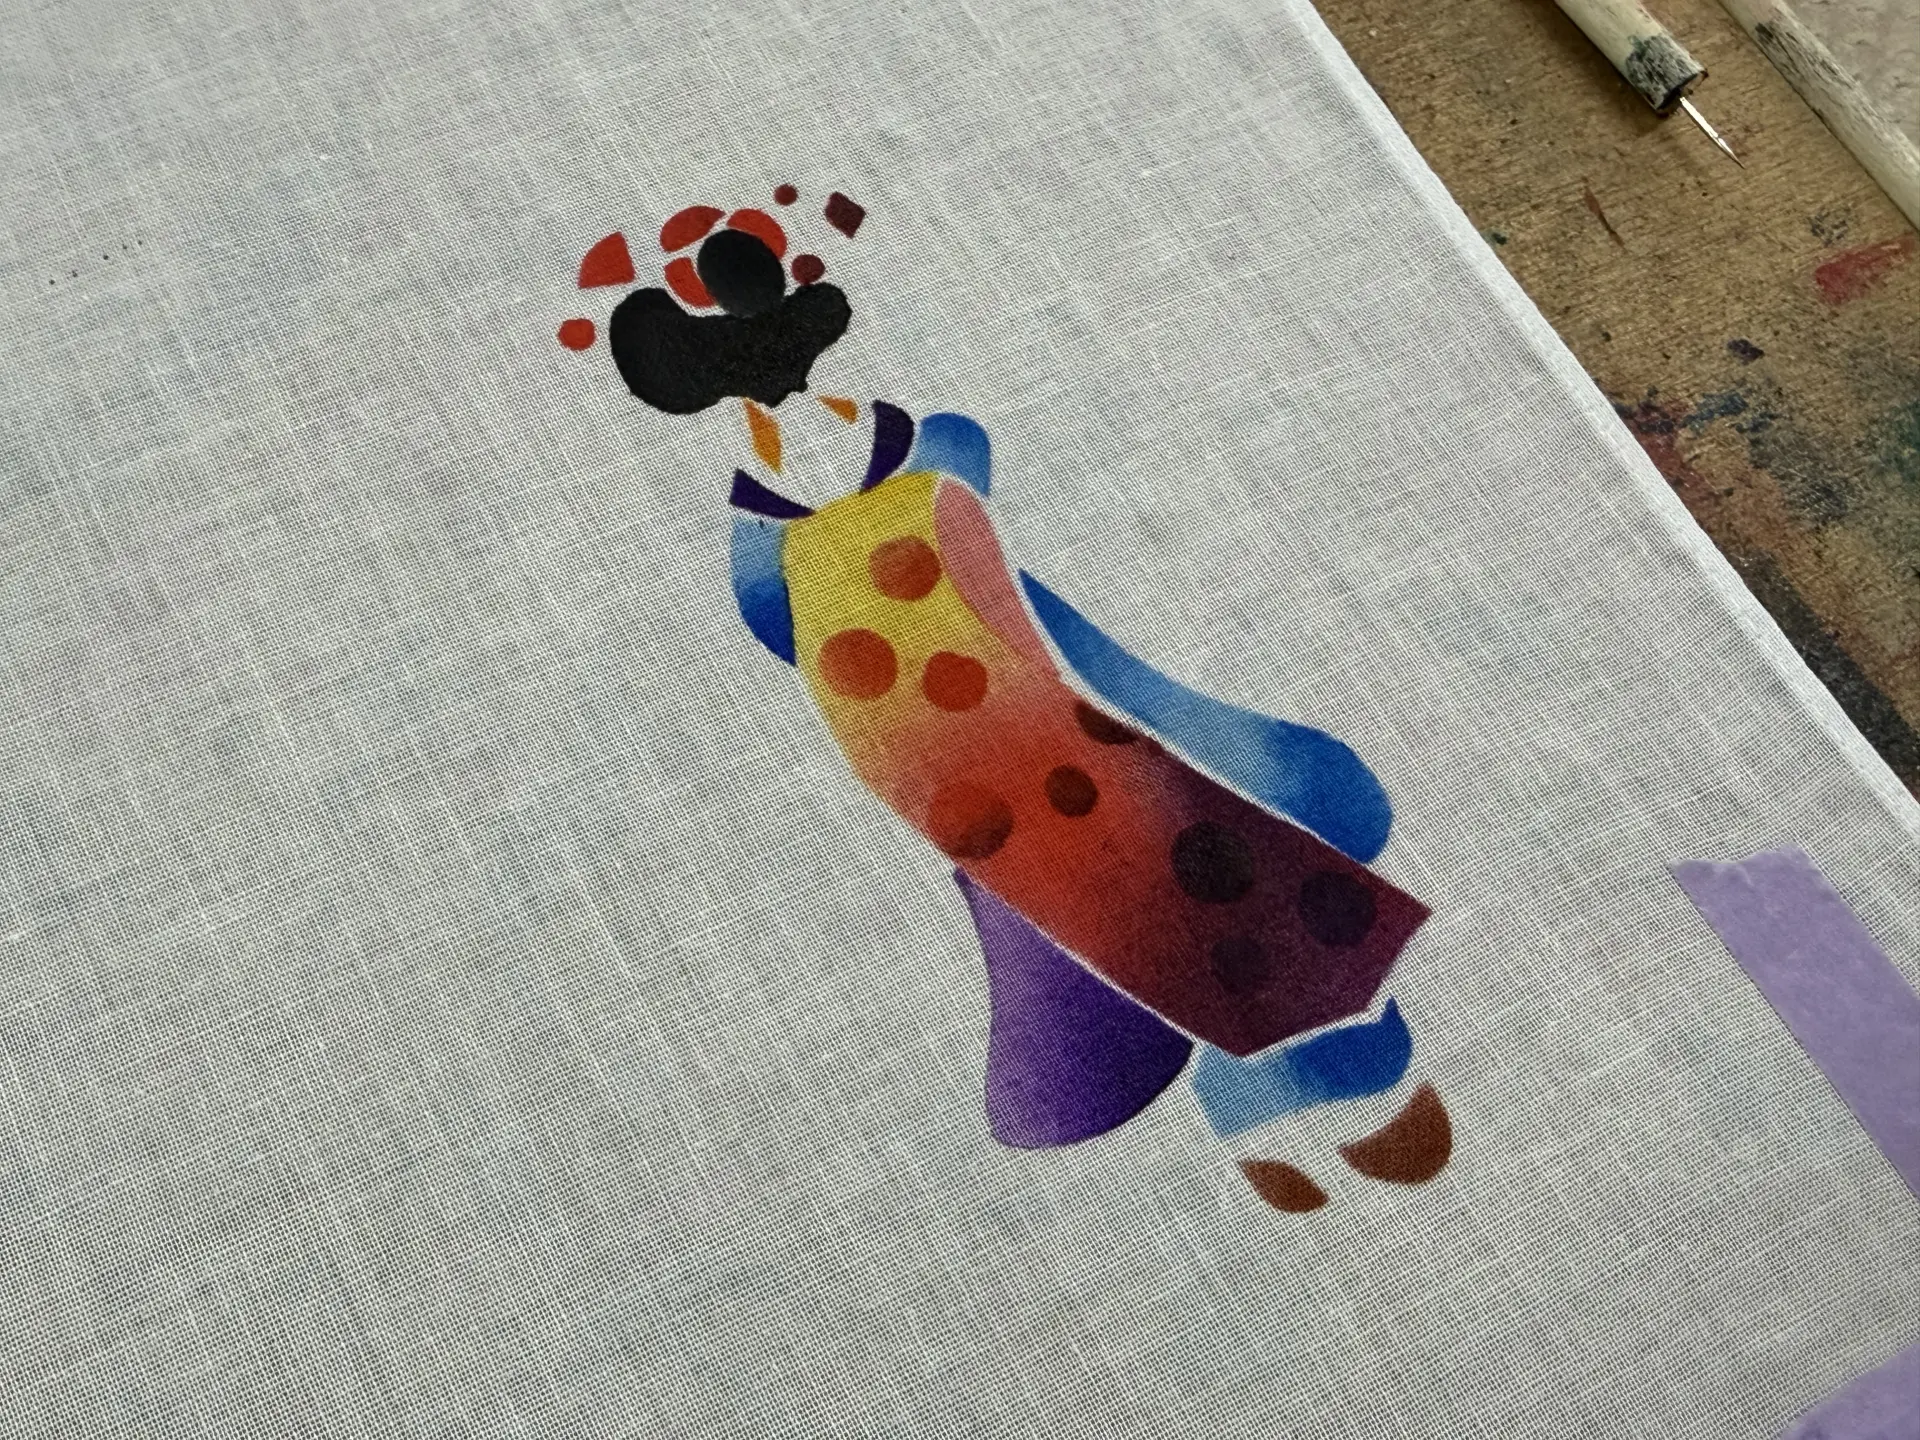
Here is the finished piece. It clearly looks like a maiko, and the color shading came out beautifully. Through the experience, we found two points especially important: spreading the dye well until it looks almost dry and dyeing while keeping the stencil from shifting. If you follow those two points carefully, you should be able to create beautiful Kyo-Yuzen.
(11) Dye Other Stencils Too
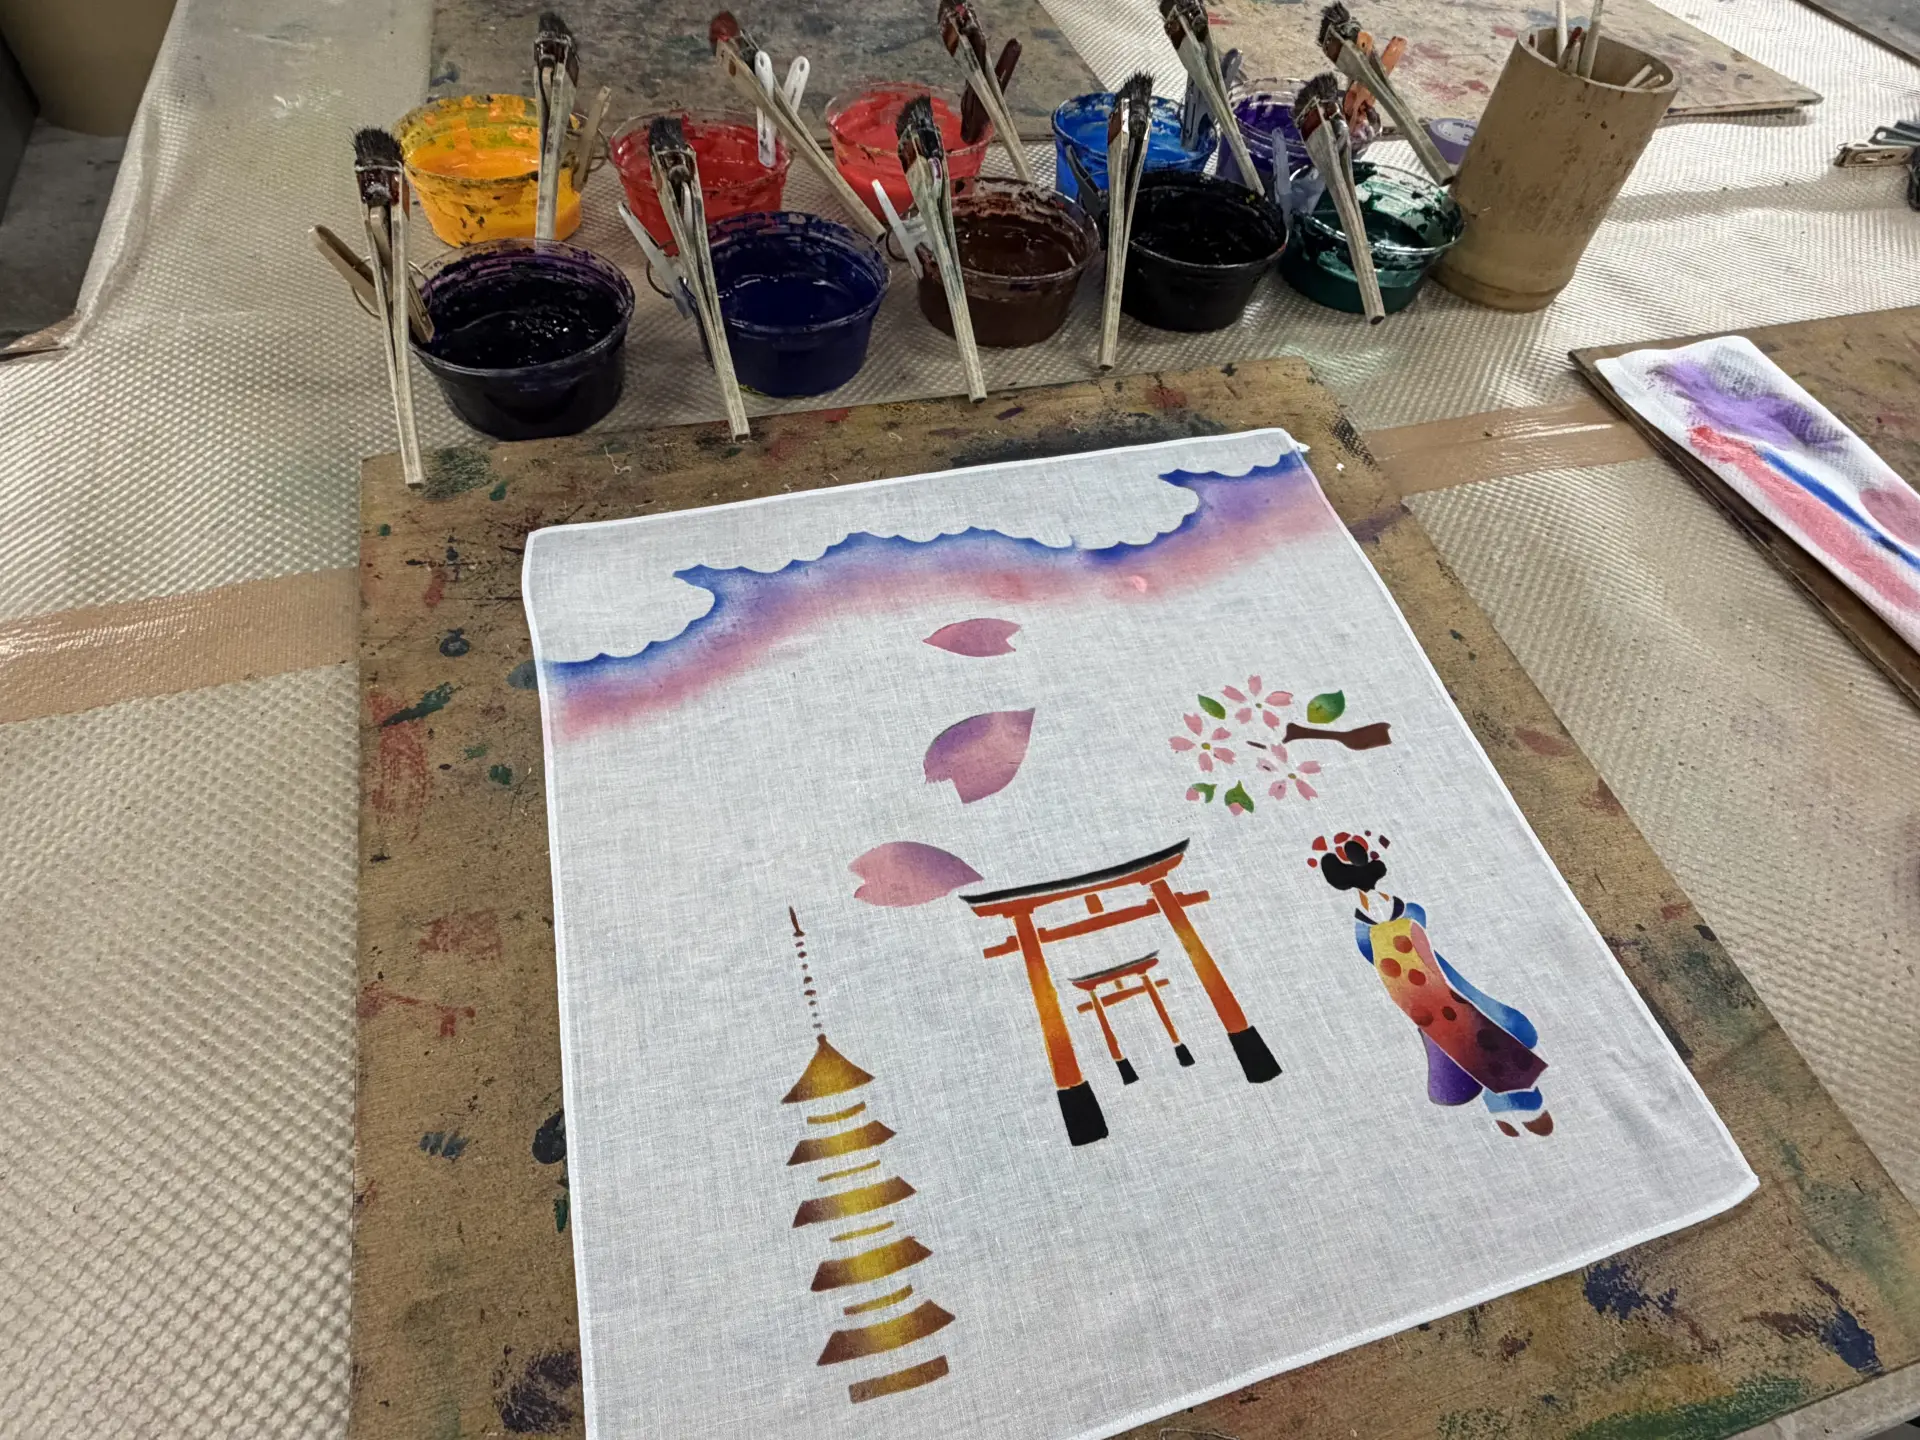
Use other stencils to fill the handkerchief with designs.
Using stencils, we dyed a five-story pagoda, a large torii gate, cherry blossoms, and clouds, creating a handkerchief full of Kyoto charm! You can freely use stencils and dye for the entire allotted time, making a piece you are happy with. You can take your finished work home the same day. After you get home, be sure to iron the dyed areas thoroughly at a temperature suitable for the fabric before using it. If time allows, you can also pay an additional fee to try stencil Yuzen on another material! Goods decorated with stencil Yuzen that you made yourself would also make great souvenirs for family and friends.
The “Chopsticks & Kyo-Yuzen Chopstick Case Making Course,” Popular with International Visitors
There is also a course where you can experience both Kyo-Yuzen and chopstick making using cedar from Kyoto. You can not only try Yuzen dyeing, but also make chopsticks, which Japanese people use every day at meals. The wood used for the chopsticks is Kitayama cedar from Kyoto.
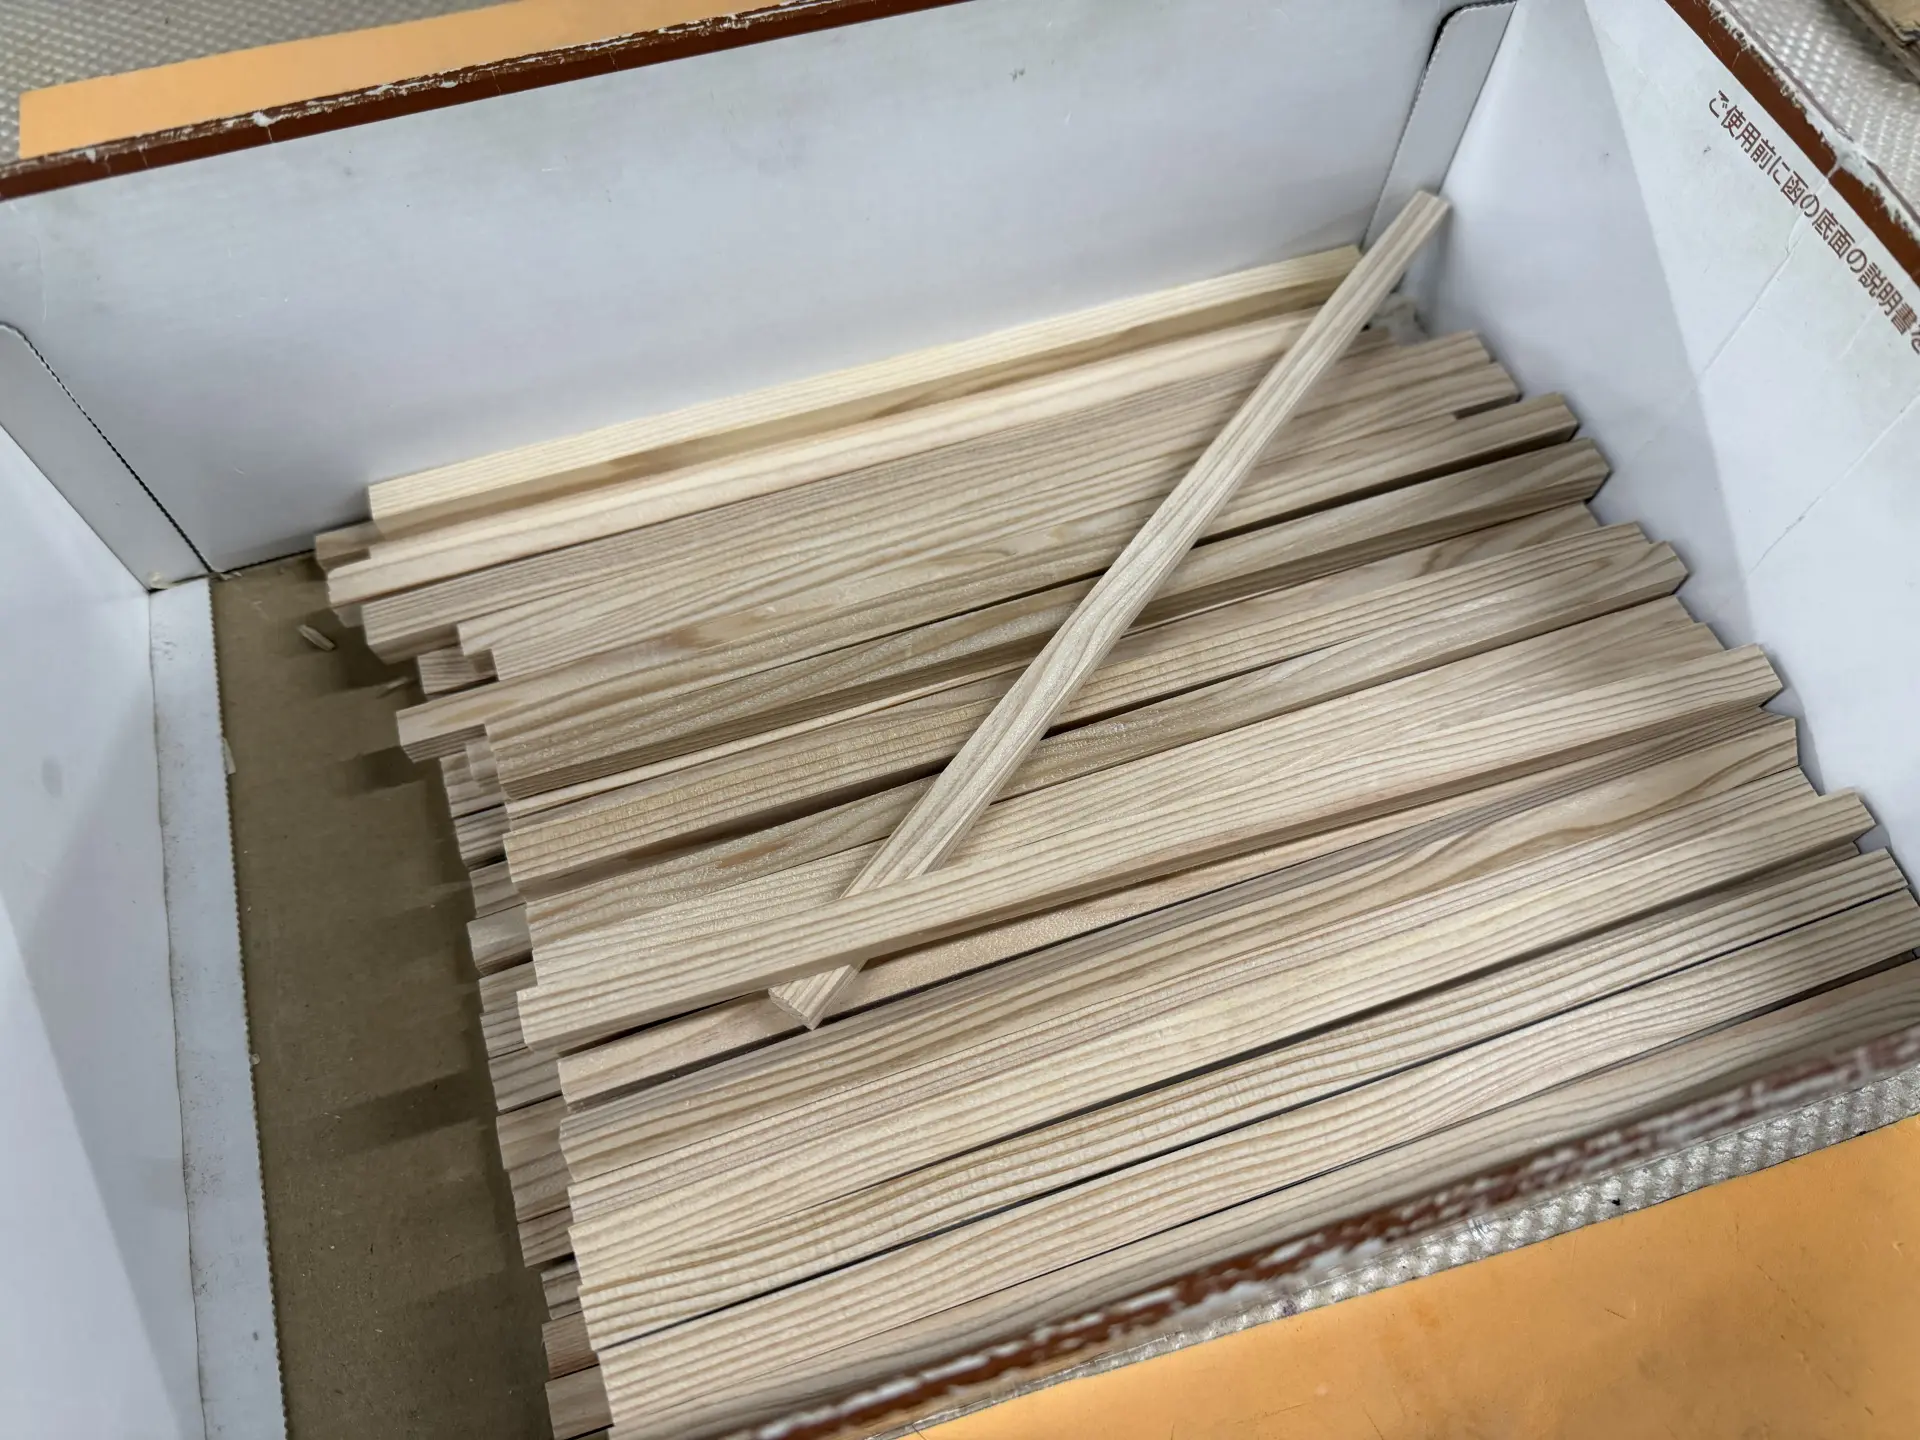
Kitayama cedar has been prized since the Muromachi period for tea rooms and sukiya-style architecture as polished logs with beautiful bark and grain. In Kyoto Prefecture’s Kitayama area, a unique forestry method has been passed down, producing wood with few knots and fine growth rings, which gives it strong hardness. Because the chopsticks are made from uncoated plain wood, the contrast between the white and brown grain is also striking, resulting in simple yet characterful chopsticks. Making chopsticks is a process of steadily shaving wood with a plane. Because it involves repeating simple motions, it is very popular with international visitors as an activity that lets them forget everyday distractions and focus. Another reason for its popularity is that making the chopsticks yourself gives them personal meaning, and you can use them as “my chopsticks” when eating Japanese food during your trip.
<Overview of the Chopsticks & Kyo-Yuzen Chopstick Case Making Course>
- Experience Fee
- 4,000 yen
- Start Time
- 9:00am–2:00pm *Experience ends at 5:30pm
- Experience Time
- 2–3 hours
Now, let’s get started!
(1) Finish Them to Your Preferred Thickness and Shape
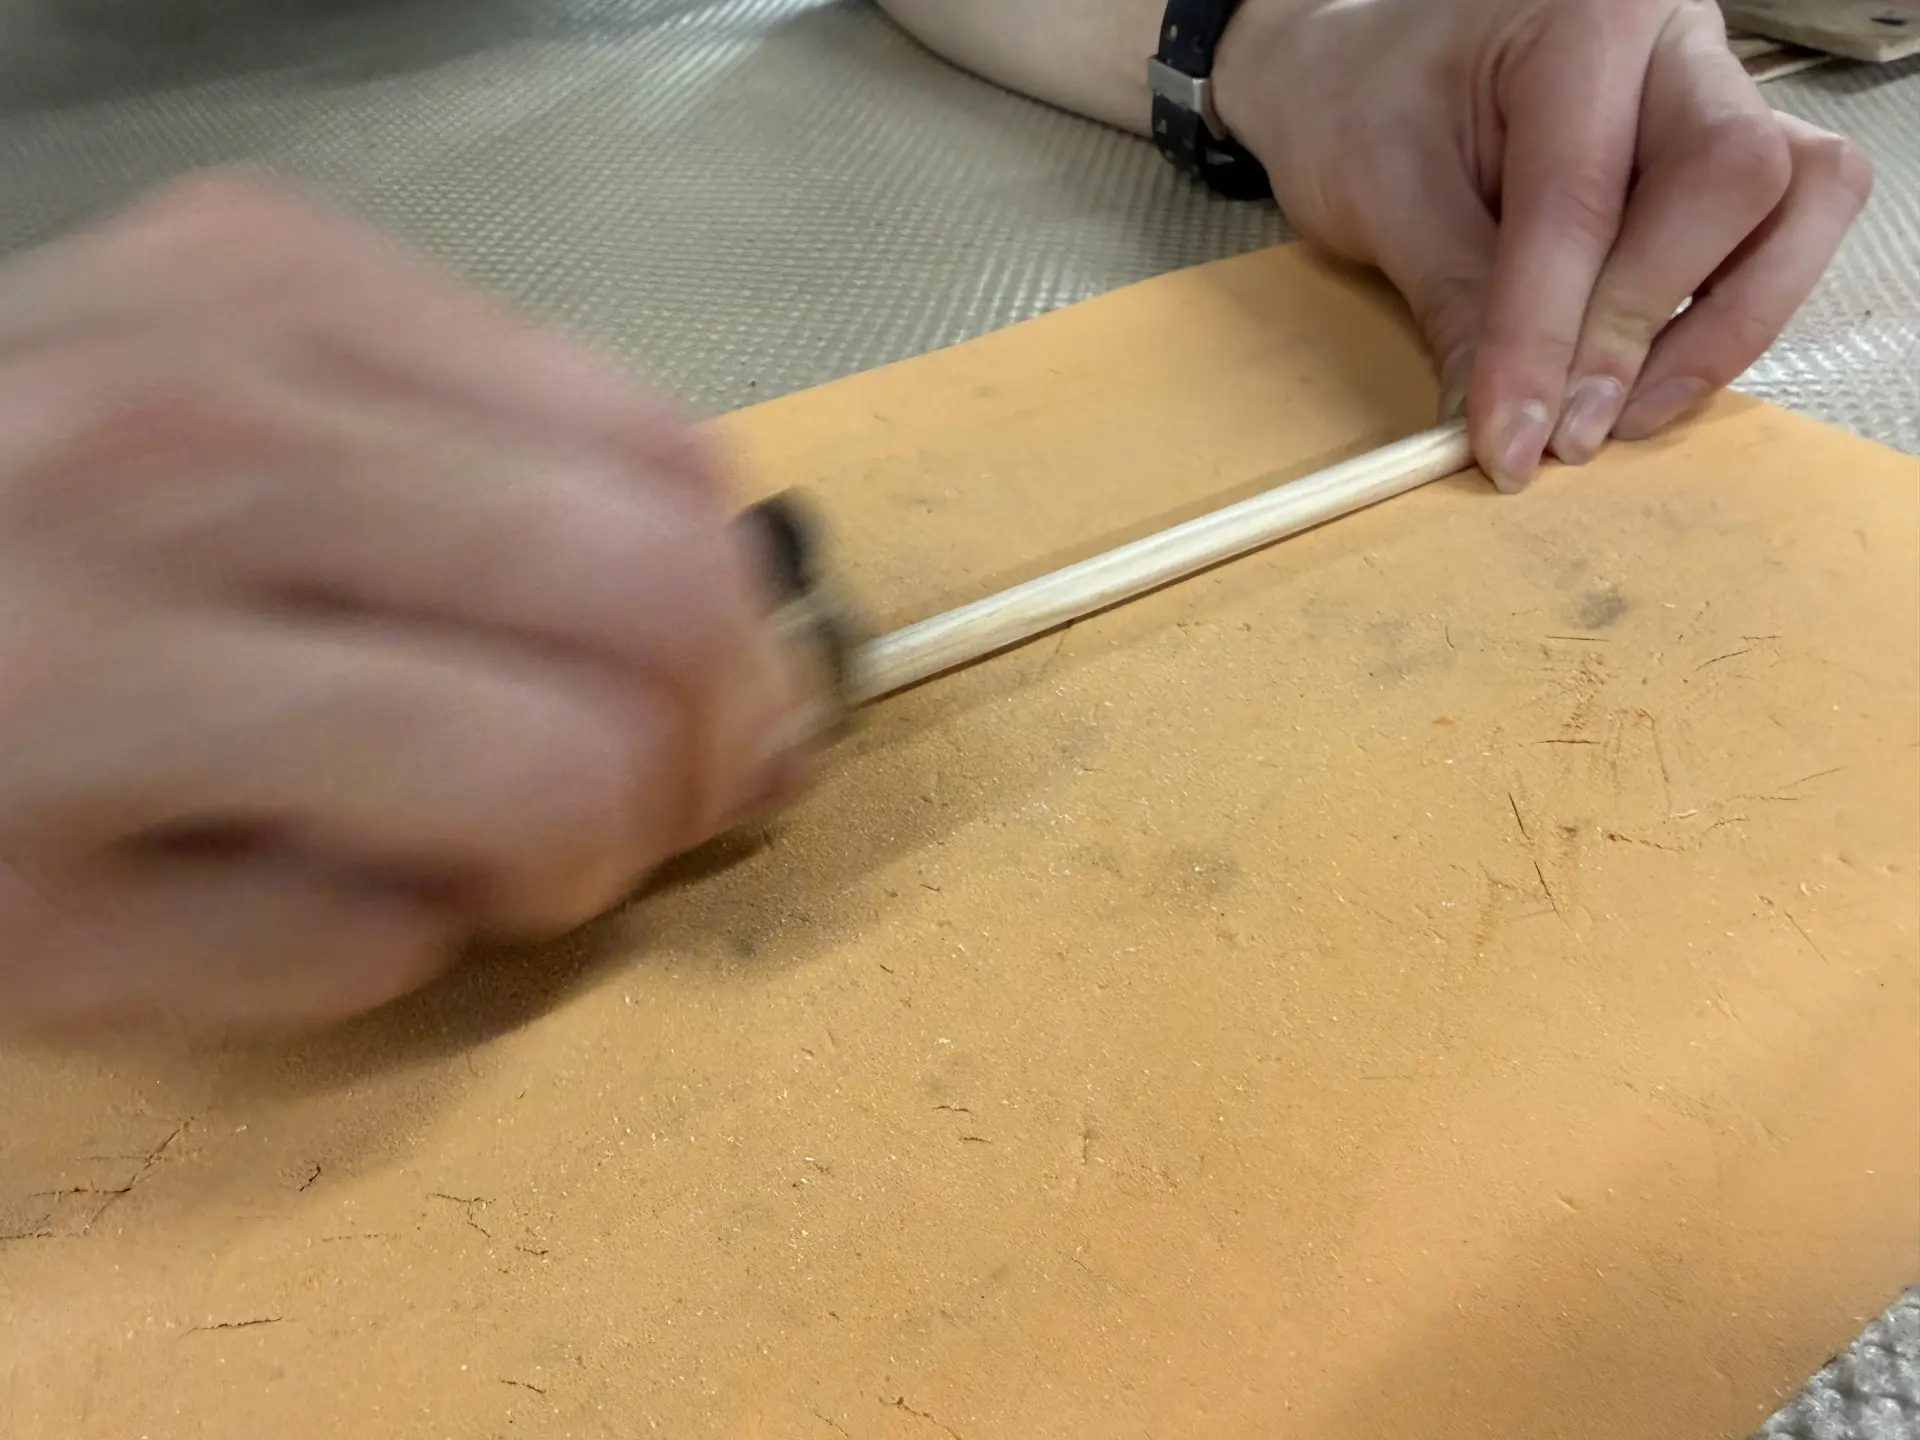
Use a plane to shave the chopsticks to a thickness and shape that feel comfortable to hold. The long, narrow wooden sticks have four corners, so start by shaving those down. This takes more strength than you might expect. We gradually shaved off the corners until they reached the thickness we liked and felt comfortable in the hand. Be careful, because shaving too much can cause them to break.
(2) Add Carving Details to the Top with a Small Knife
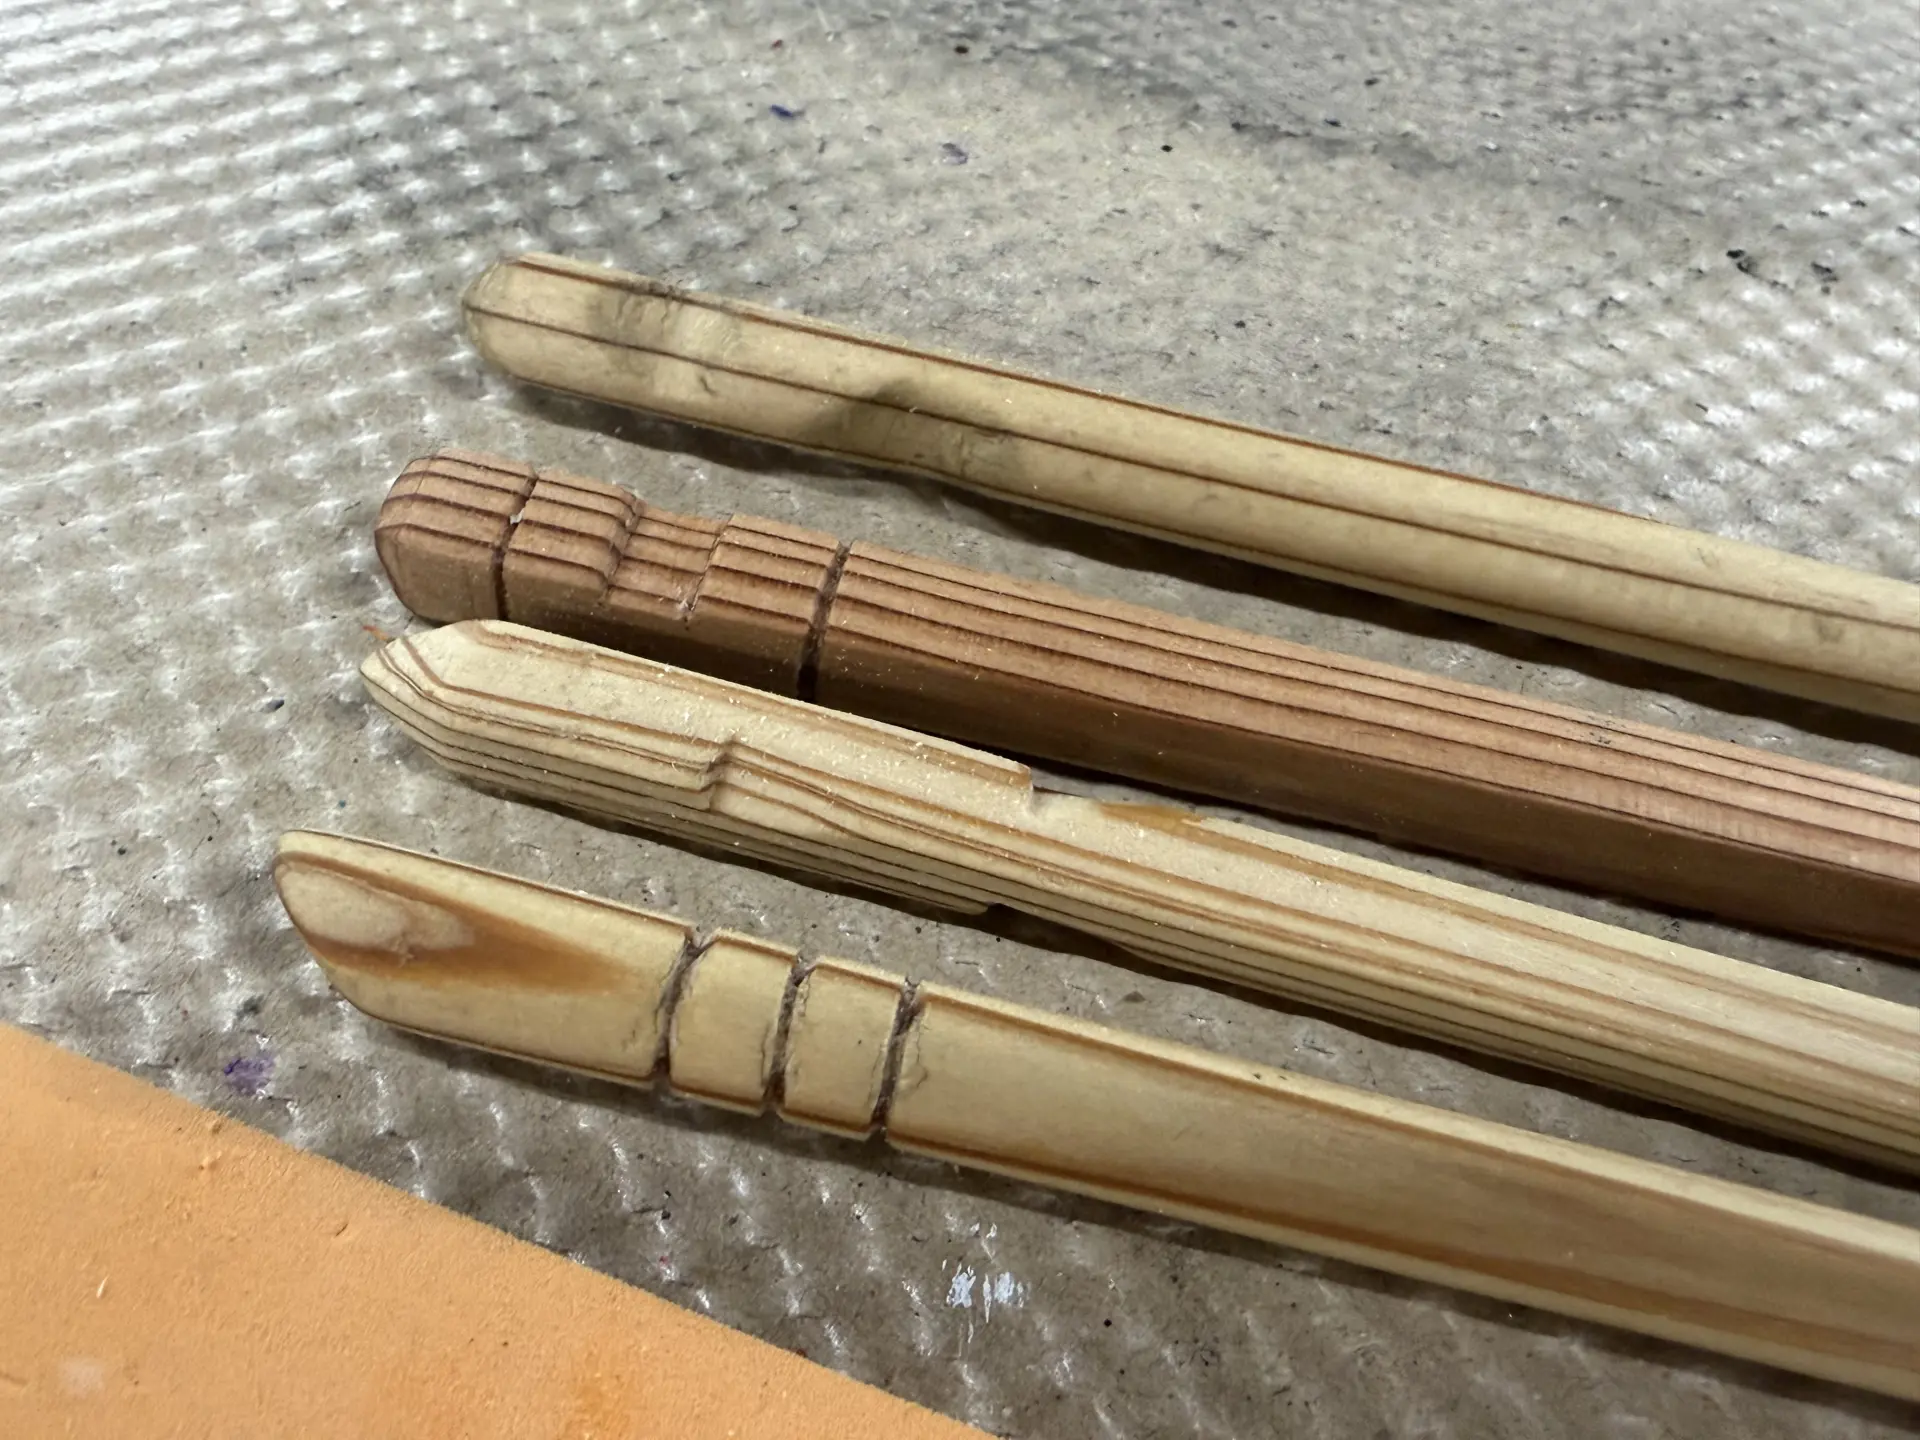
Add carved details with a small knife to the part of the chopsticks you hold. With advice from the artisan, create your favorite design.
(3) Smooth the Surface with Sandpaper
Smooth the surface with two types of sandpaper. At this step, do not forget to round the tips of the chopsticks.
(4) Finish with Olive Oil
After removing the powder from the surface, wipe the chopsticks with olive oil to give them a sheen, and they are complete.
(5) Make a Kyo-Yuzen Chopstick Case
After making your chopsticks, make a chopstick case with Yuzen. Try making your own chopsticks and chopstick case with your favorite Yuzen design!
You Might Even See Artisans Dyeing Yuzen!?
This experience facility also has a Kyo-Yuzen workshop on site. If you are lucky, you may be able to watch artisans dyeing Yuzen through the glass.
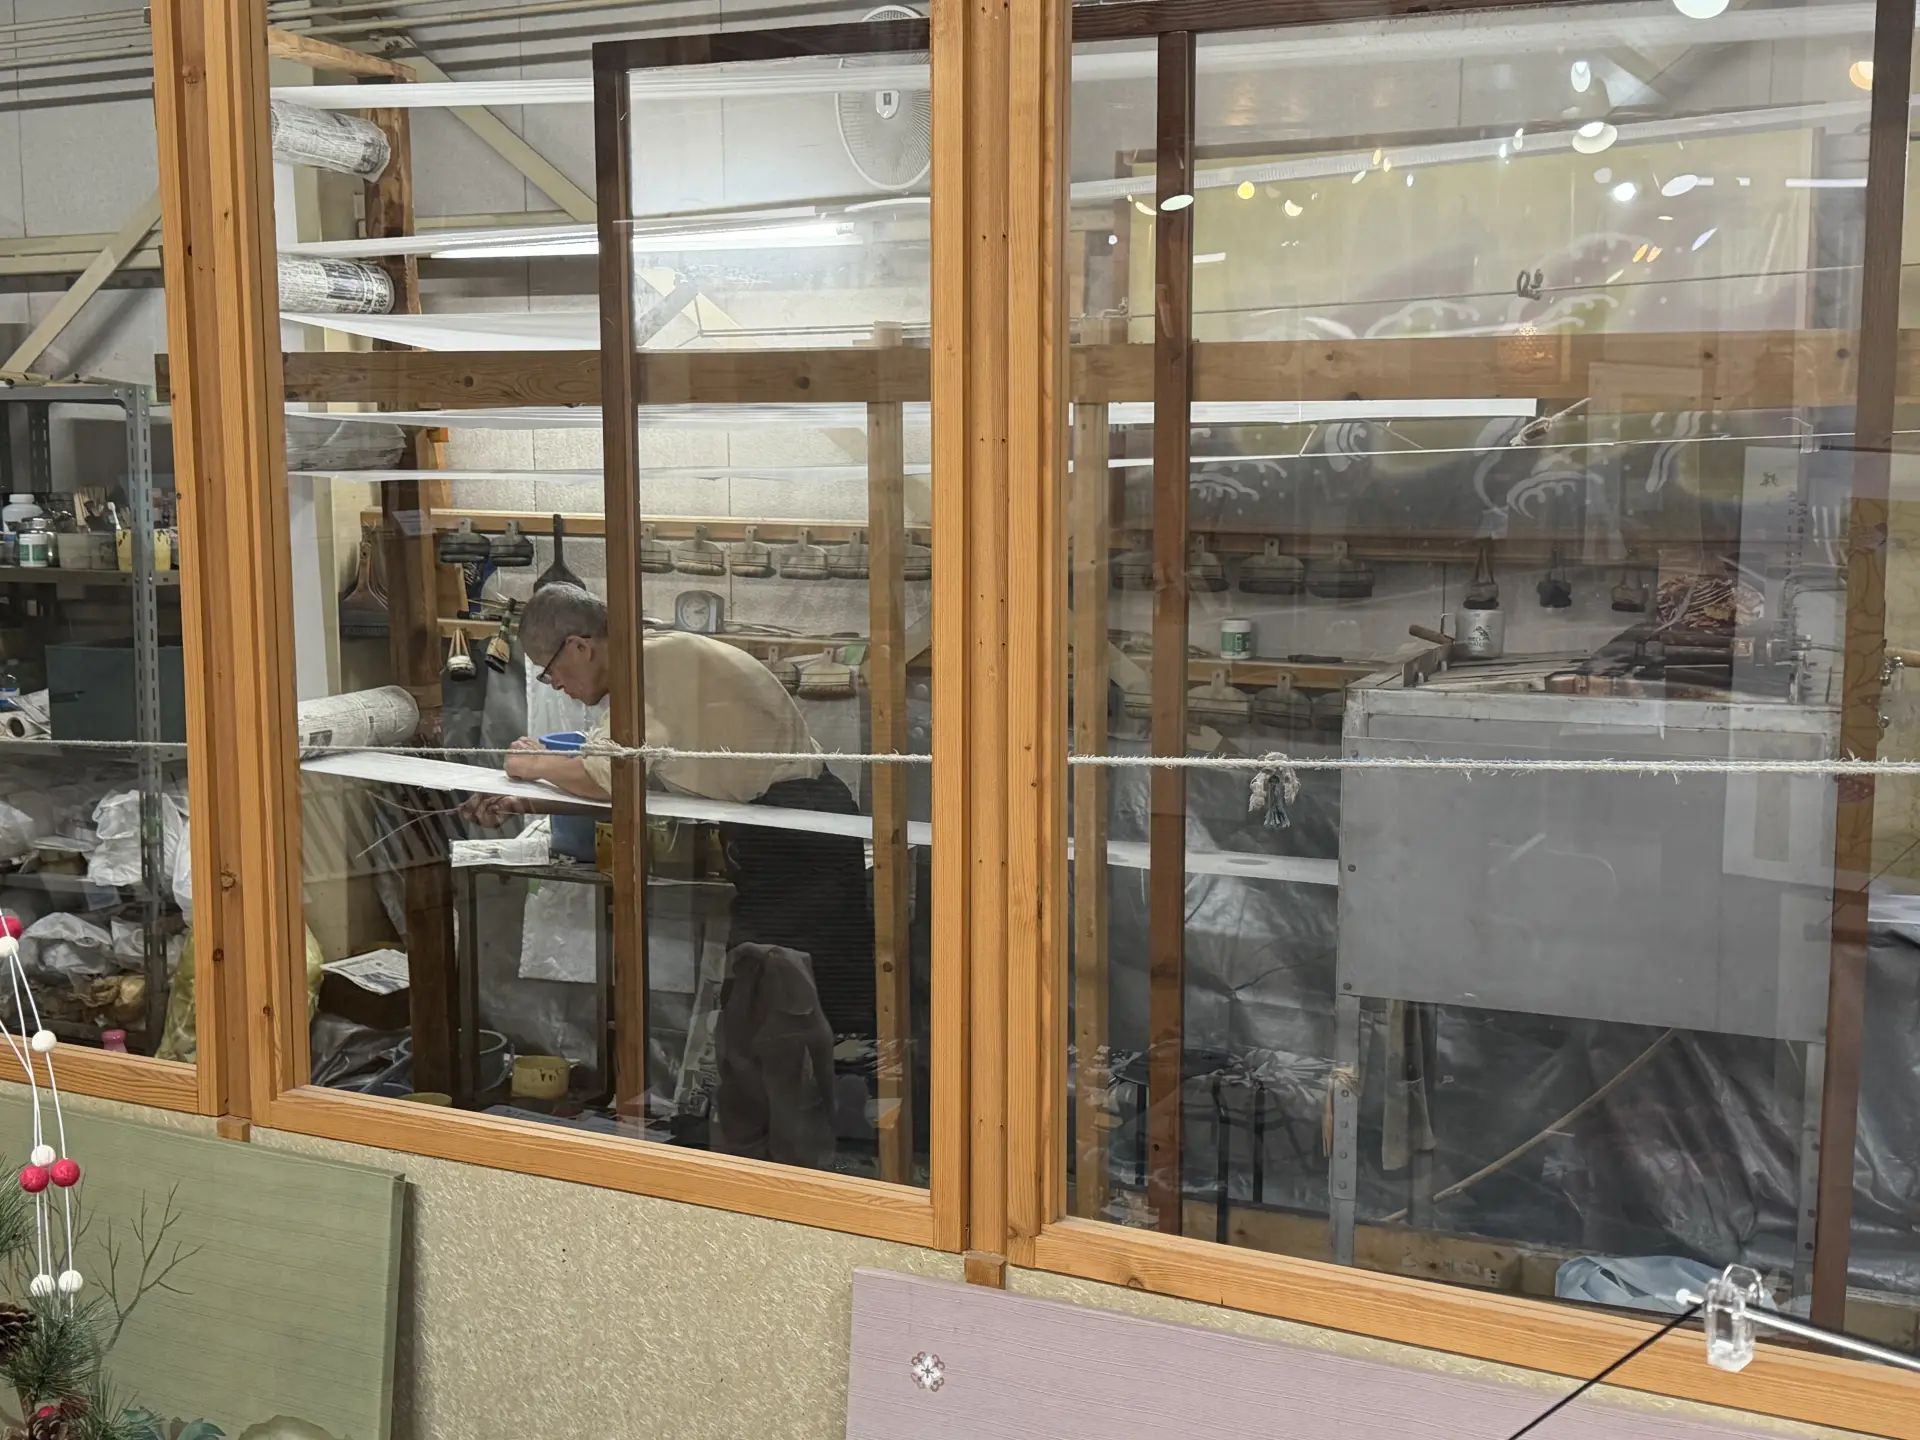
On the day of our visit, we happened to see an artisan dyeing an obiage sash. Of course, every piece is made by hand. The distinctive light and dark tones of Kyo-Yuzen are expressed with a single brush. Seeing the skilled craftsmanship that has supported Japan’s kimono culture up close is a very special experience!
Summary
Yuzen dyeing is one of Japan’s proud traditional techniques. Behind its painting-like beauty lies the precise and meticulous skill of each artisan. By trying it yourself, you can appreciate the care that goes into the handwork of Yuzen artisans and gain a deeper understanding of the value of kimono. When you visit Kyoto, why not go beyond wearing a kimono and experience how one is made?

Author
Freelance Announcer
Sayaka Motomura
Focused on sharing insights related to traditional culture, performing arts, and history.